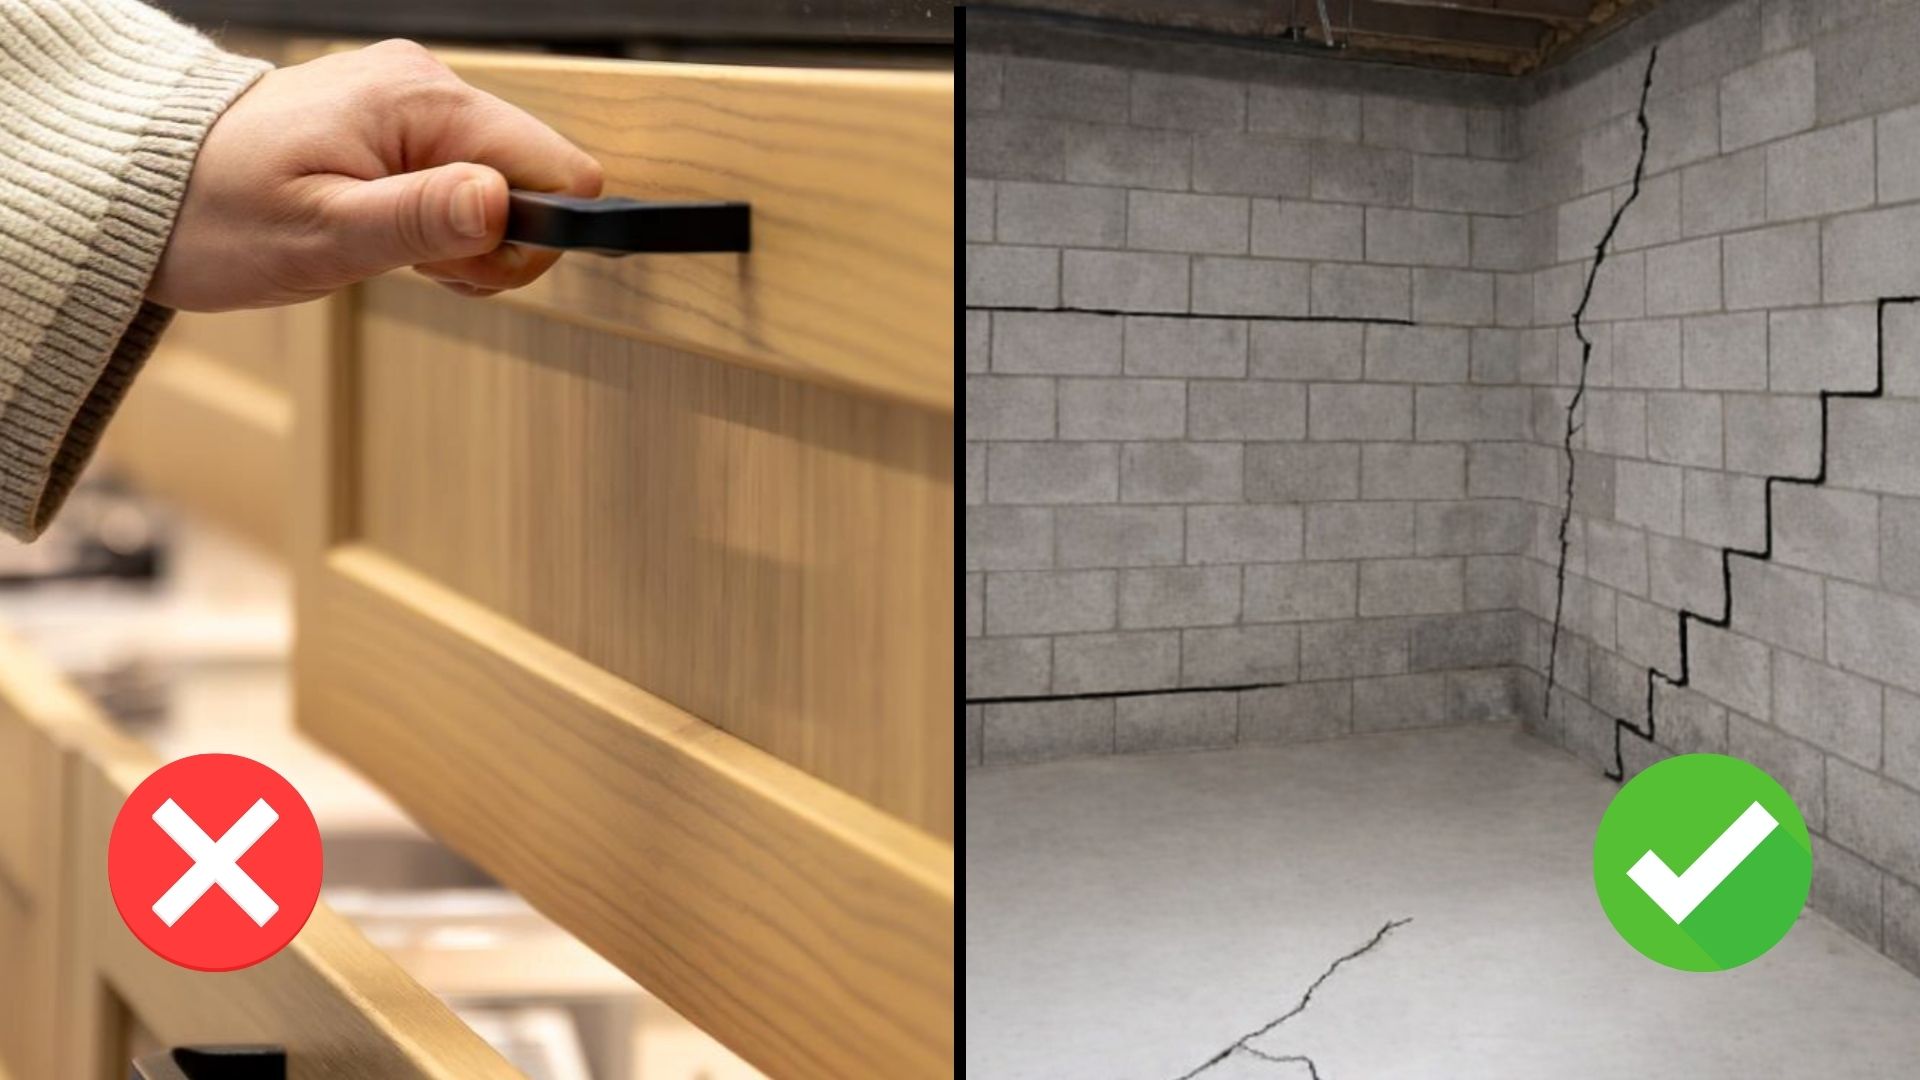
Most homeowners plan their renovations room by room: “We’ll do the kitchen this year, the bathroom next year, maybe the basement after that.”
But architects don’t renovate room by room. We follow a specific three-phase sequence that has nothing to do with rooms and everything to do with preventing expensive mistakes.
As a Venezuelan-trained architect with 10 years of construction experience in Toronto, I see the same costly error repeatedly: people focus on which room to renovate instead of what order to do the work in. They install beautiful finishes, then discover structural or mechanical problems underneath—and have to rip out finished work to fix what should have been addressed first.
So in this post (and video below), I’m breaking down the exact three-phase renovation sequence architects use, with Toronto-specific examples and real costs, so you understand why order matters more than rooms.
Why “Room by Room” Is the Wrong Approach
Here’s what typically happens with room-by-room renovations:
Someone decides to renovate their kitchen. They hire a contractor, pick cabinets and tile, install everything. Halfway through or right after completion, they discover their electrical panel doesn’t have enough capacity for the new appliances. Now they’re opening up walls they just finished to upgrade the panel.
Or someone finishes their basement with new drywall, flooring, and paint. Six months later, water starts seeping through foundation cracks they ignored. Now they’re ripping out $20,000 worth of finished work to fix the foundation.
Or someone tiles their bathroom beautifully. Then they find out the drain wasn’t sloped properly and water pools. Now they’re breaking $8,000 worth of tile to access and fix the drain.
The problem: They thought about rooms (kitchen, bathroom, basement) instead of systems (structure, electrical, plumbing).
The solution: Stop thinking room by room. Start thinking phase by phase.
The Three-Phase Renovation Sequence Architects Use
Architects approach renovations in three distinct phases, and the order is critical. Do them backwards and you pay twice.
Phase 1: Structure & Exterior
Phase one addresses everything that holds your house up and keeps weather out: foundation, framing, roof, and windows.
This phase comes first because if these systems fail, everything you build on top of them fails too.
What to Address in Phase 1:
Foundation
Look for:
- Cracks in basement walls or floors
- Water seeping in
- Uneven settling (floors sloping, doors not closing properly)
If you see cracks, fix them now. Water damage gets worse over time, not better. Ignore foundation issues and water will eventually ruin your finished basement, damage your framing, and cause mold.
In Toronto, century homes often have stone foundations that need attention. If you’re planning any basement work, get a structural assessment first.
Framing
Check for:
- Sagging floors
- Cracked or compromised joists
- Load-bearing walls that have been improperly modified by previous owners
Toronto’s older homes settle over time. If your floors bounce when you walk on them or slope noticeably, fix the framing before you install new flooring. Otherwise, your new hardwood will crack as the structure continues to settle.
Roof
Address:
- Active leaks
- Missing or deteriorated shingles
- Flashing around chimneys and vents
A leaking roof damages everything below it—insulation, drywall, electrical wiring. Fix roof issues before you renovate interior spaces.
Windows and Doors
Replace or repair:
- Rotted frames
- Broken seals (condensation between panes)
- Air leaks around edges
Old windows in Toronto homes leak both air and water. In our winters, air leaks cost you money every month in heating bills. Water leaks damage walls and create mold. If your windows are original to a 50+ year old house, plan to replace them during your renovation.
Why Structure Comes First
If you finish your basement and then discover foundation cracks, water will come in and damage everything you just installed. You’ll end up fixing the foundation AND replacing all the damaged finishes.
If you install new flooring and then discover your joists are sagging, the new floor will crack as the structure continues to settle.
Structure first prevents damage to everything else. Fix the bones before you build on top of them.
Phase 2: Mechanical Systems
Once your structure is solid, phase two addresses the systems inside your walls: electrical, plumbing, and HVAC.
This phase happens before you close up walls with drywall, because once walls are finished, accessing these systems means cutting them back open.
Electrical Systems
Panel Capacity
Toronto homes built before 1980 typically have 60 to 100 amp electrical service. Modern homes need 200 amps to handle today’s appliances and electronics.
If you’re renovating a kitchen and adding:
- Induction cooktop or electric range
- Dishwasher
- Microwave
- Multiple outlets for small appliances
- Under-cabinet lighting
…you’ll likely need a panel upgrade. Cost in Toronto: $3,000 to $8,000.
Do this before you finish walls. Upgrading a panel after drywall and tile are installed means cutting open walls you just paid to finish.
New Circuits
Every major appliance needs its own dedicated circuit:
- Refrigerator
- Range/cooktop
- Dishwasher
- Microwave
- Garbage disposal
Plan these circuits before walls close up. Adding an outlet later by opening finished walls costs 10 times more than running the wire during renovation.
Plumbing Systems
Old Pipes
Toronto houses built before 1960 often have cast iron drain pipes or galvanized water supply pipes. Both corrode from the inside over time.
If you’re opening walls for any reason, consider replacing old pipes now. Otherwise, you’ll be opening walls again in 5-10 years when they fail.
Cast iron pipes develop holes and leak sewage. Galvanized pipes restrict water flow as they corrode, reducing water pressure throughout your house.
Drainage Slope
All drains must slope properly for water to flow. If drains don’t have the correct slope, you get slow drainage or backups.
This is especially important for basement bathrooms, where drains need to connect to the main stack. If the slope is wrong and you’ve already installed tile, you’ll be breaking expensive tile to access and fix the drain.
Check drainage during the rough-in phase, before any finishes are installed.
Water Heater Capacity
Adding a bathroom means more demand on your water heater. A 40-gallon tank that worked fine for one bathroom might not keep up with two.
If you’re adding bathrooms or significantly increasing water usage, make sure your water heater has capacity—or plan to replace it before you finish walls.
HVAC Systems
System Capacity
Finishing a basement or adding an addition means your furnace and air conditioner need to heat and cool additional square footage.
An undersized system will run constantly trying to keep up, costing you money and wearing out faster. It also won’t keep the new space comfortable.
Before finishing any space, have an HVAC professional assess whether your system has capacity for the additional load.
Ductwork
New spaces need new ducts. These get run before insulation and drywall go in.
In Toronto’s older homes, you might also discover that existing ductwork is inadequate or improperly sized. Address this during phase two, while walls are open.
Ventilation
Building code requires:
- Bathroom exhaust fans vented to the outside (not into the attic)
- Kitchen range hoods vented to the outside
- Proper makeup air for high-CFM range hoods
These aren’t optional. They’re code requirements and they prevent moisture damage.
Run all ventilation ductwork during phase two, before walls are closed.
Why Systems Come Before Finishes
Once drywall is up, painted, and tiled, getting to electrical wiring or plumbing means cutting open finished walls.
If you discover you need a panel upgrade after your kitchen is finished, you’re cutting into your new drywall and possibly your backsplash.
If you need to move a drain after tile is installed, you’re breaking tile to access it.
Do all systems work in phase two, before walls close up. It’s not glamorous, but it prevents expensive do-overs.
Phase 3: Finishes
Phase three is what most people think of when they think “renovation”—drywall, flooring, cabinets, tile, paint. The visible stuff.
Finishes come last because they’re expensive and you don’t want to damage them while fixing structure or systems underneath.
The Order Within Finishes
Even within the finishes phase, order matters:
1. Insulation
Once all wiring and plumbing are in place, insulate walls and ceilings. This is your last chance before drywall goes up.
Don’t skip insulation. Toronto winters are cold, and proper insulation pays for itself in reduced heating bills.
2. Drywall
Hang, tape, mud, and sand drywall.
Don’t rush this step. Bad drywall work shows through paint. Take the time to get smooth, even surfaces.
3. Interior Doors and Trim
Install door frames and baseboards before flooring. This makes flooring installation cleaner and allows the flooring to slide under the trim.
4. Flooring
Install flooring after drywall dust is completely cleaned up, but before cabinets.
Why before cabinets? Because cabinets sit on top of finished floor. This makes future flooring replacement easier—you can remove and replace flooring without touching cabinets.
5. Cabinets
Kitchen and bathroom cabinets go in after flooring is complete.
Cabinets must be level for countertops to fit properly. Take the time to shim and level them correctly.
6. Countertops
Countertops are measured and fabricated after cabinets are installed and leveled.
Stone countertops (granite, quartz, marble) are custom-cut to your specific cabinet layout. They can’t be measured until cabinets are in place.
7. Backsplash
Tile backsplash comes after countertops are installed.
This allows the tile to sit flush against the countertop with no gaps. If you tile before countertops, you risk gaps or poor fit.
8. Paint
Paint is the last thing you do.
Why? Because you’ll inevitably ding walls during cabinet installation, countertop installation, and backsplash work. Do all the heavy work first, then paint and touch up at the very end.
Why This Order Matters
If you paint first and then install cabinets, you’re touching up paint anyway. Might as well paint once, at the end.
If you install countertops before cabinets are properly leveled, the countertops won’t fit right and you’ll have gaps or uneven surfaces.
If you tile your backsplash before countertops are in, you risk gaps between the tile and countertop that are difficult to seal properly.
Each step builds on the previous one. Follow the sequence and everything fits together properly.
Real Toronto Scenarios: What Happens When You Get the Order Wrong
Scenario 1: Finished Basement, Ignored Foundation
Client finished their basement with $25,000 worth of new drywall, flooring, bathroom, and rec room. Six months later, water started seeping through foundation cracks they’d noticed but ignored.
Result: Ripped out all the finished work to fix the foundation, then rebuilt everything. Total cost: $40,000+ instead of $25,000 if they’d fixed the foundation first.
Scenario 2: New Kitchen, Inadequate Electrical
Client installed a beautiful $60,000 kitchen with induction cooktop, high-end appliances, and under-cabinet lighting. During the final inspection, they discovered their 100-amp panel didn’t have capacity for all the new electrical load.
Result: Panel upgrade required cutting into finished drywall and tile backsplash to access the panel. Additional $8,000 for the panel upgrade plus drywall and tile repair.
If they’d assessed electrical capacity in phase two, the panel upgrade would have been done before drywall and tile went in.
Scenario 3: Tile Bathroom, Wrong Drain Slope
Client tiled a bathroom with $12,000 worth of custom tile. After completion, they noticed water pooling around the shower drain. The drain hadn’t been sloped properly during rough-in.
Result: Breaking tile to access and reposition the drain, then retiling. Additional $8,000+ in tile replacement and labor.
If they’d checked drainage during phase two (before tile), this would have been caught and corrected.
Why Team Coordination Matters
This three-phase sequence only works if everyone on your project understands it.
The designer needs to know what structural and mechanical constraints the builder is dealing with. The builder needs to understand the design intent and how each phase supports the final vision.
When these aren’t coordinated, problems happen:
- Designer specifies something that doesn’t work structurally
- Builder makes field decisions that compromise the design
- Systems get installed in the wrong sequence
- Finished work gets damaged during later phases
This is why we work as design-build at Habitual Homes. Design and construction are coordinated from the start, with everyone following the same three-phase sequence.
When design and build are separated (traditional model where you hire an architect separately from a general contractor), coordination becomes more difficult. The architect might not know what the contractor discovers during demolition. The contractor might not understand why certain design decisions were made.
Design-build eliminates this gap. We think about structure, systems, and finishes together—in the right order—from day one.
How to Apply This to Your Renovation
If you’re planning a renovation, here’s how to use this three-phase approach:
Step 1: Assess Your Structure
Before you think about finishes or design, assess:
- Foundation condition (cracks, water intrusion, settling)
- Framing condition (sagging floors, compromised joists)
- Roof condition (leaks, missing shingles)
- Window and door condition (rot, air leaks, broken seals)
Get a professional assessment if you’re unsure. In Toronto, this might mean hiring a structural engineer for older homes or homes with visible issues.
Step 2: Plan Your Systems
Before walls close up, plan:
- Electrical capacity and new circuits
- Plumbing (pipe replacement, drainage slope, water heater capacity)
- HVAC (system capacity, new ductwork, ventilation)
Work with professionals who understand building code and can help you plan properly.
Step 3: Design Your Finishes
Only after structure and systems are addressed should you focus on finishes:
- Material selections (flooring, tile, countertops)
- Cabinet design and layout
- Paint colors
- Fixtures and hardware
This doesn’t mean you can’t think about finishes early—just don’t install them until phases one and two are complete.
Common Questions About Renovation Sequencing
Can I do some rooms in a different order if the structure is fine?
If you’ve verified that structure and systems are sound, you have some flexibility with finishes. But you still need to follow the sequence within each room: insulation → drywall → flooring → cabinets → countertops → backsplash → paint.
What if I can only afford to do one phase at a time?
That’s fine—just do them in order. Phase one this year, phase two next year, phase three the year after. The key is not doing phase three before phases one and two are complete.
Do small projects need this sequencing too?
Yes. Even a bathroom renovation needs proper sequencing. You don’t install tile before confirming your plumbing drainage is correct.
How do I know if my structure needs work?
Visible signs include:
- Cracks in foundation walls
- Sloping or bouncing floors
- Doors that won’t close properly
- Windows that stick
- Water stains in basement
- Visible roof damage
If you see any of these, get a professional assessment before starting any renovation work.
The Bottom Line
Stop thinking room by room. Start thinking phase by phase.
Structure first. Systems second. Finishes last.
Follow this sequence and you don’t rip out finished work to fix what you should have addressed first. You do each thing once, not twice. And you save thousands in the process.
Ready to Plan Your Renovation?
At Habitual Homes, we help Toronto homeowners plan renovations in the right sequence—structure, systems, finishes—so they don’t pay twice.
Our design-build approach means design and construction are coordinated from day one, following this exact three-phase sequence for every project.
If you’re planning a renovation and want professional guidance on sequencing, book a consultation →
We’ll assess your structure, plan your systems, and design your finishes—in that order.
About Habitual Homes
Habitual Homes is a Toronto-based design-build firm specializing in custom homes and major renovations. Founded by Venezuelan-trained architects Sandra and Johanna Serrano, we bring 10 years of construction experience across Venezuela, Chile, and Toronto to every project.
Our approach: design first, build once. We handle everything from initial planning and design through permits, construction, and final inspections.