Transforming Sloppy Work into a Stunning Staircase
When Tania reached out to us, she was beyond frustrated. She had hired a contractor to stain and paint her staircase as part of her new home renovations.
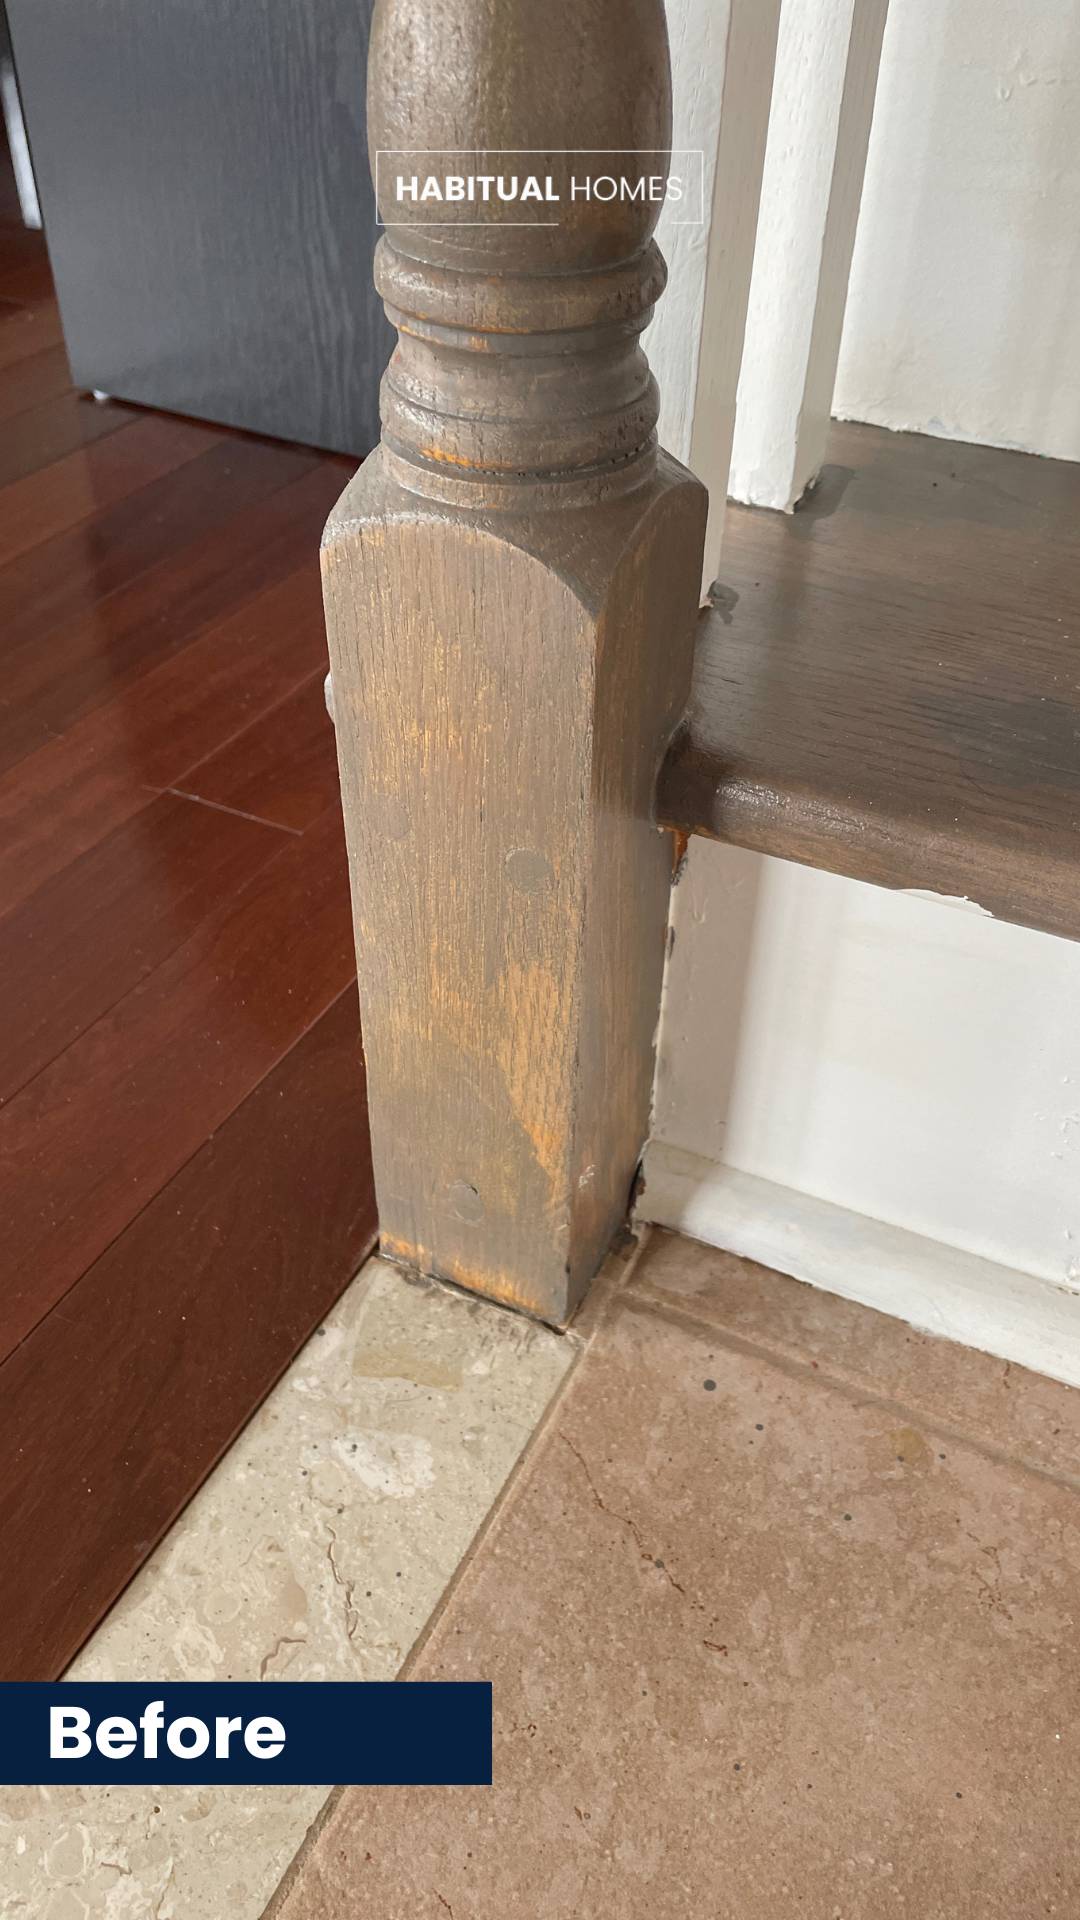
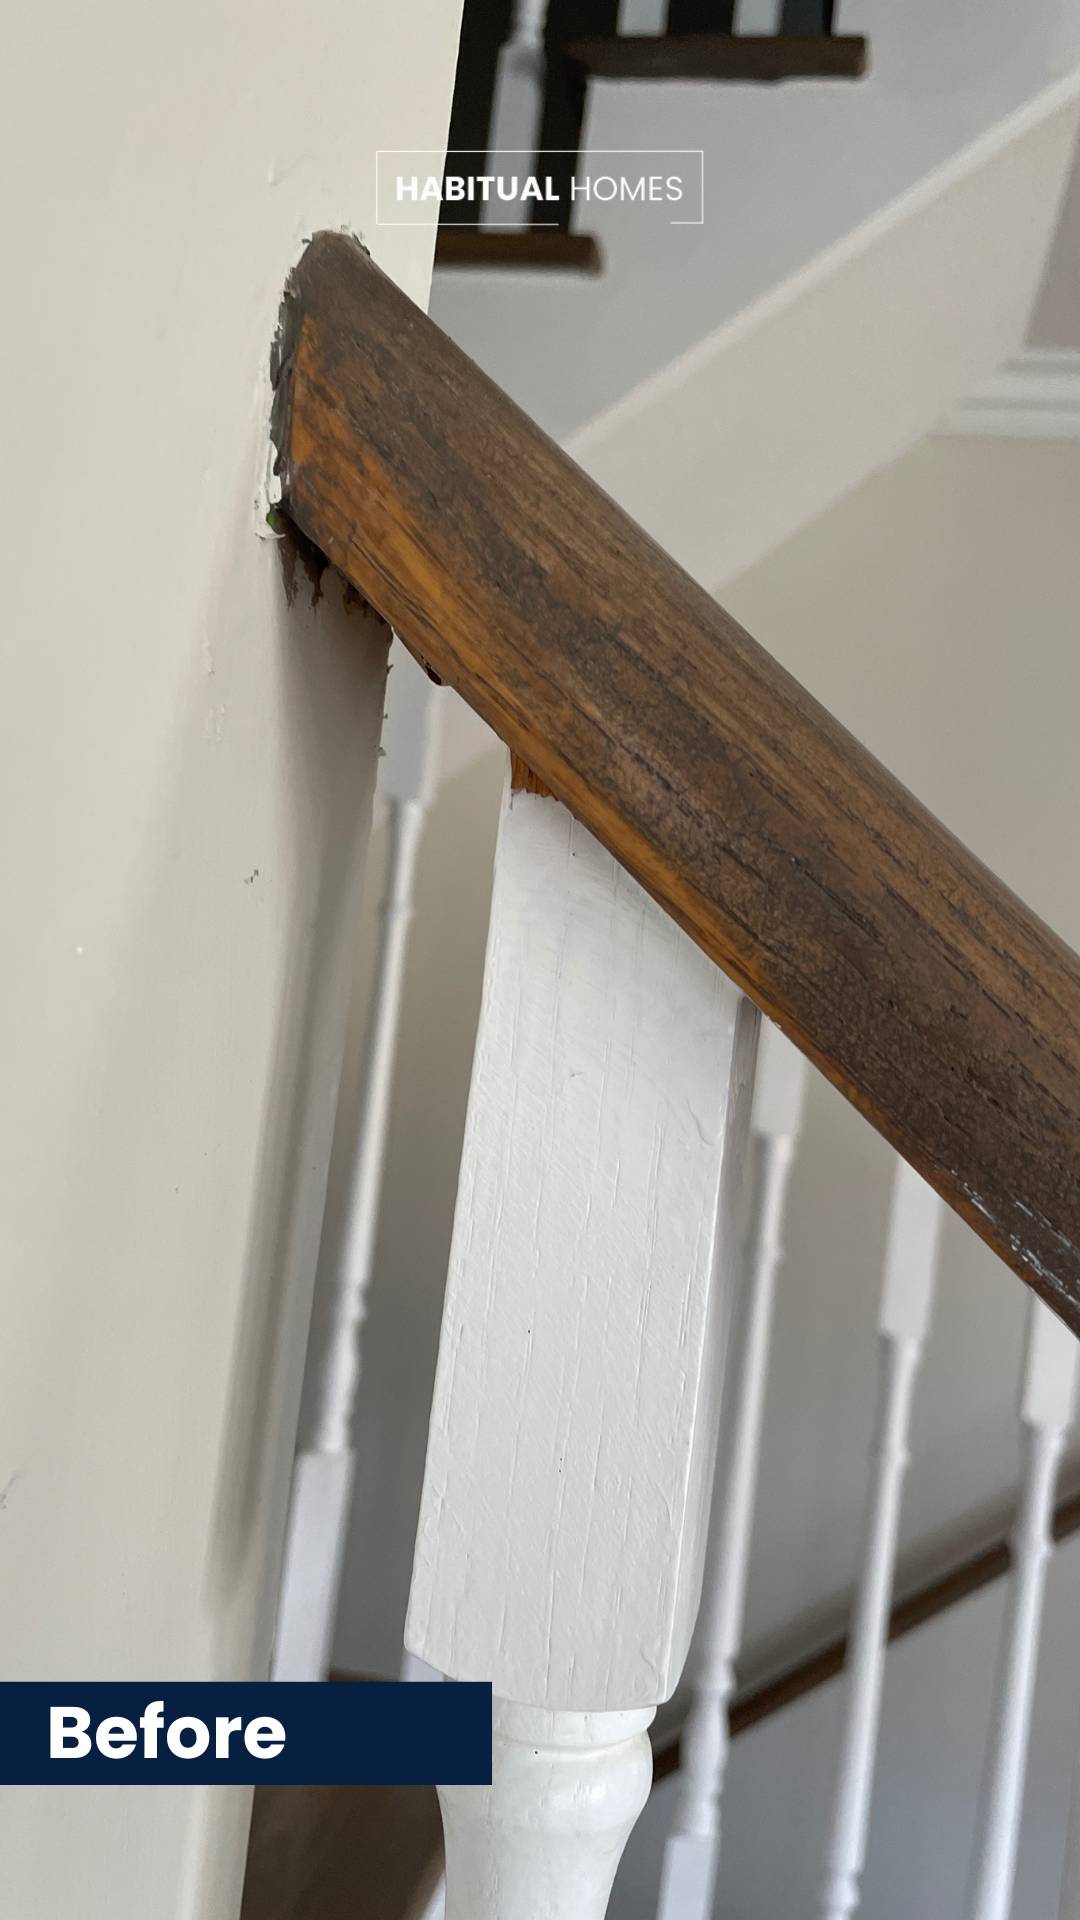
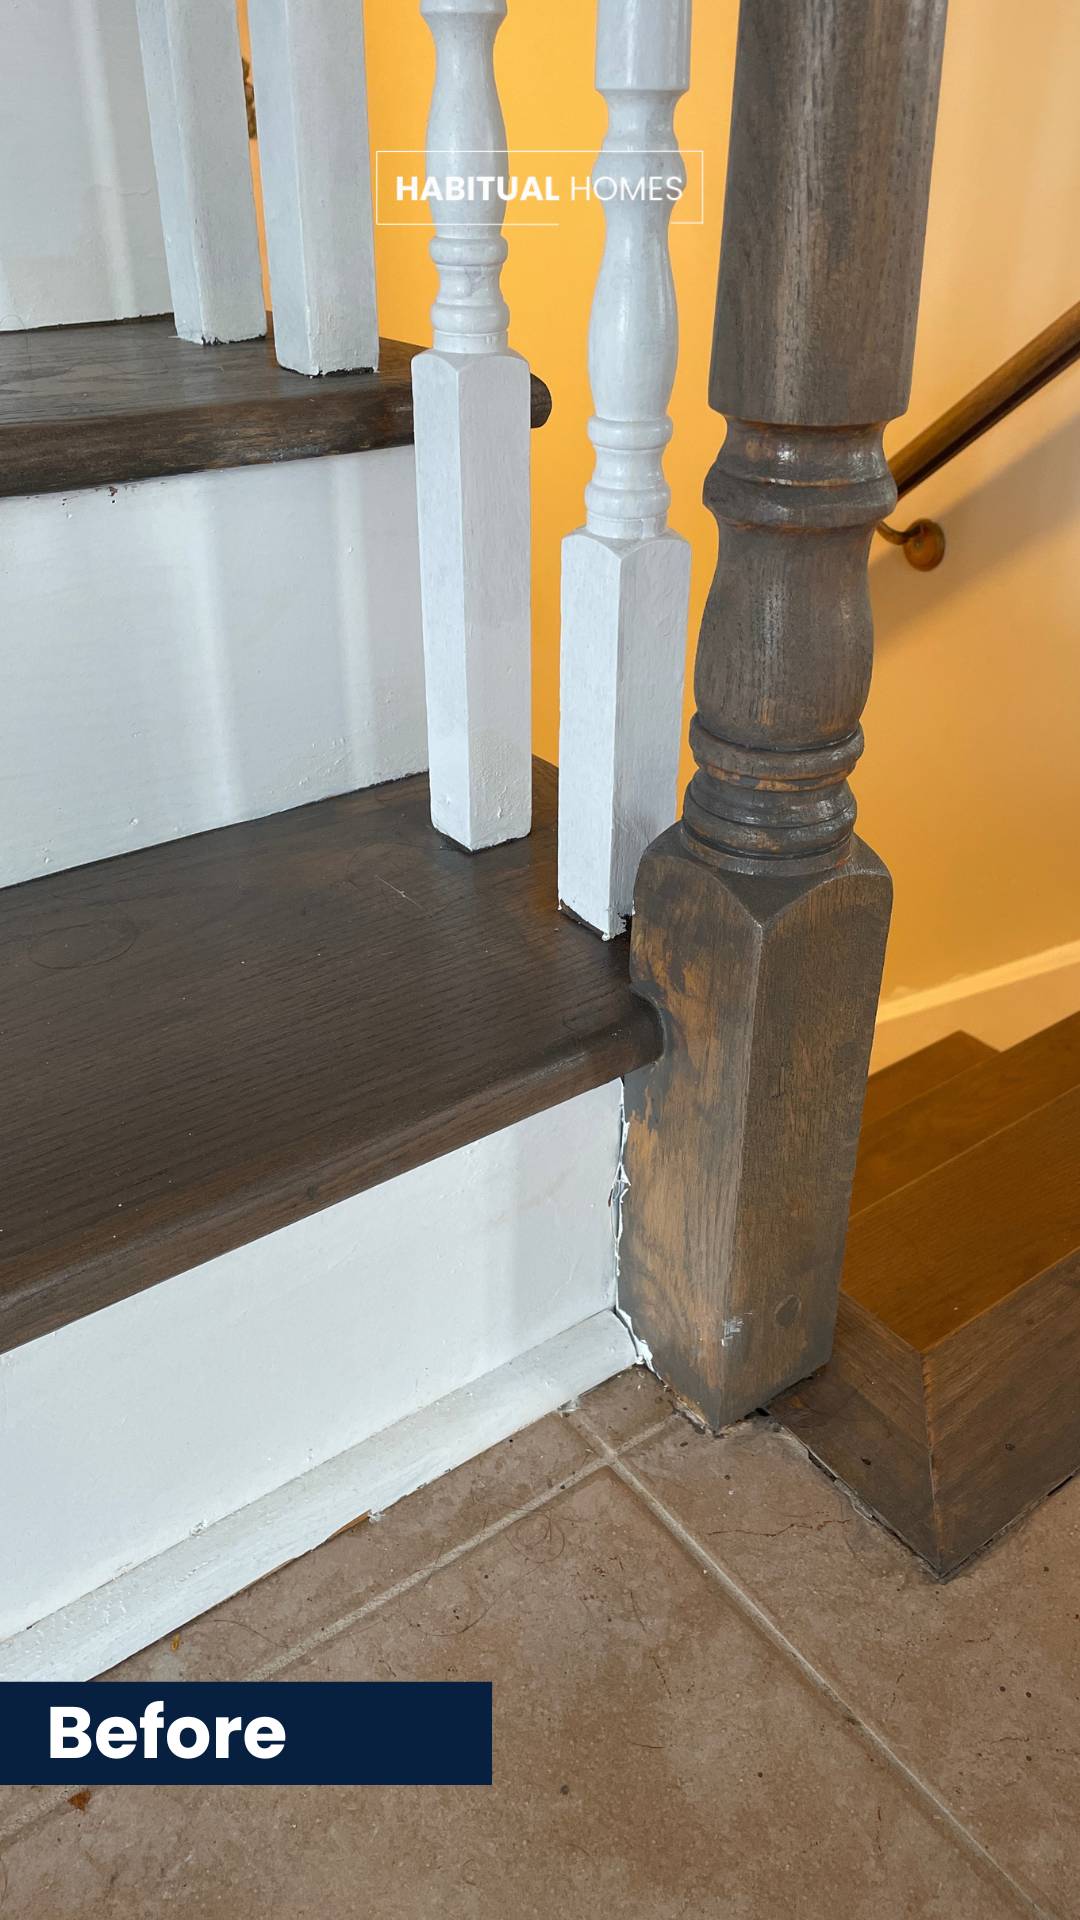
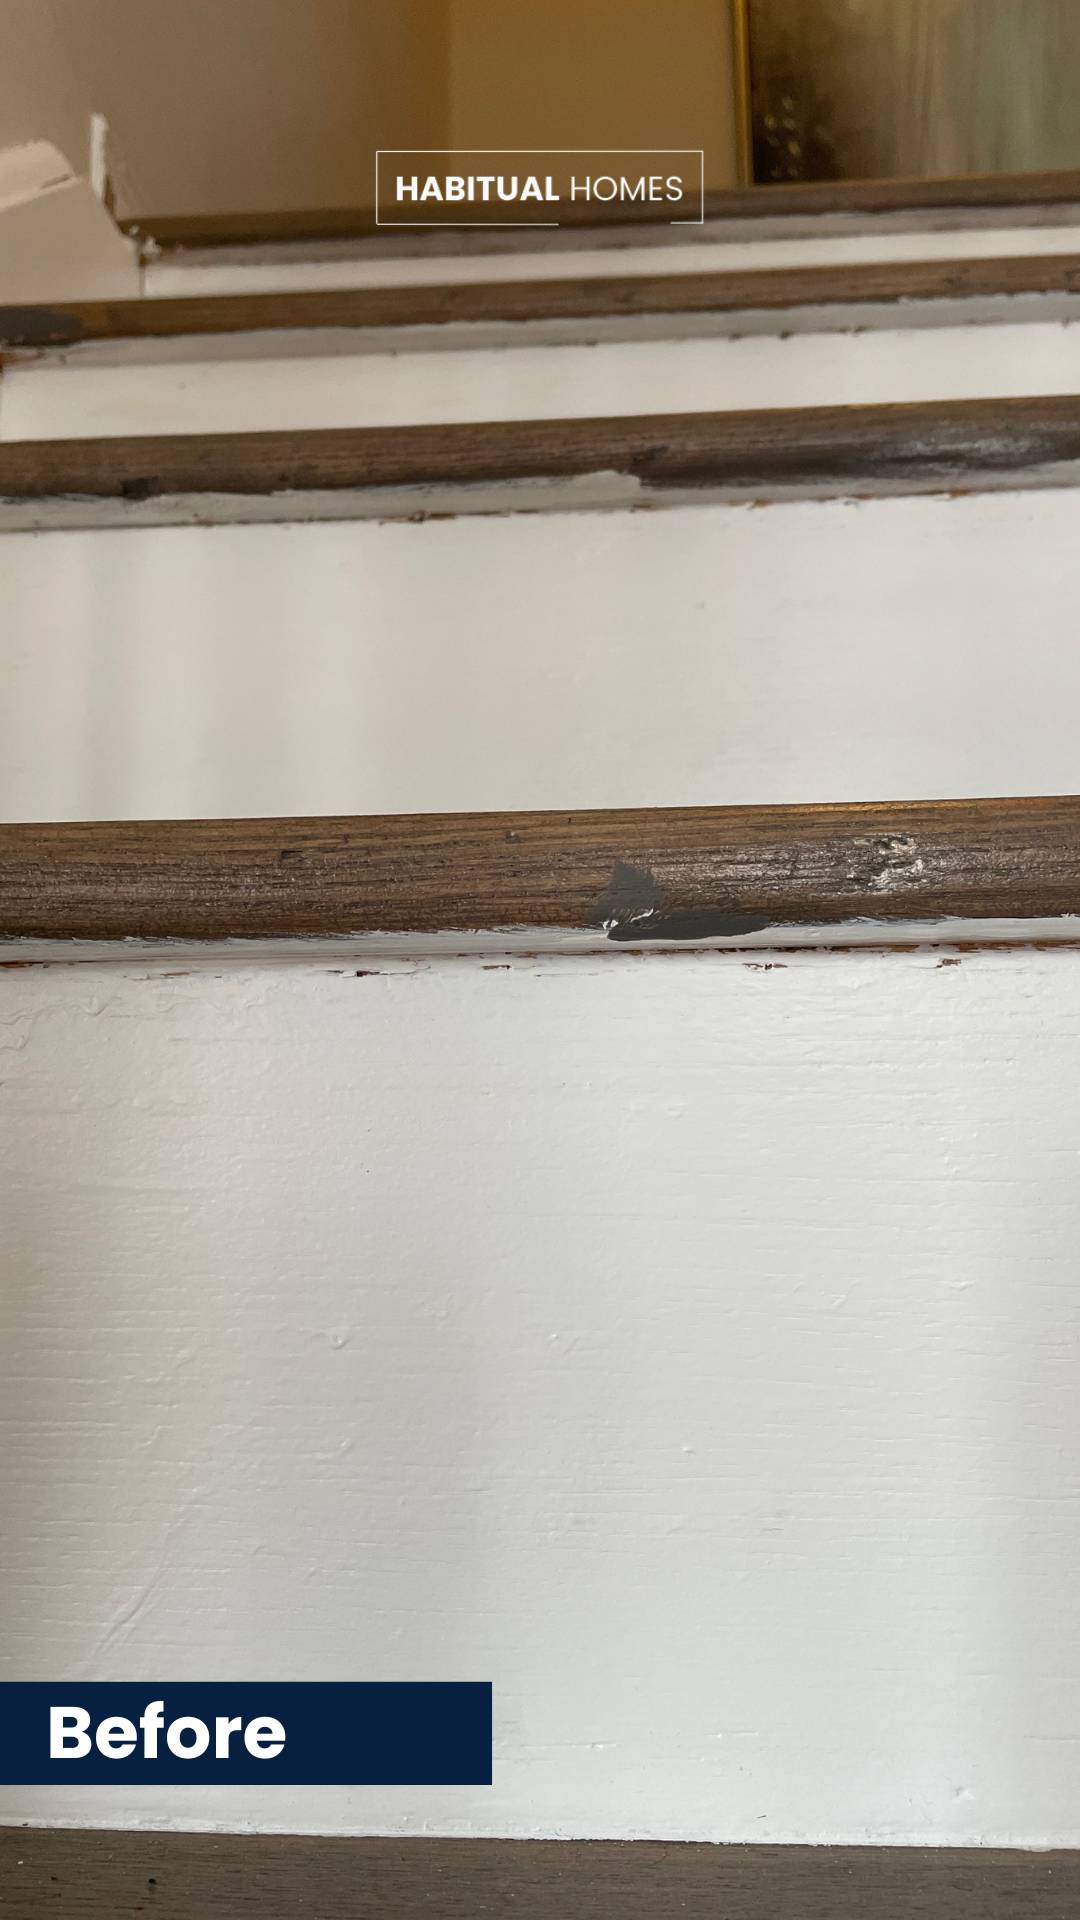
Unfortunately, the results were disappointing—sloppy lines, uneven paint, and stain application that left her staircase looking like it was painted by a toddler (her words!). To make things worse, this was a brand-new home for her, and the staircase was supposed to be a centerpiece.
The issue stemmed from a deal her contractor offered after installing her upstairs laminate flooring. The quality of the staircase makeover was far below what her beautiful home deserved. That’s when she called us, Habitual Homes, to help turn this disaster into a staircase she could be proud of.
The Problem
Tania’s staircase suffered from:
- Uneven paint and stain lines.
- Visible gaps and poor-quality finishes.
- A color mismatch with her newly installed gray laminate flooring.
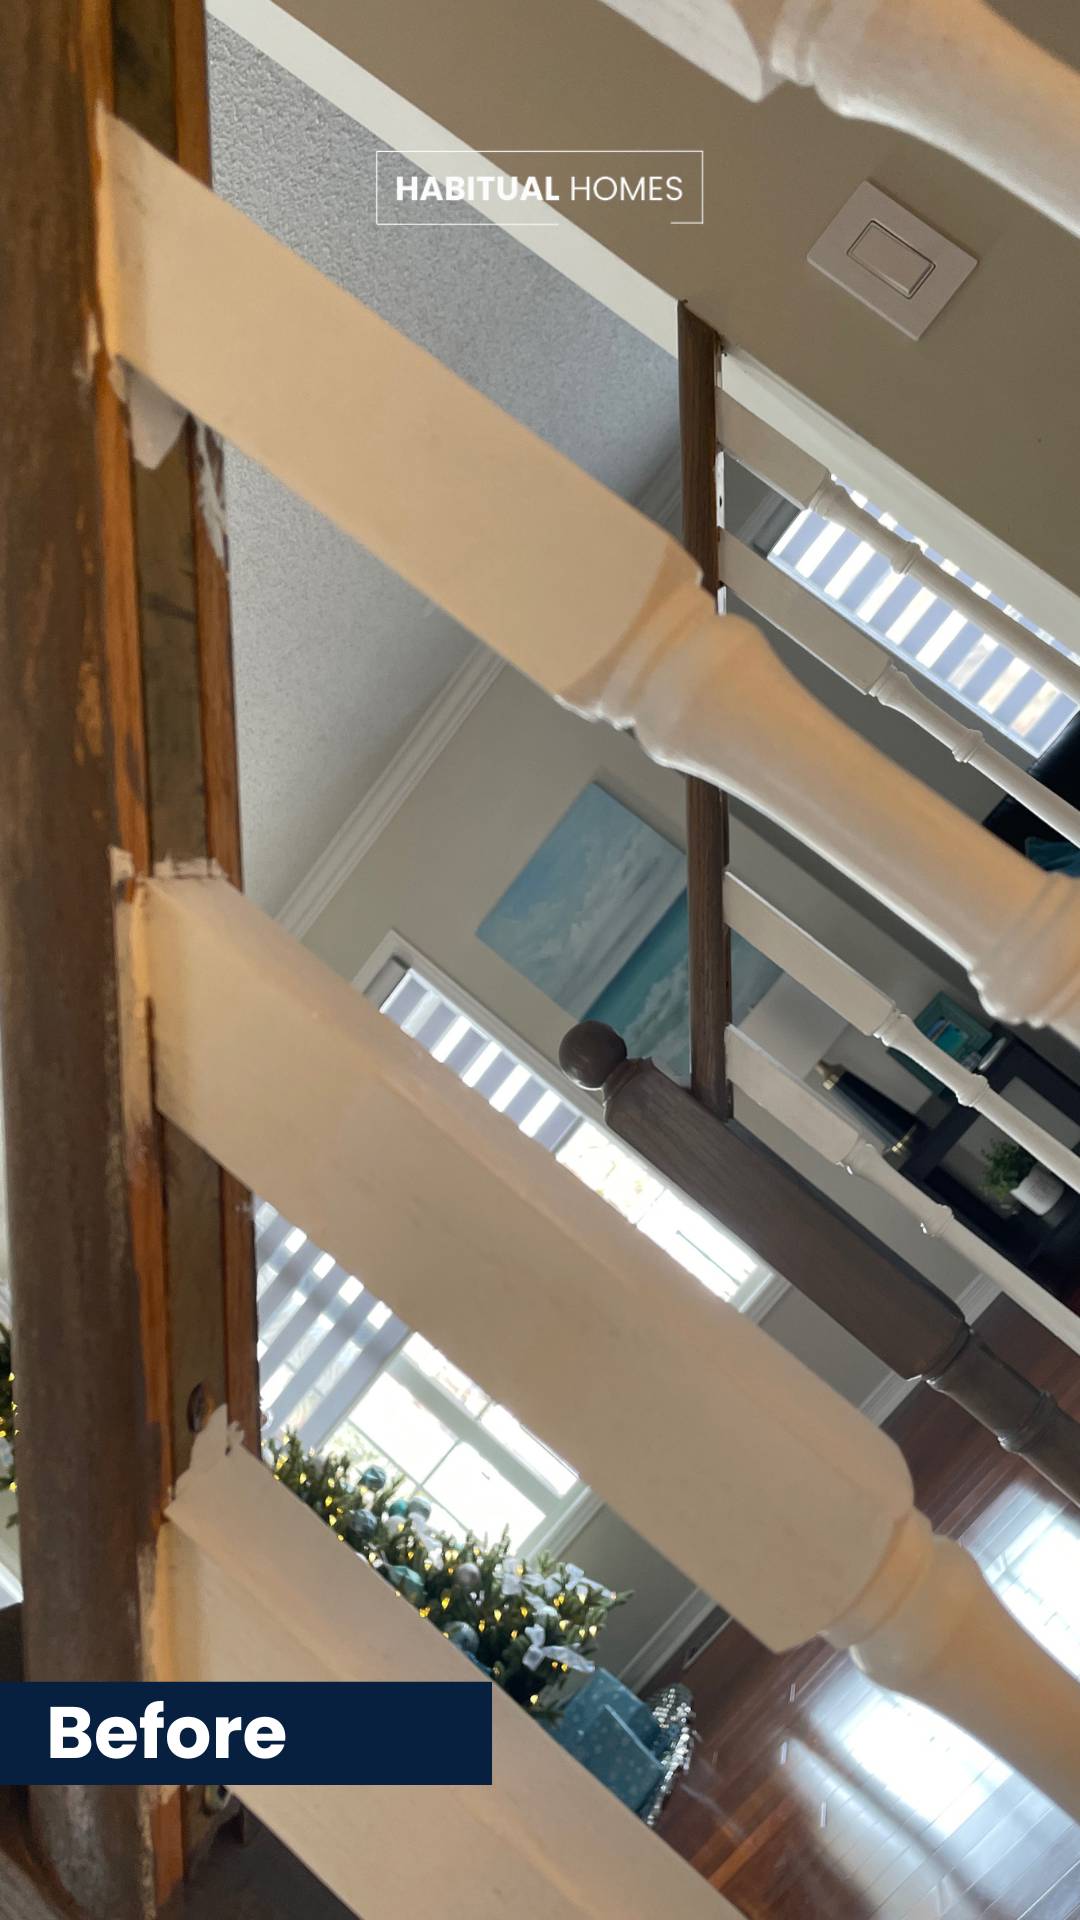
Renovations can be incredibly stressful, especially when the results fall short of expectations. We immediately understood her frustration and assured her we could bring her staircase back to life.
Our Solution: Restaining and Repainting
We approached this project with care, attention to detail, and empathy. Here’s how we tackled the transformation:
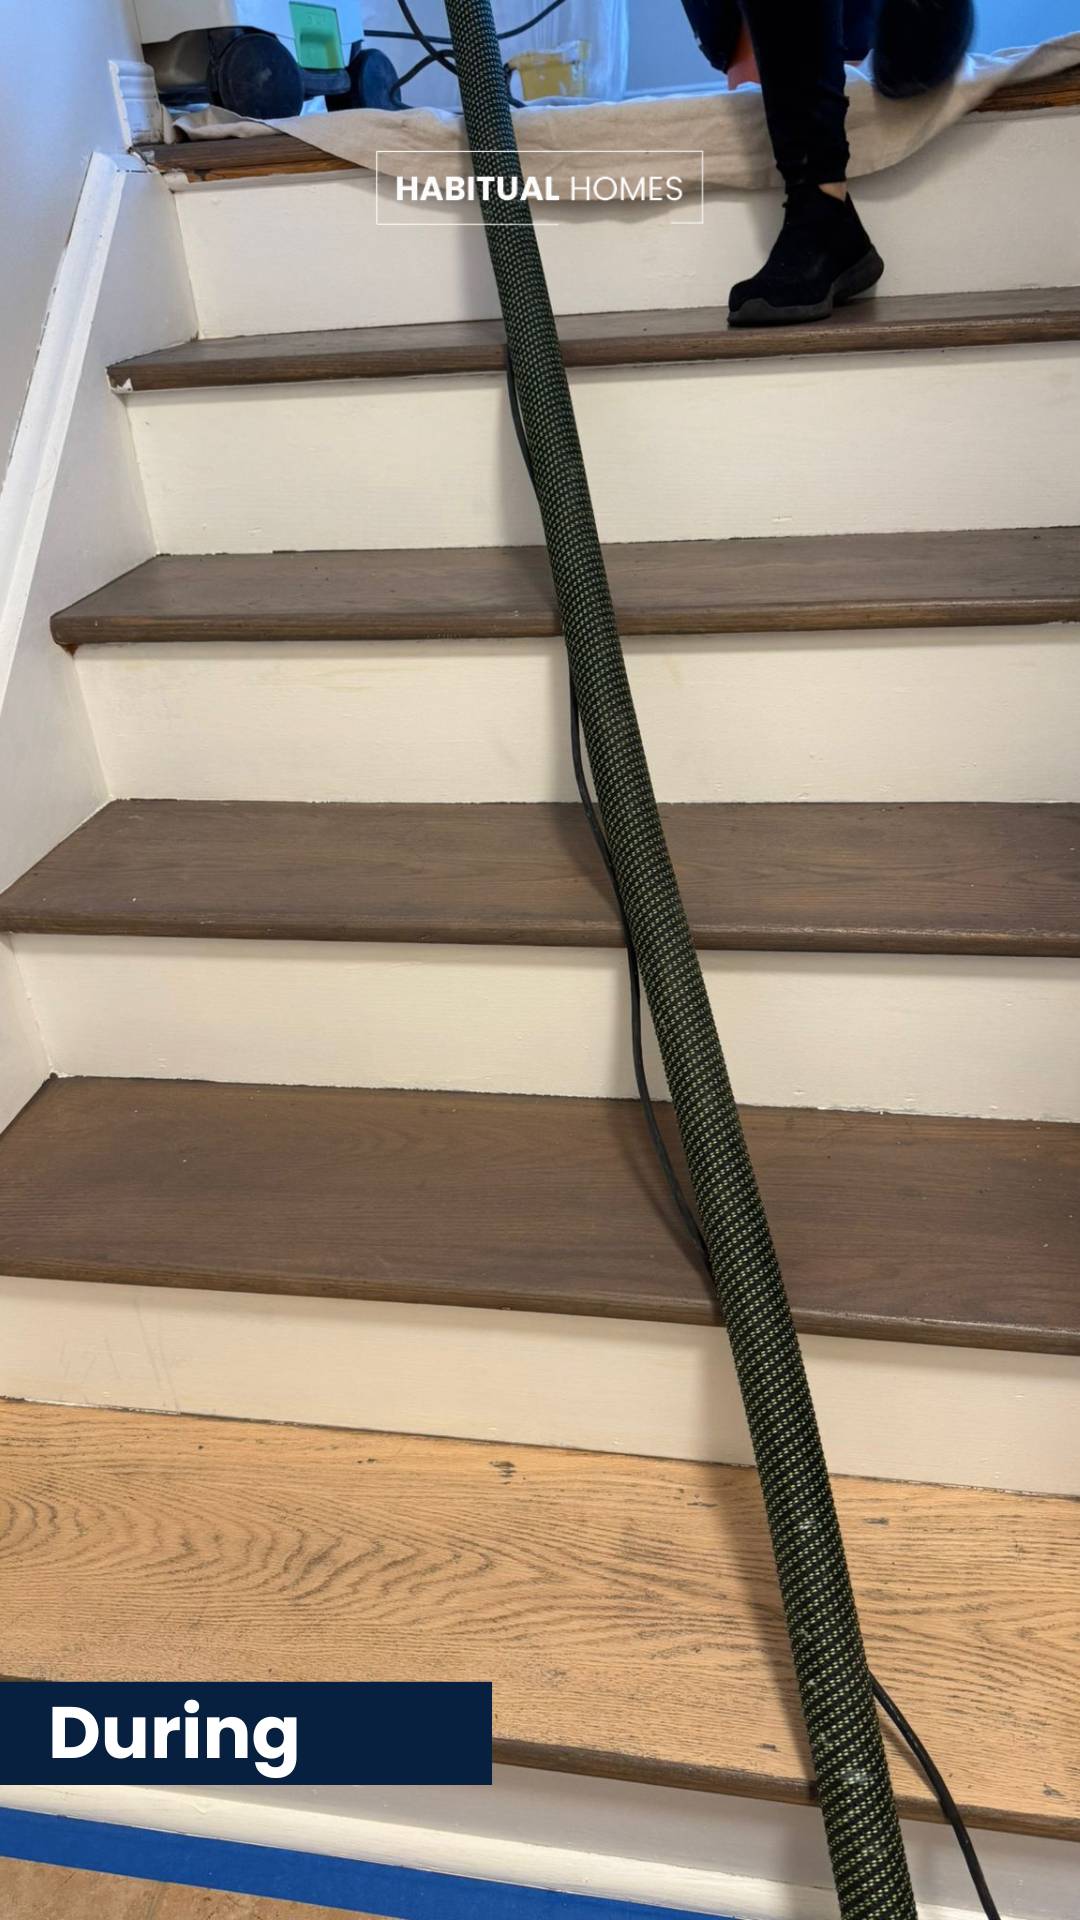
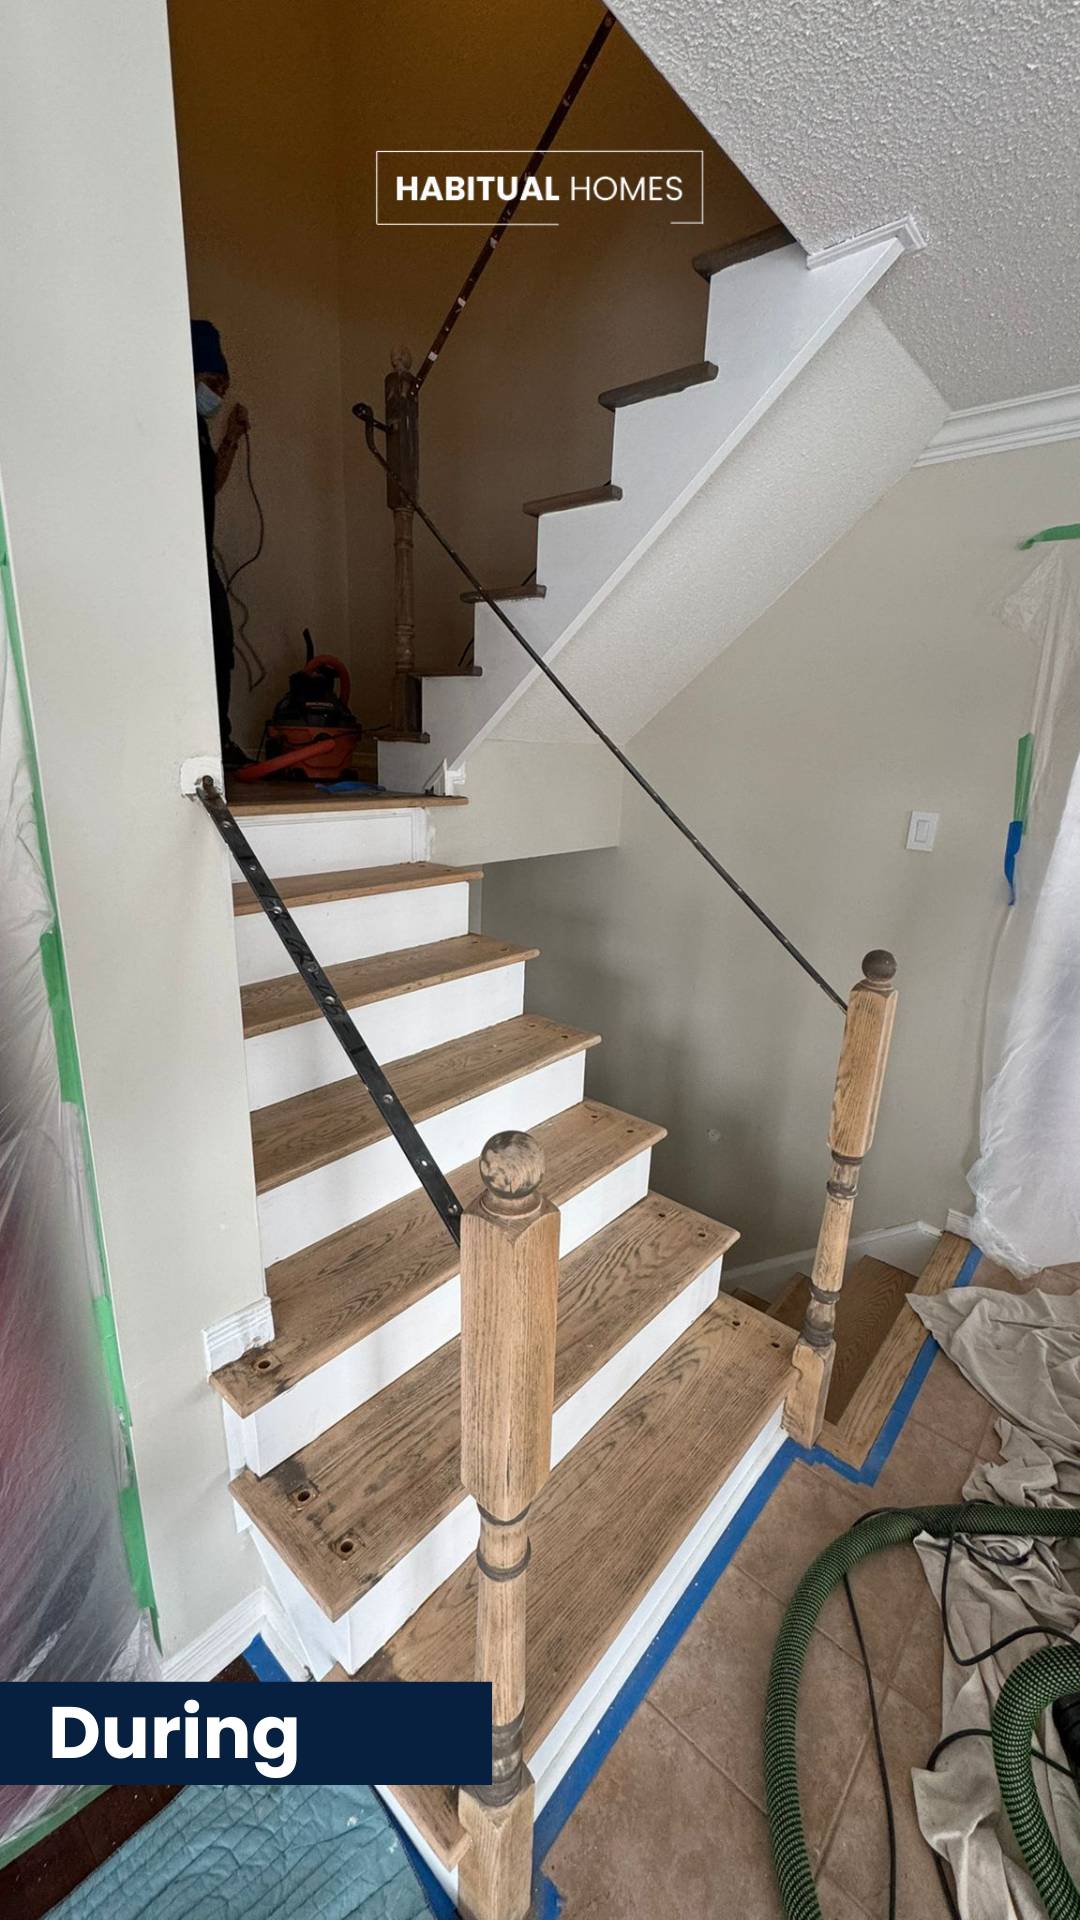
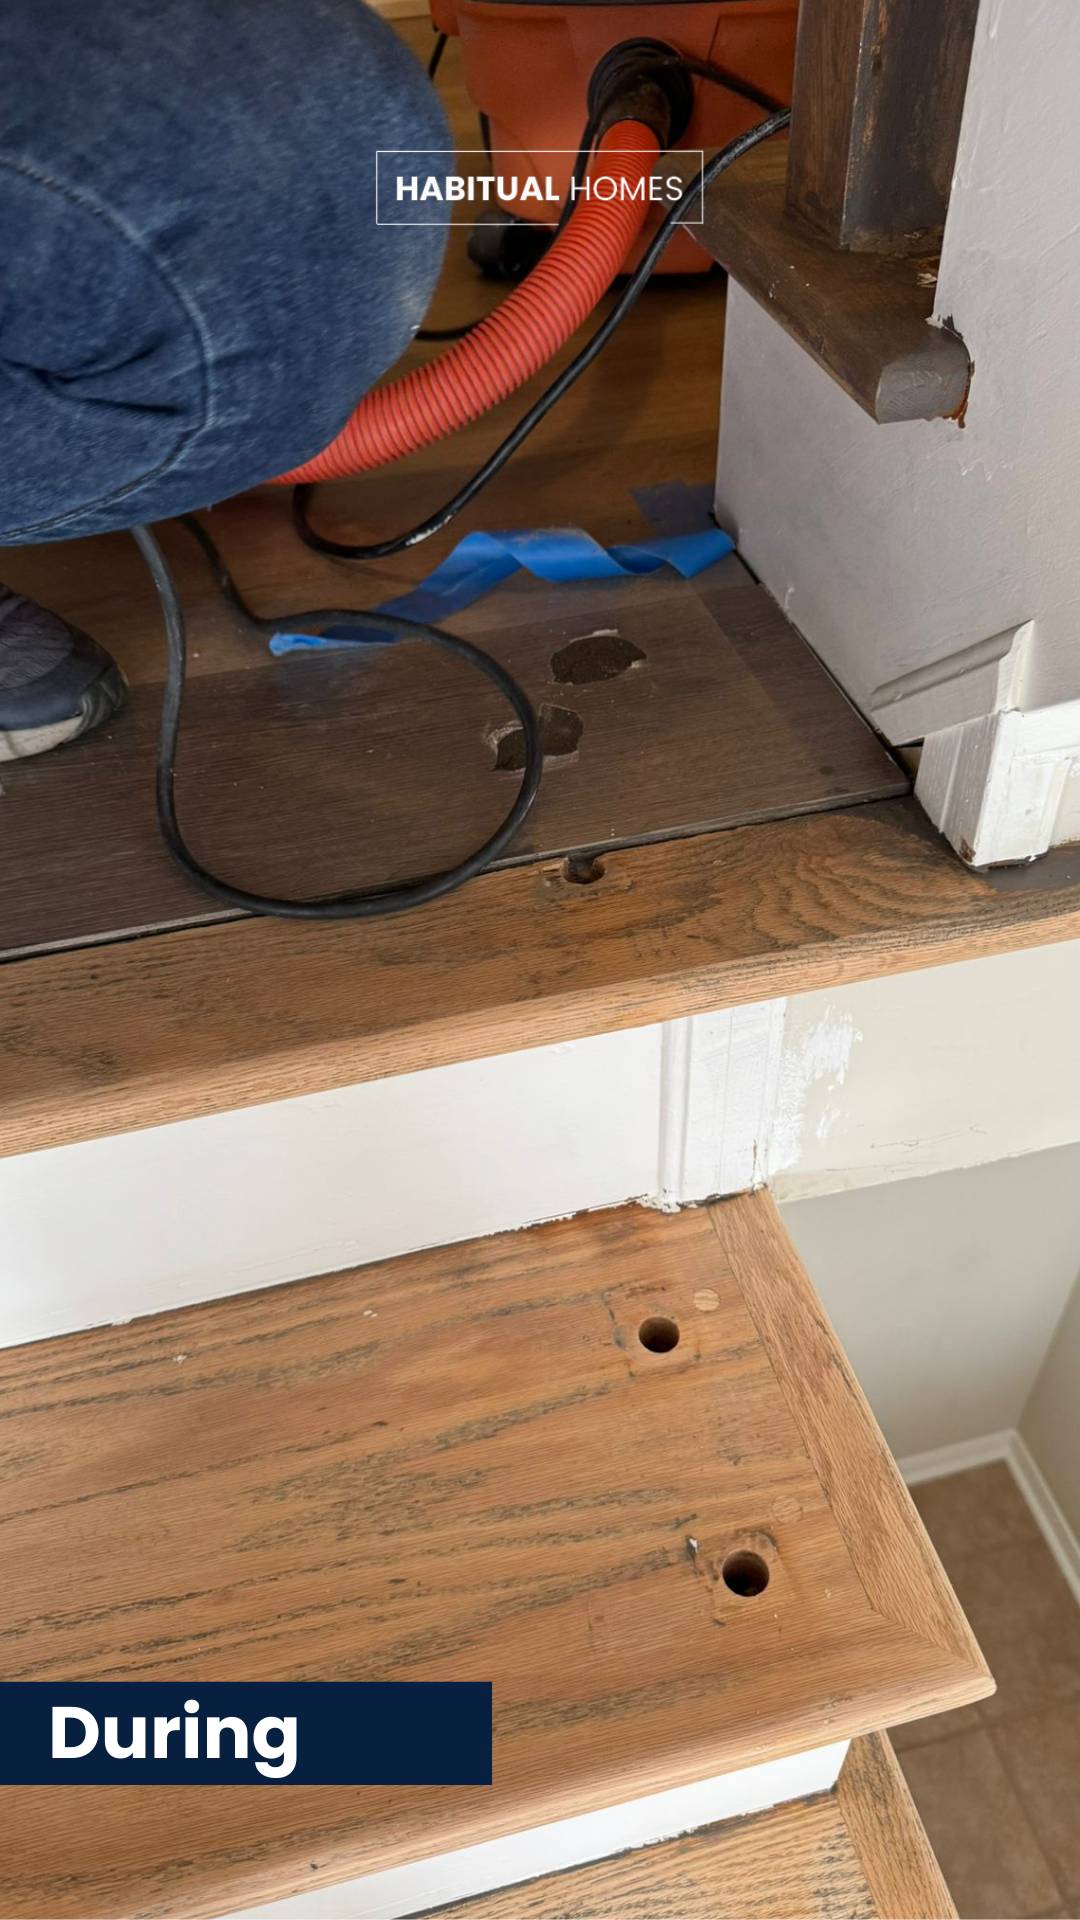
- Removing the Old Finish: The first step was removing the poor-quality stain and paint. Sanding was labor-intensive and took two days of careful work, but it was necessary to create a clean base.
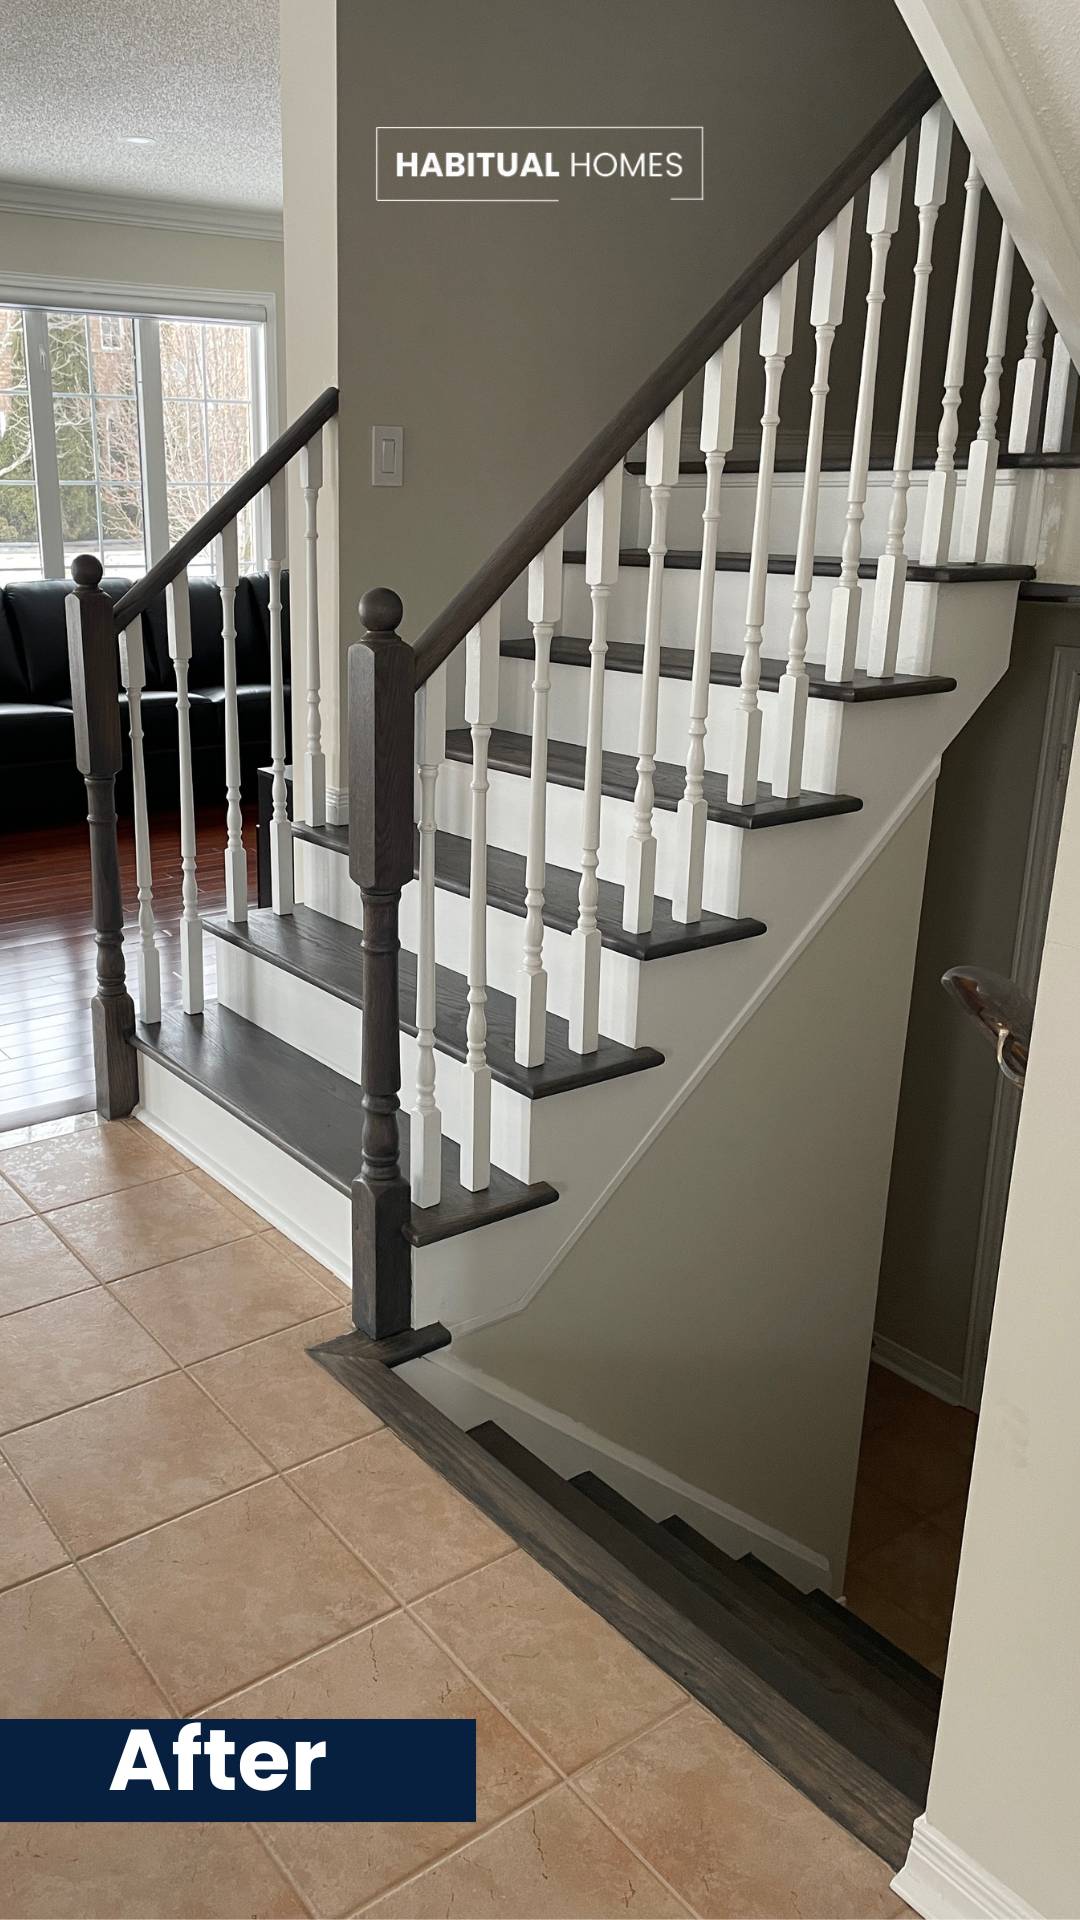
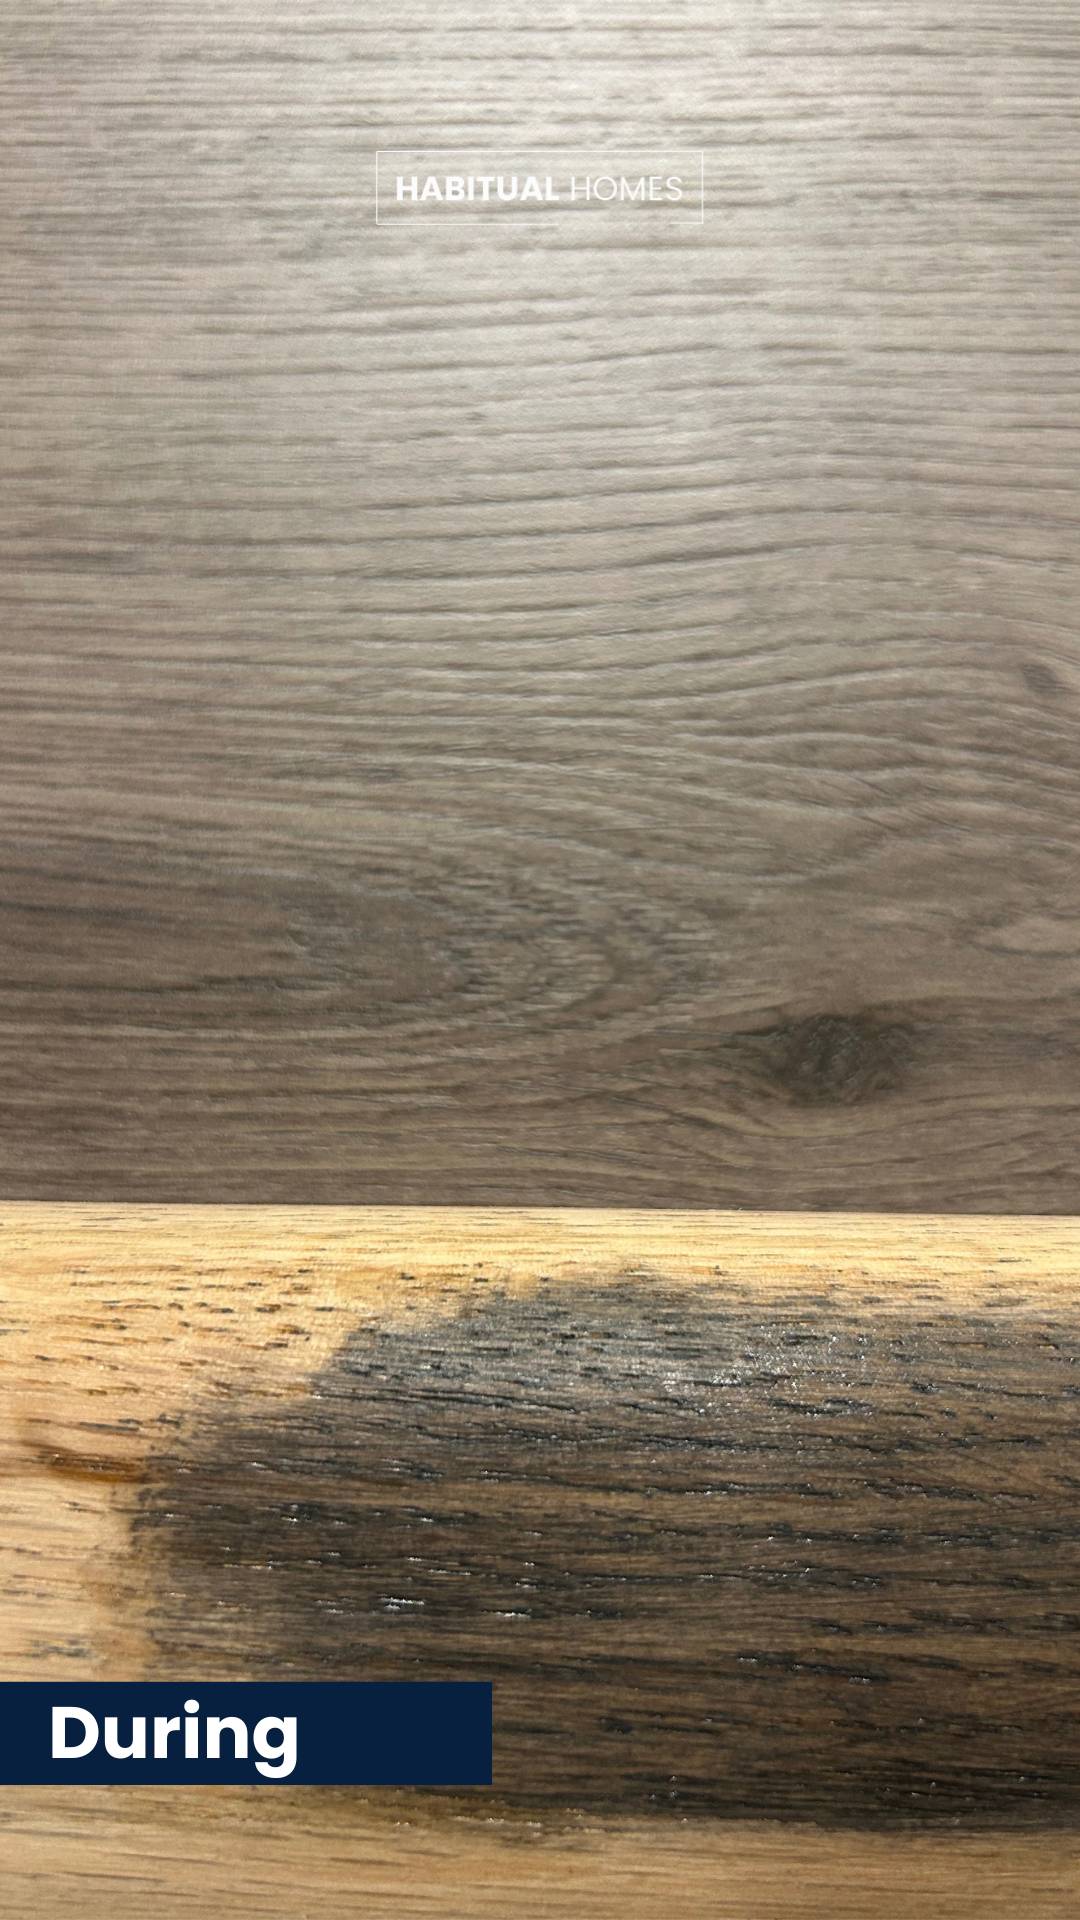
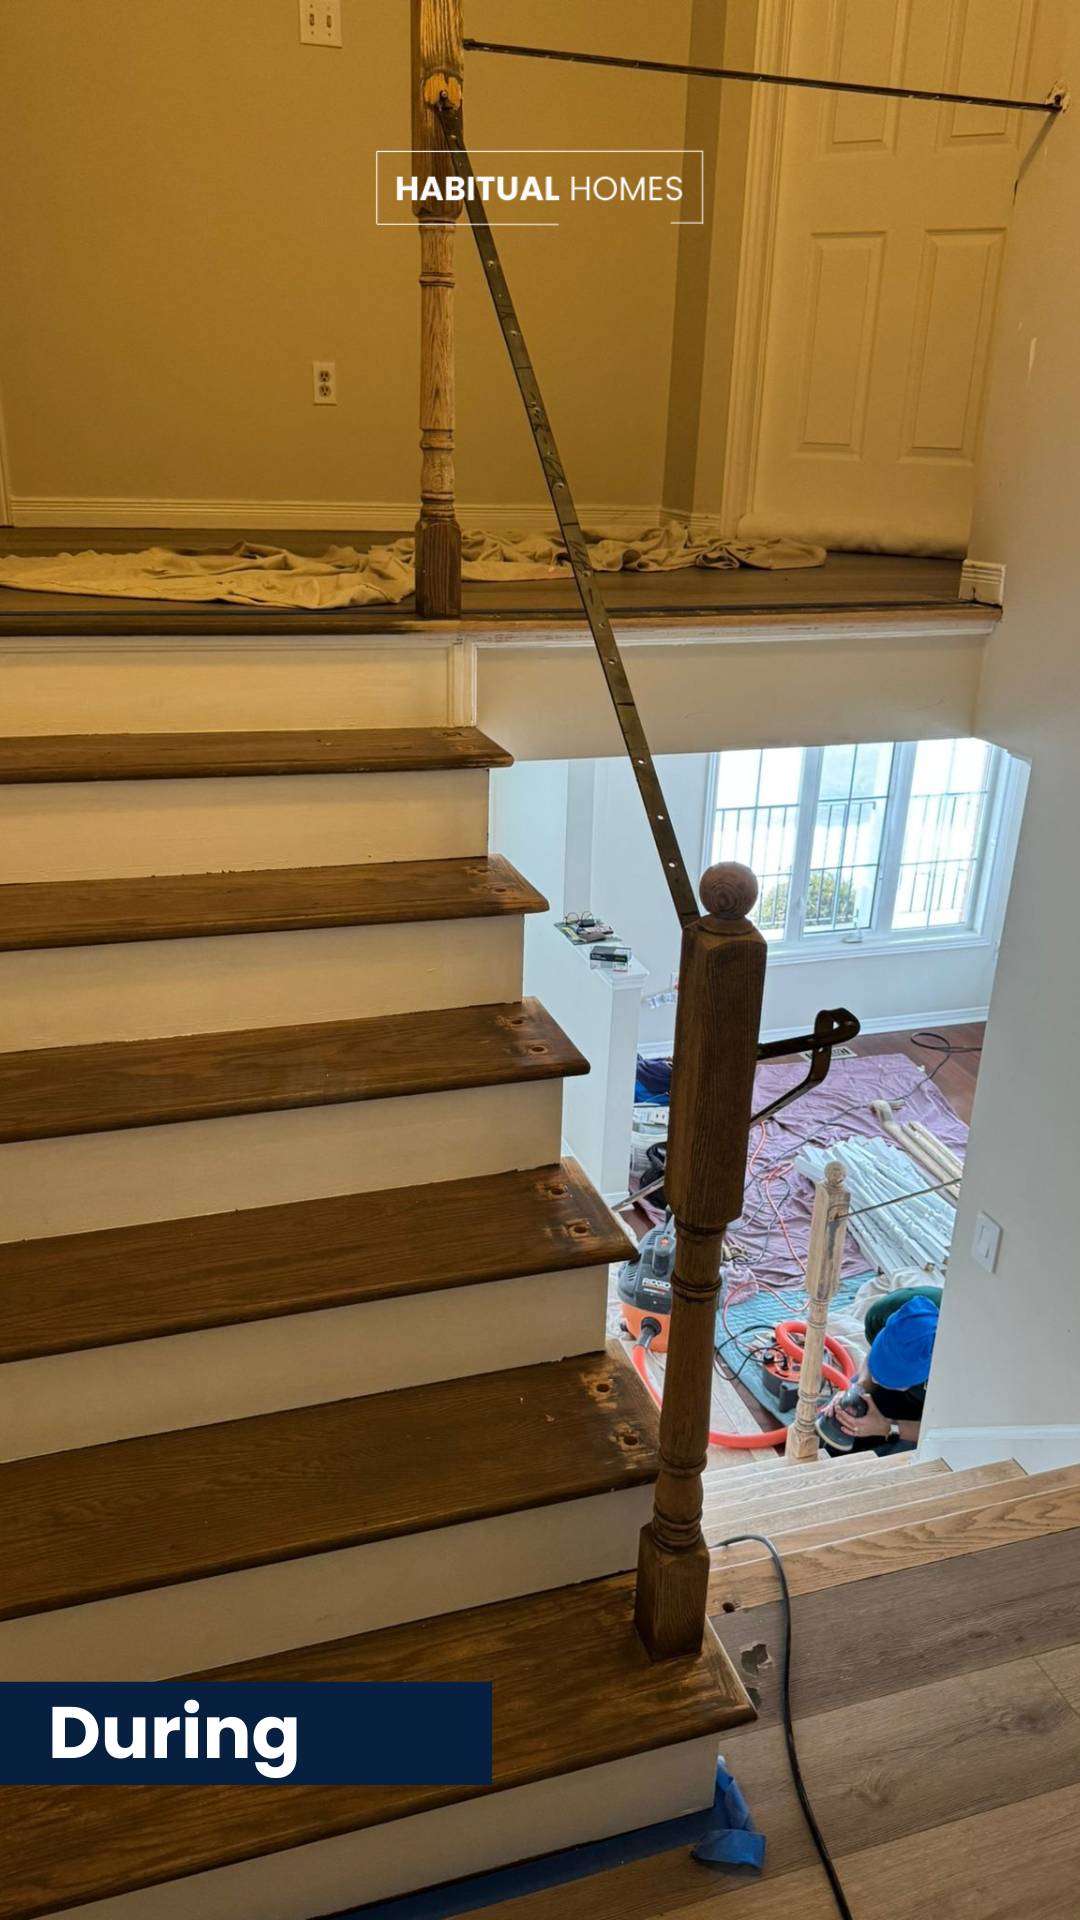
- Choosing the Right Stain: Before we started, we prepared stain samples for Tania. She selected a dark gray tone to match her upstairs laminate flooring—a color that tied the staircase to the rest of her home beautifully.
- Painting the Details:
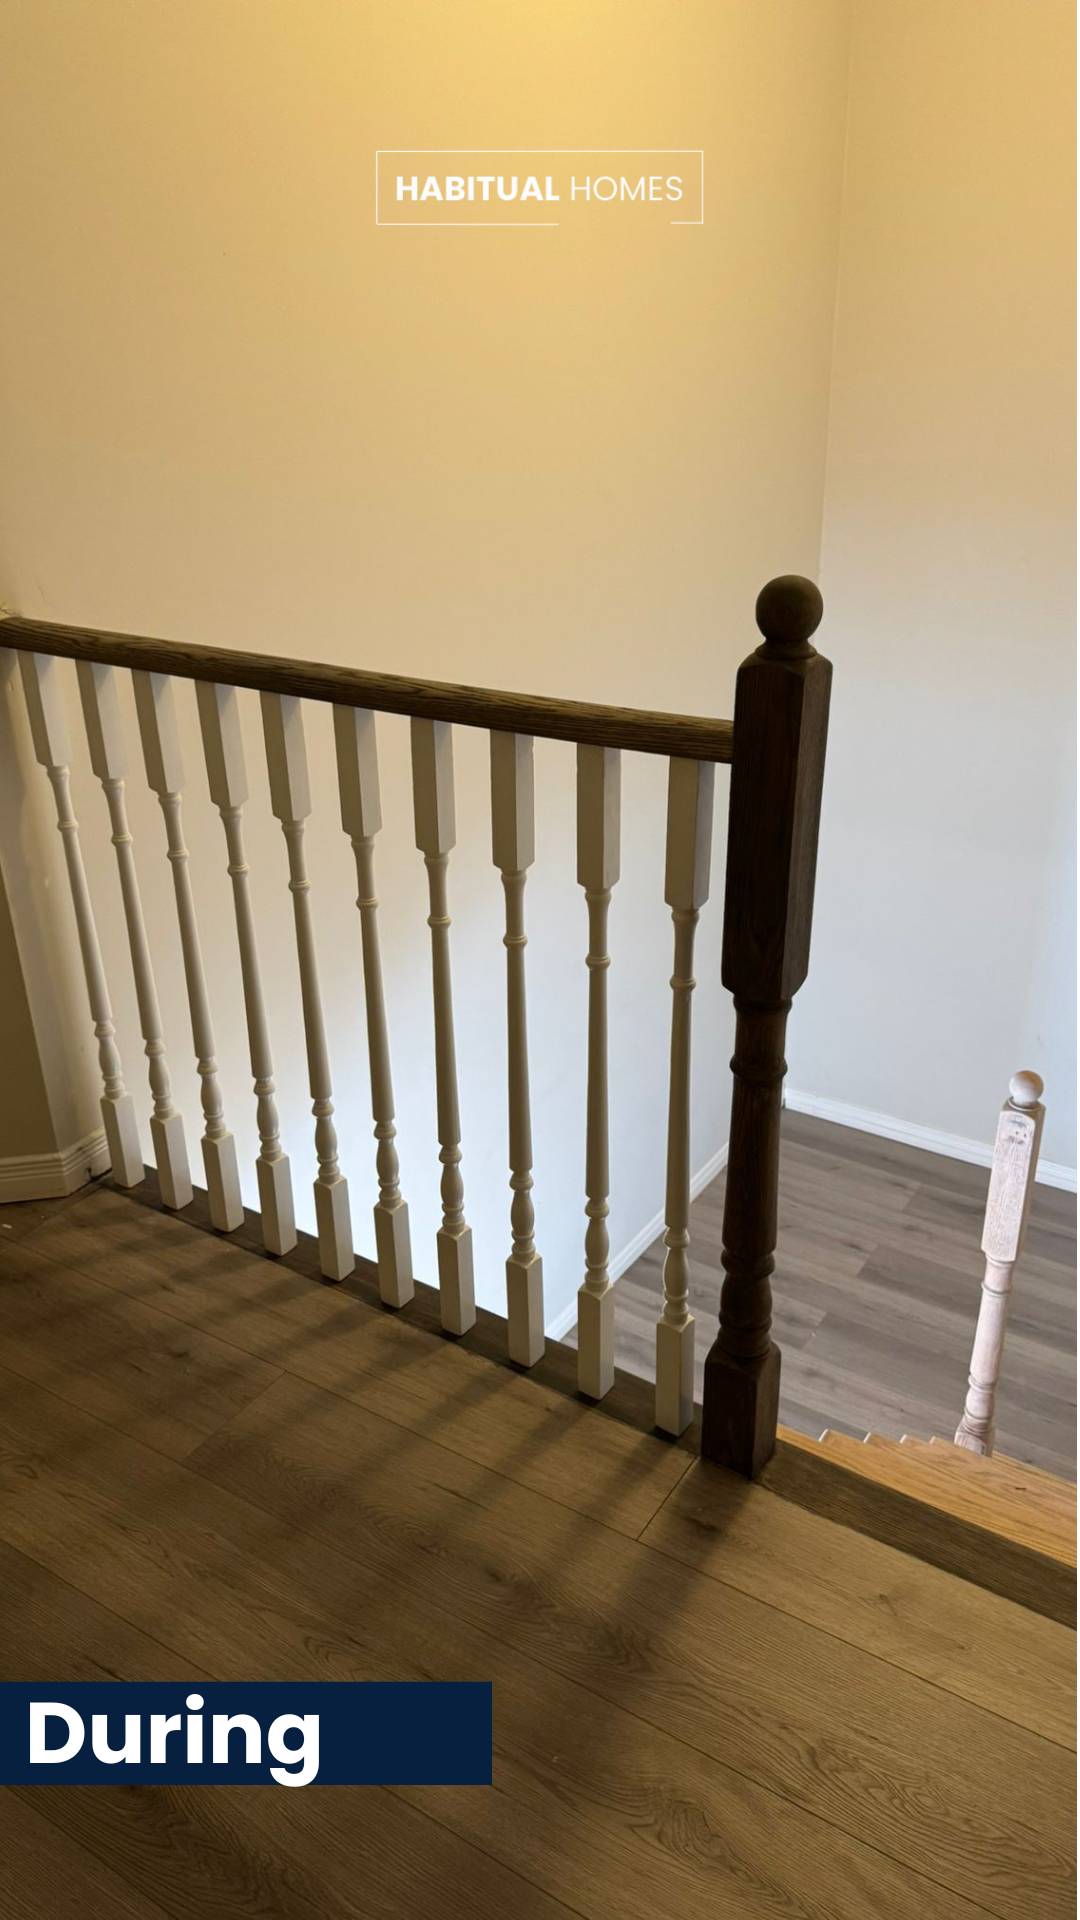
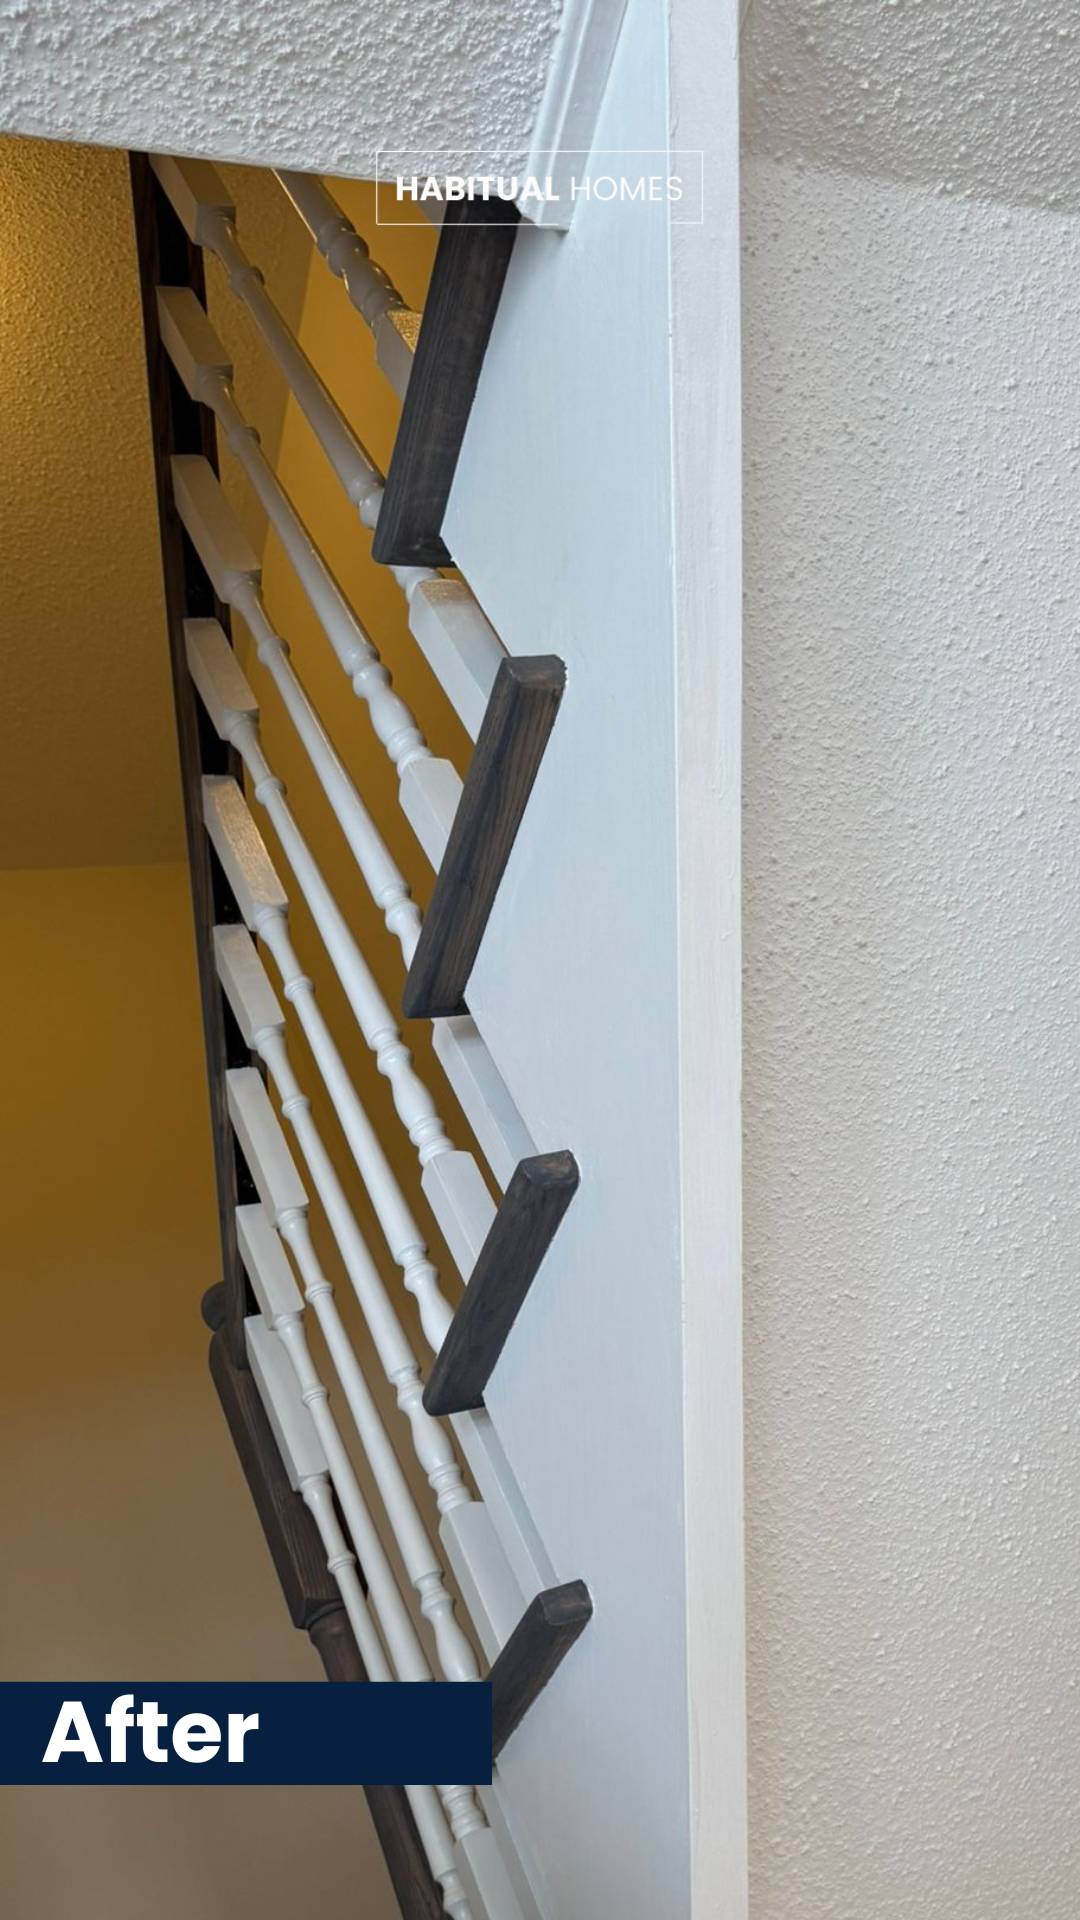
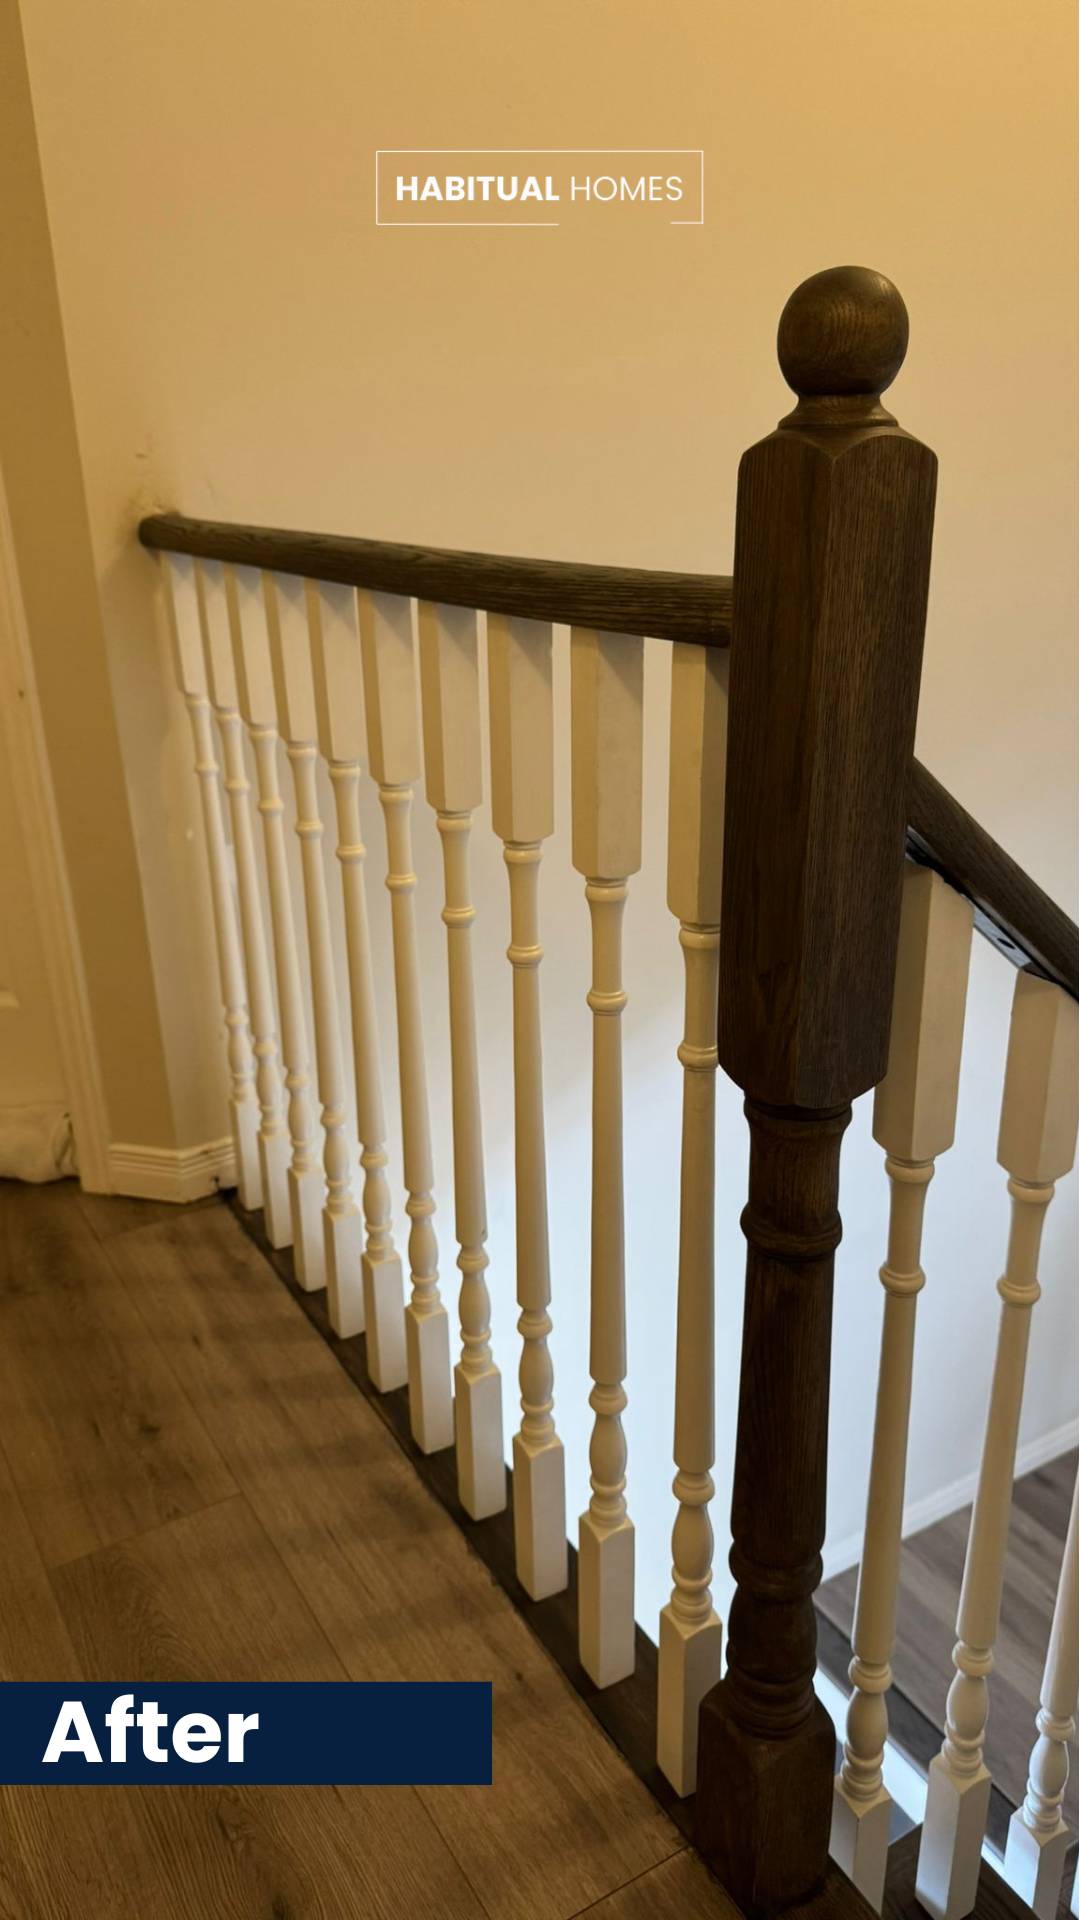
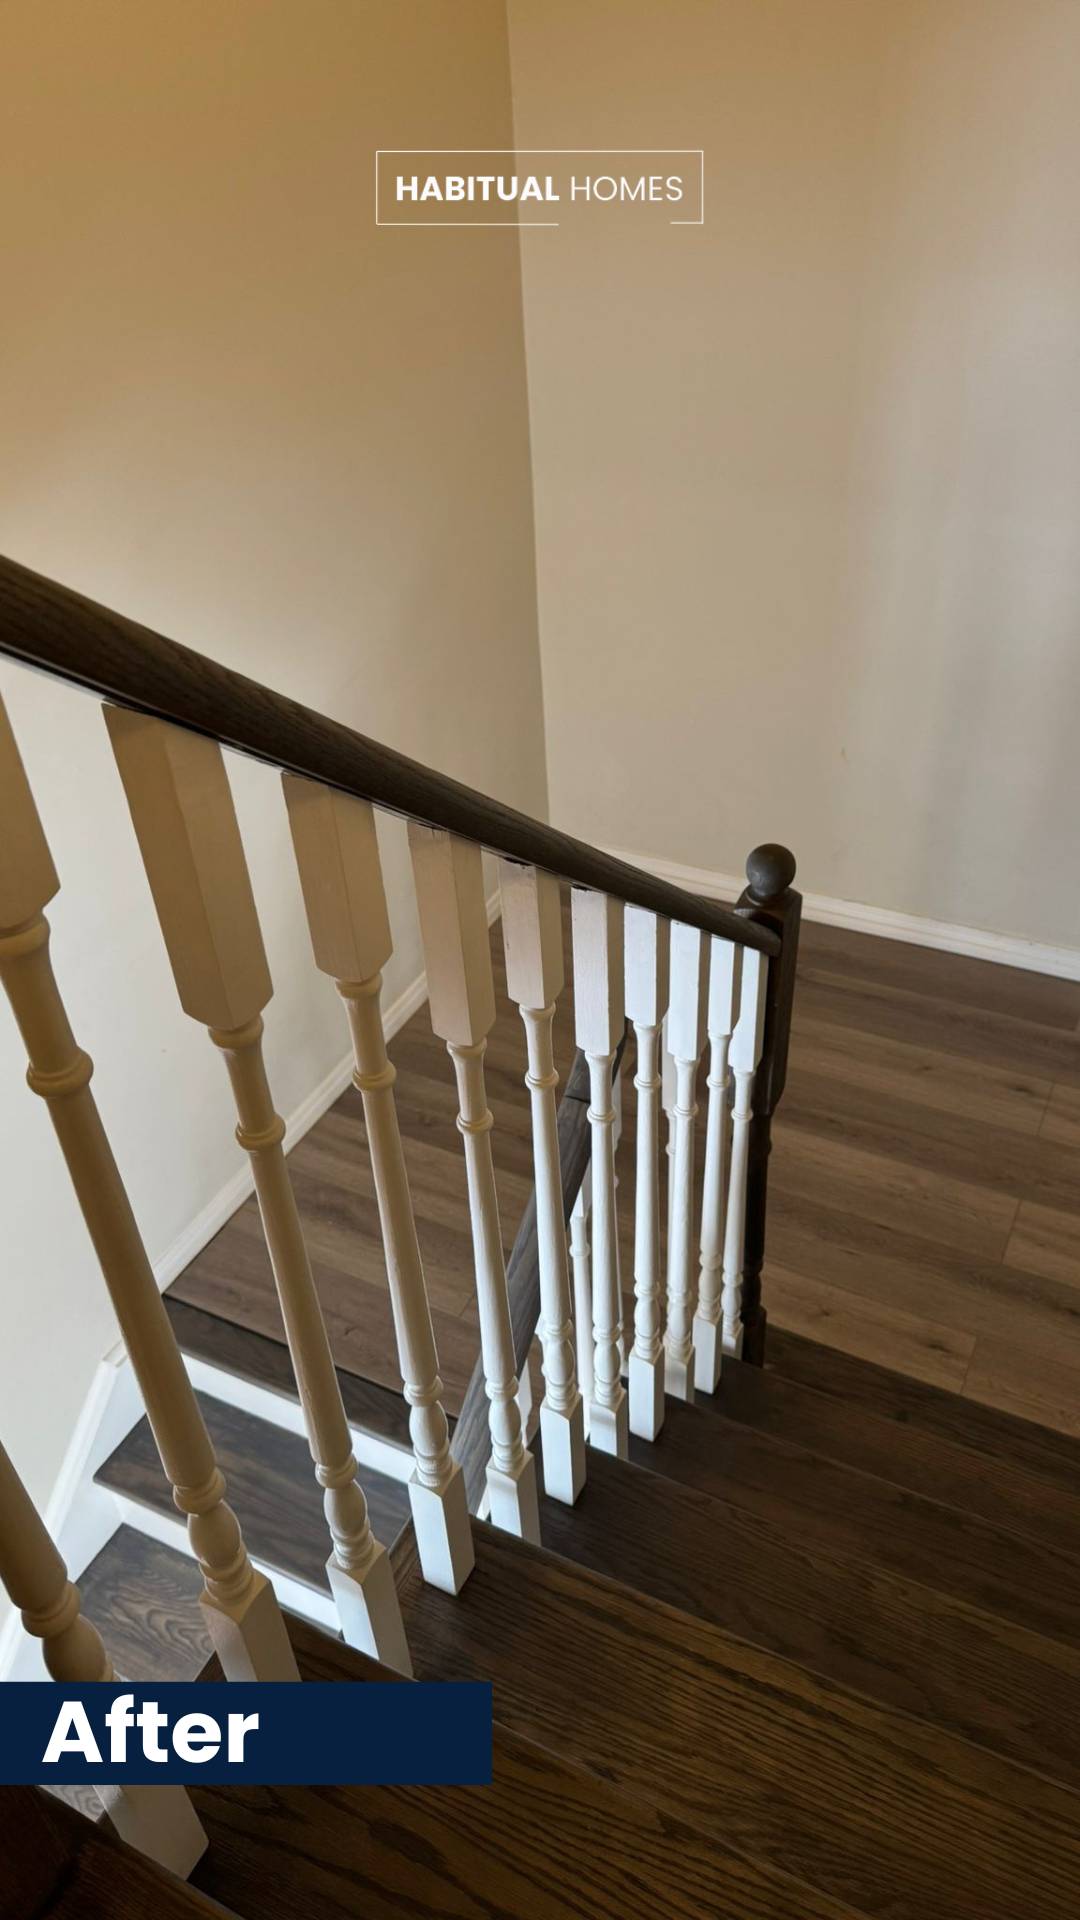
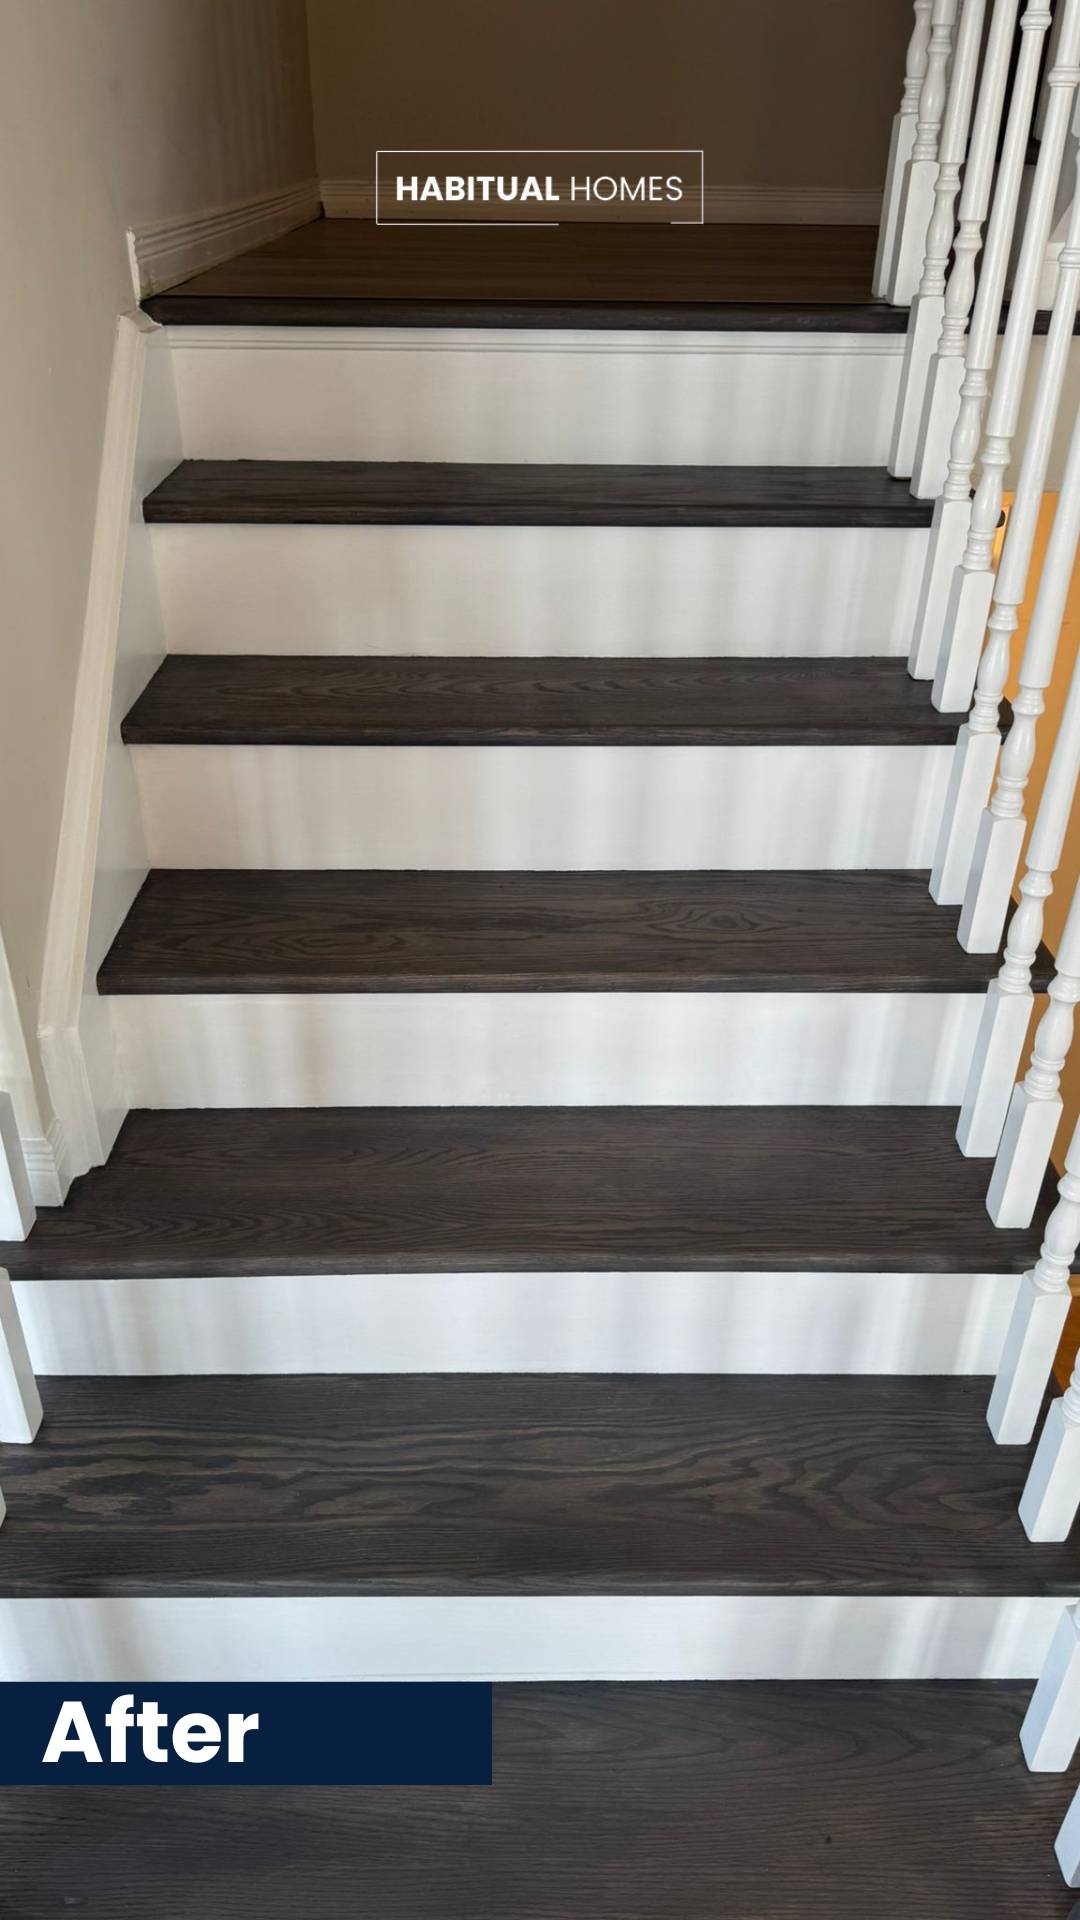
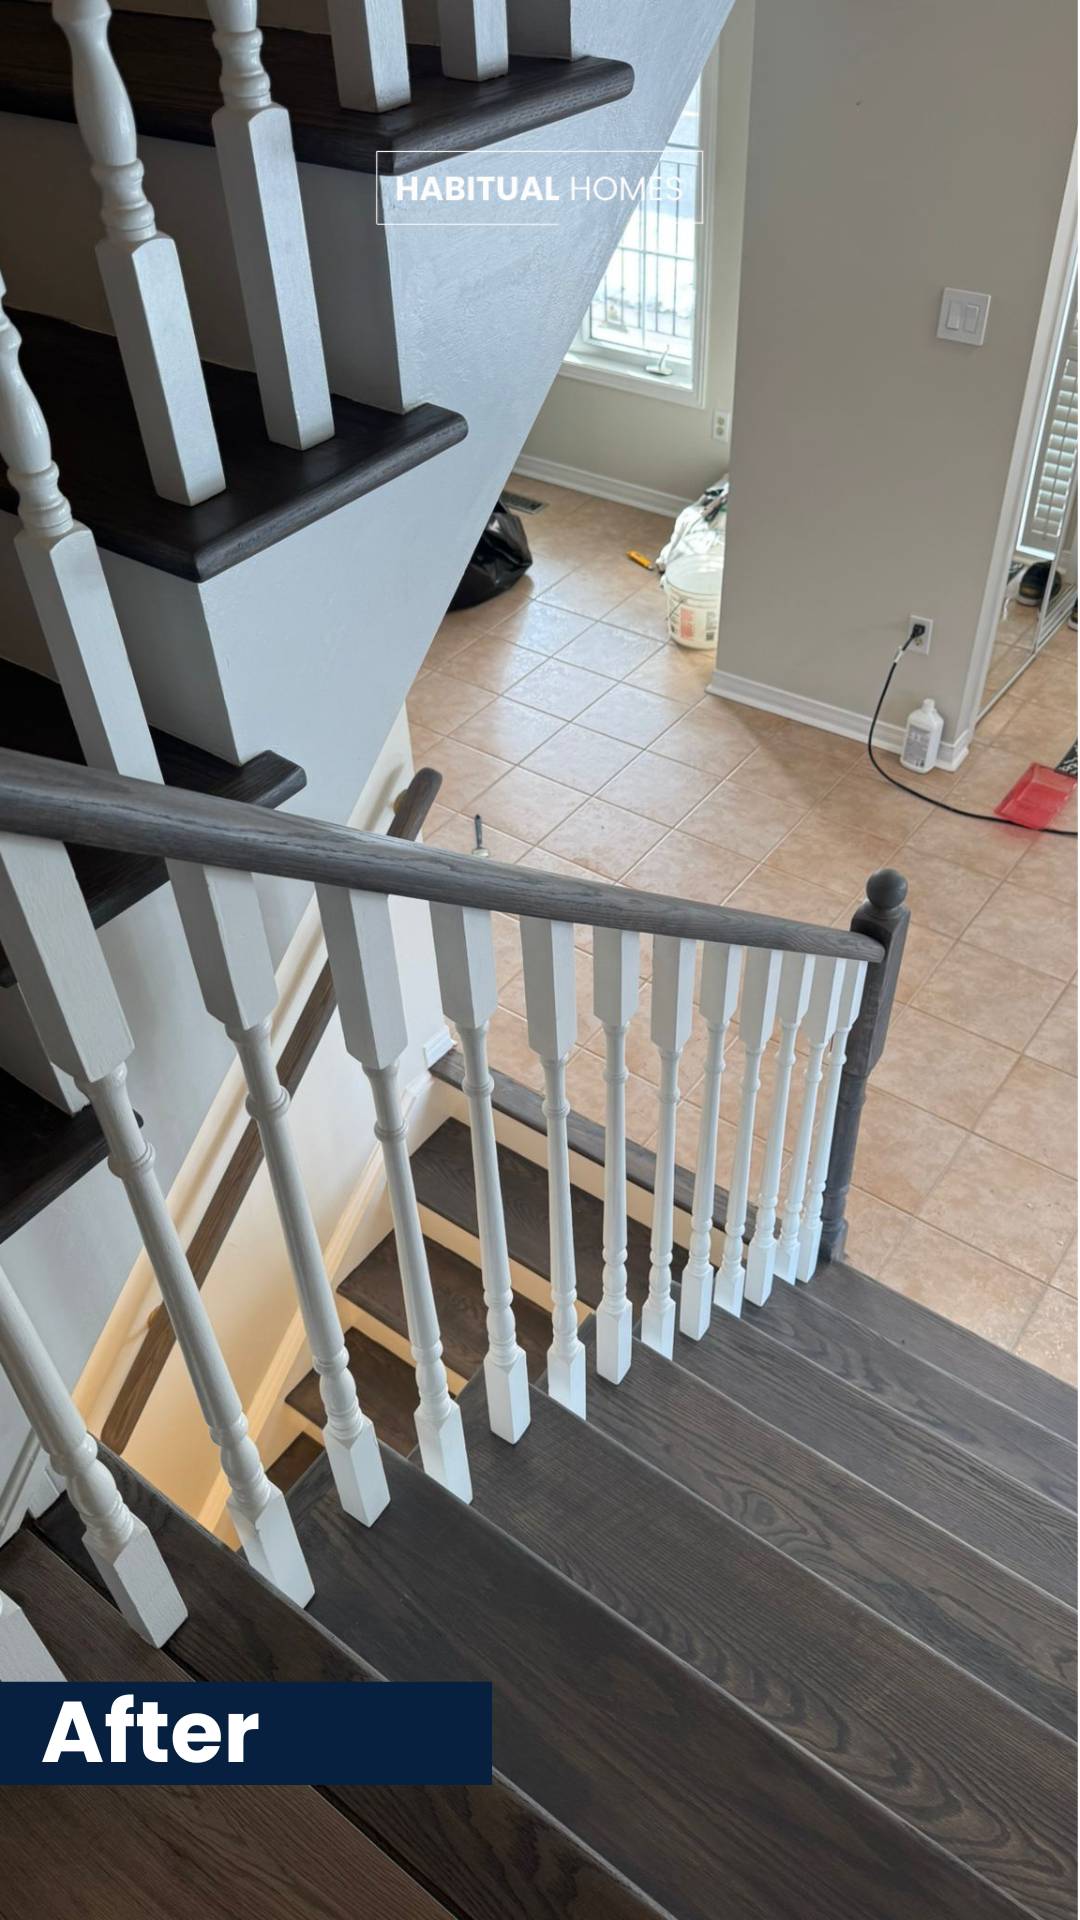
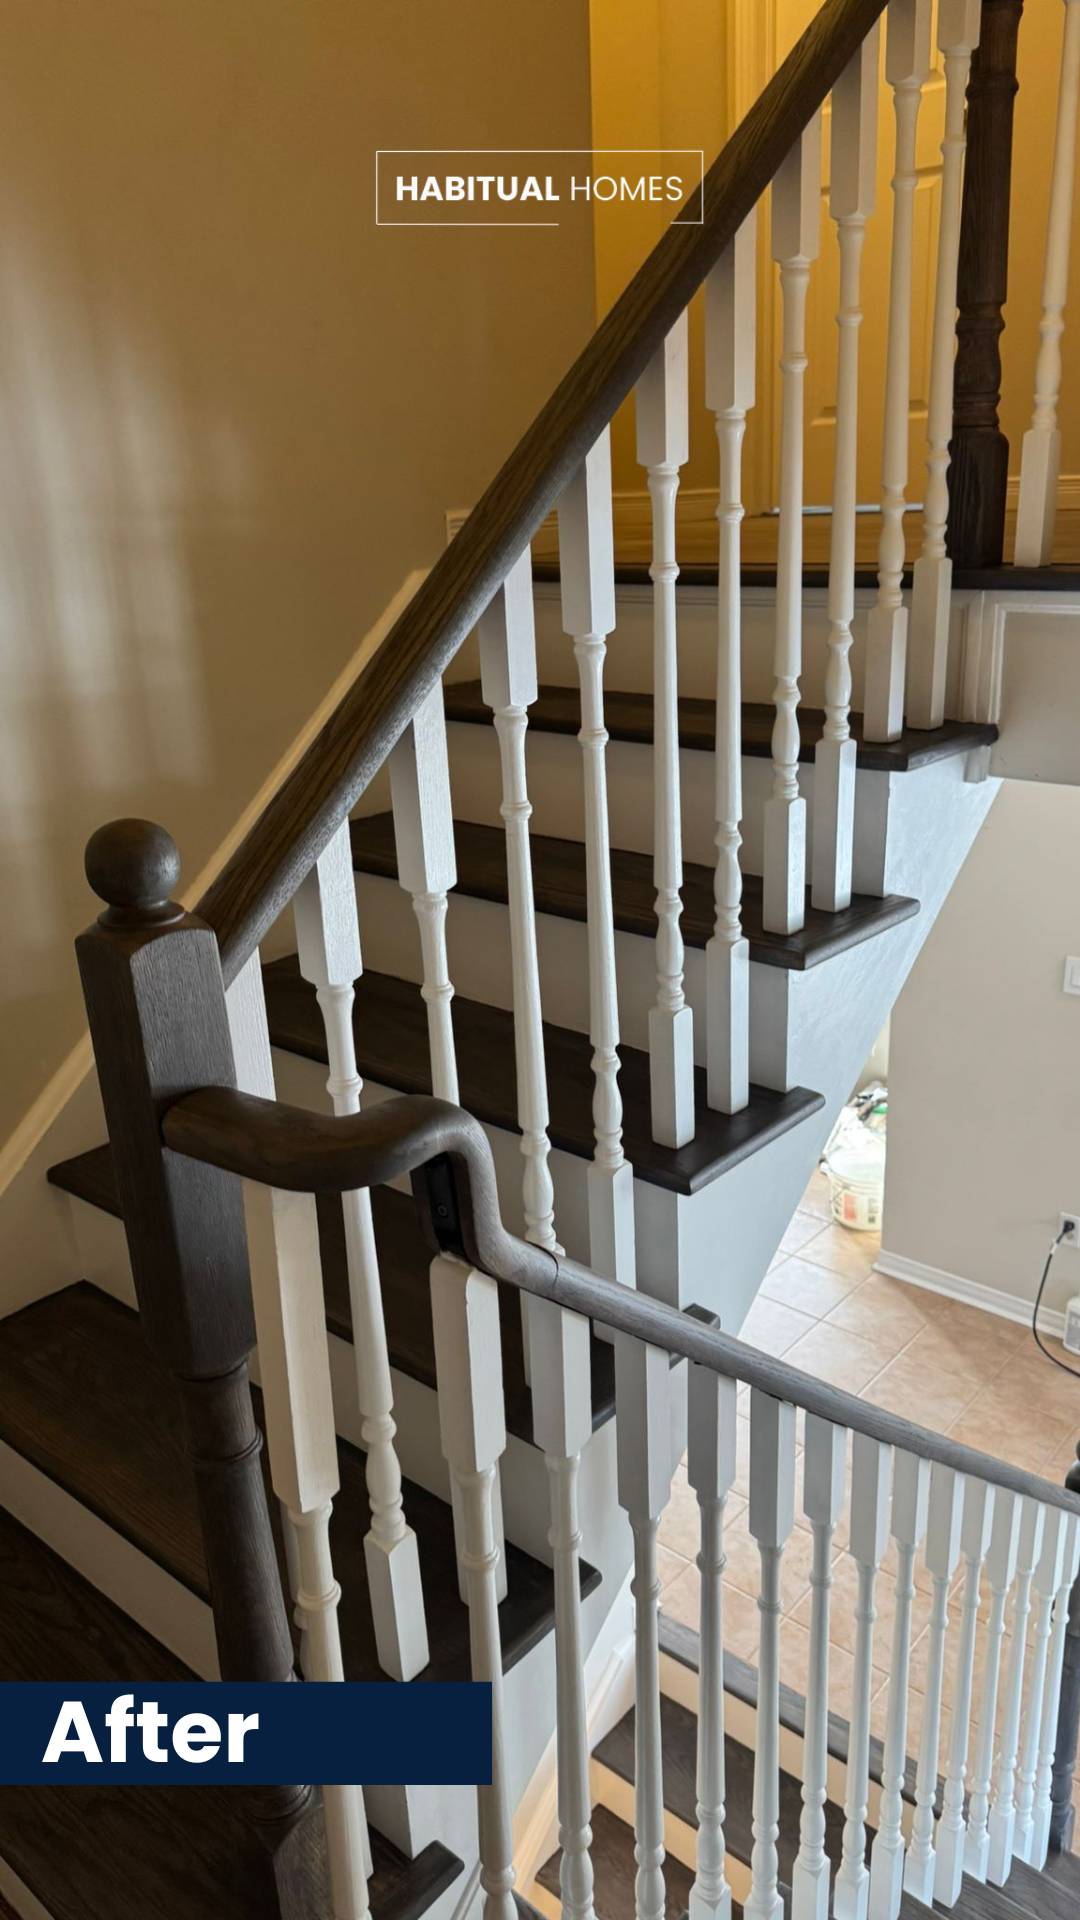
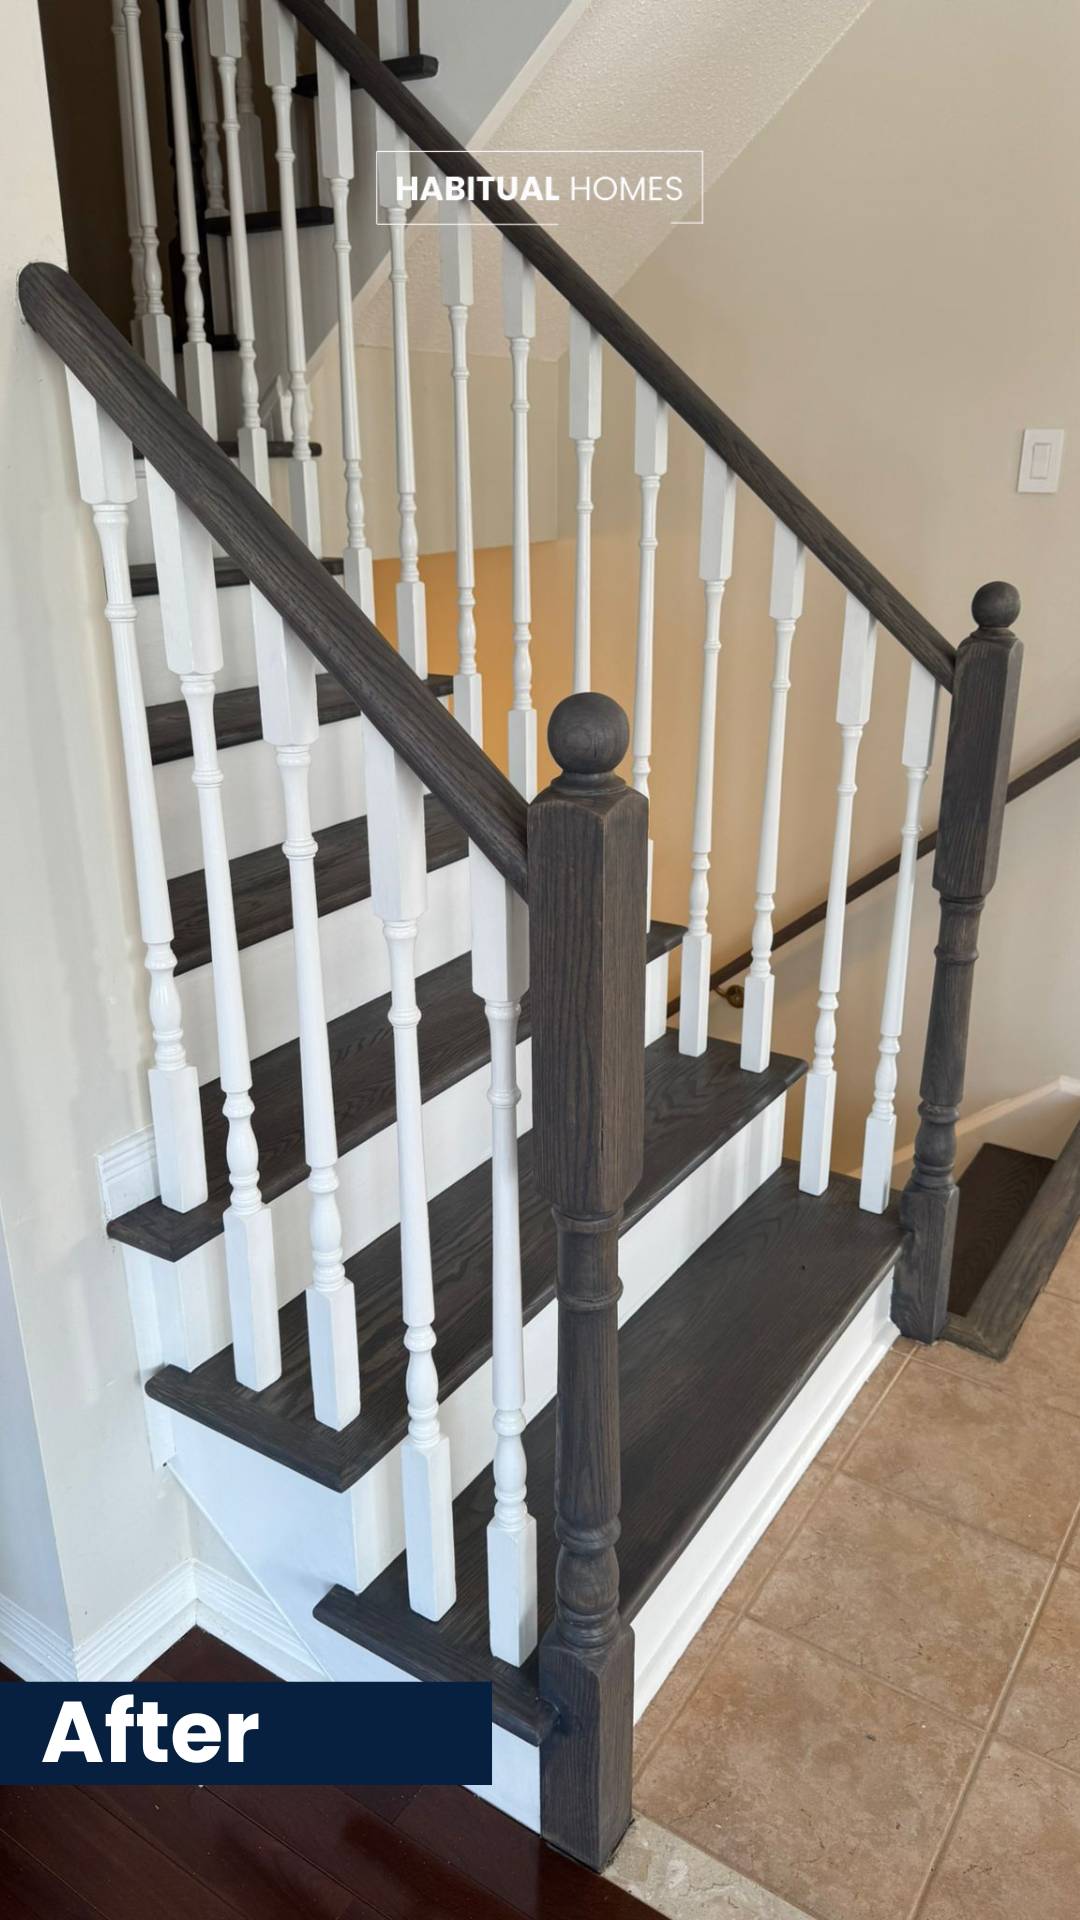
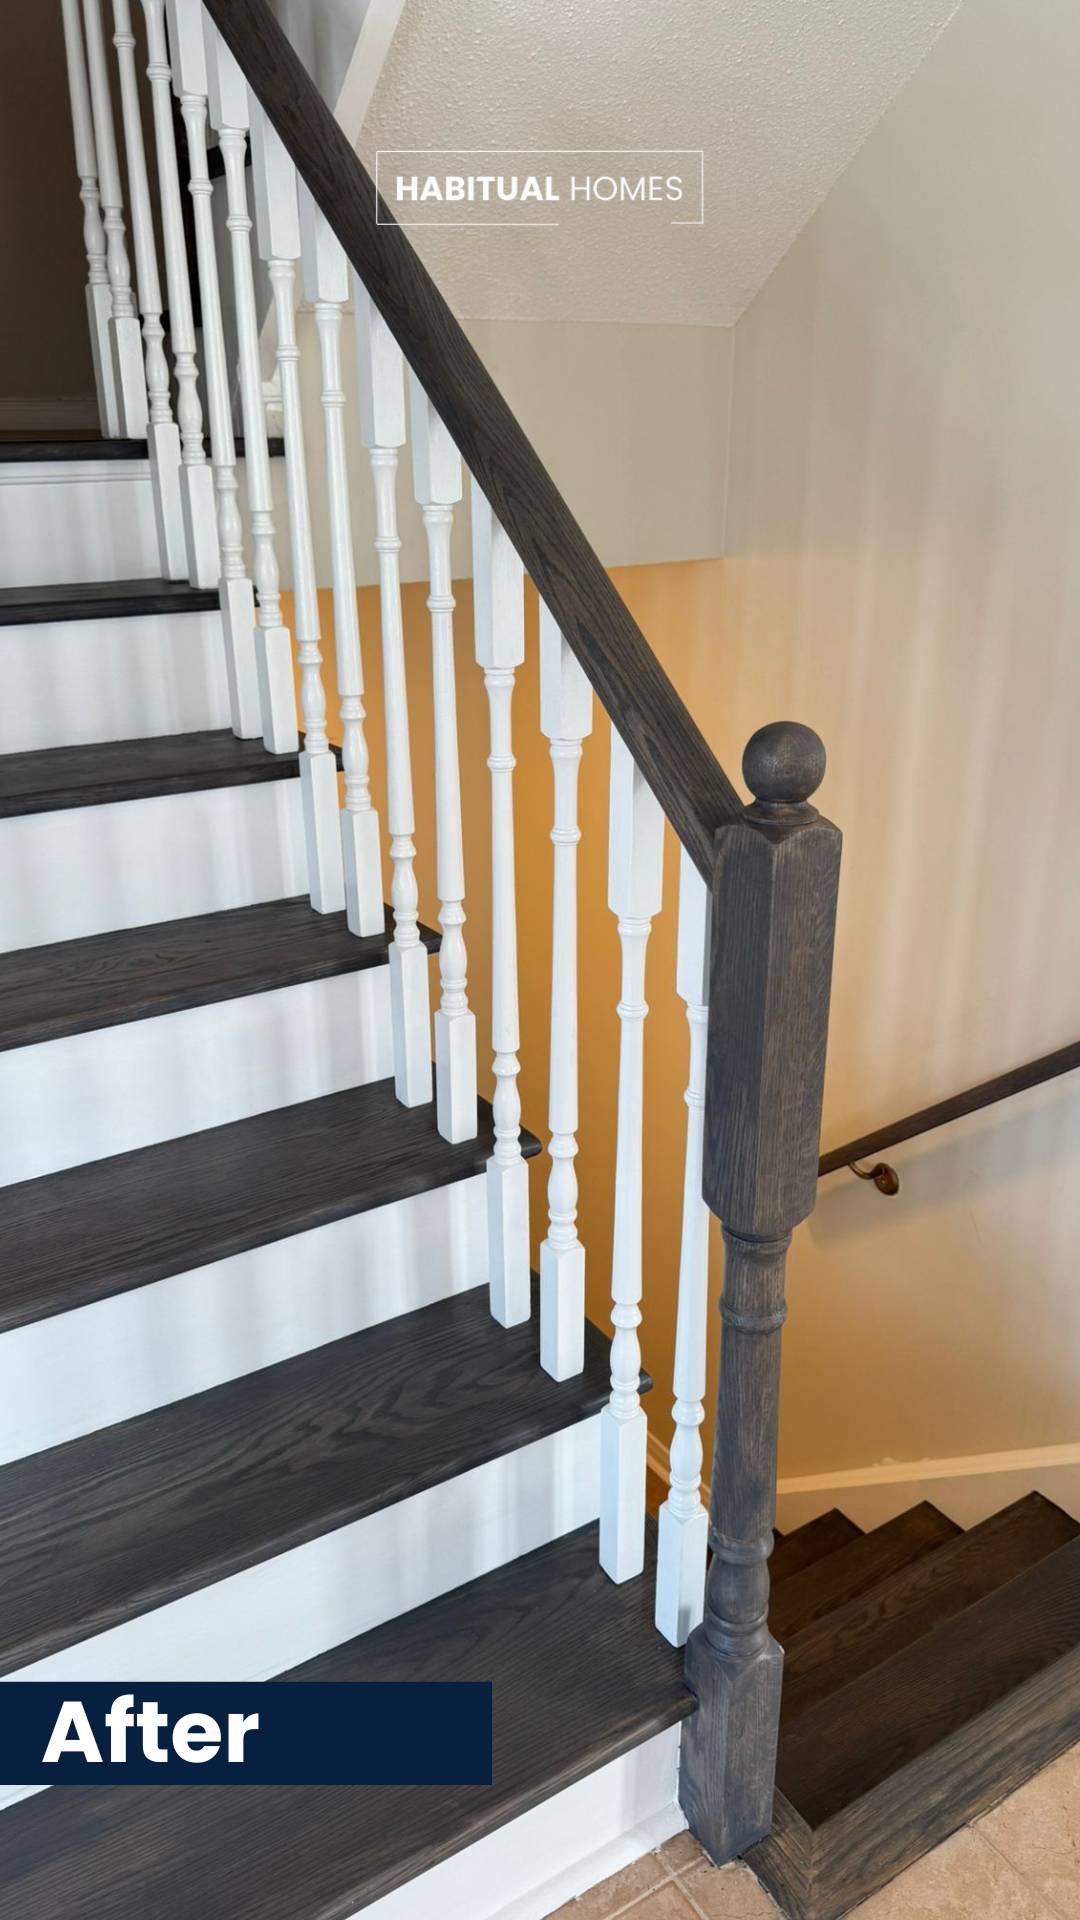
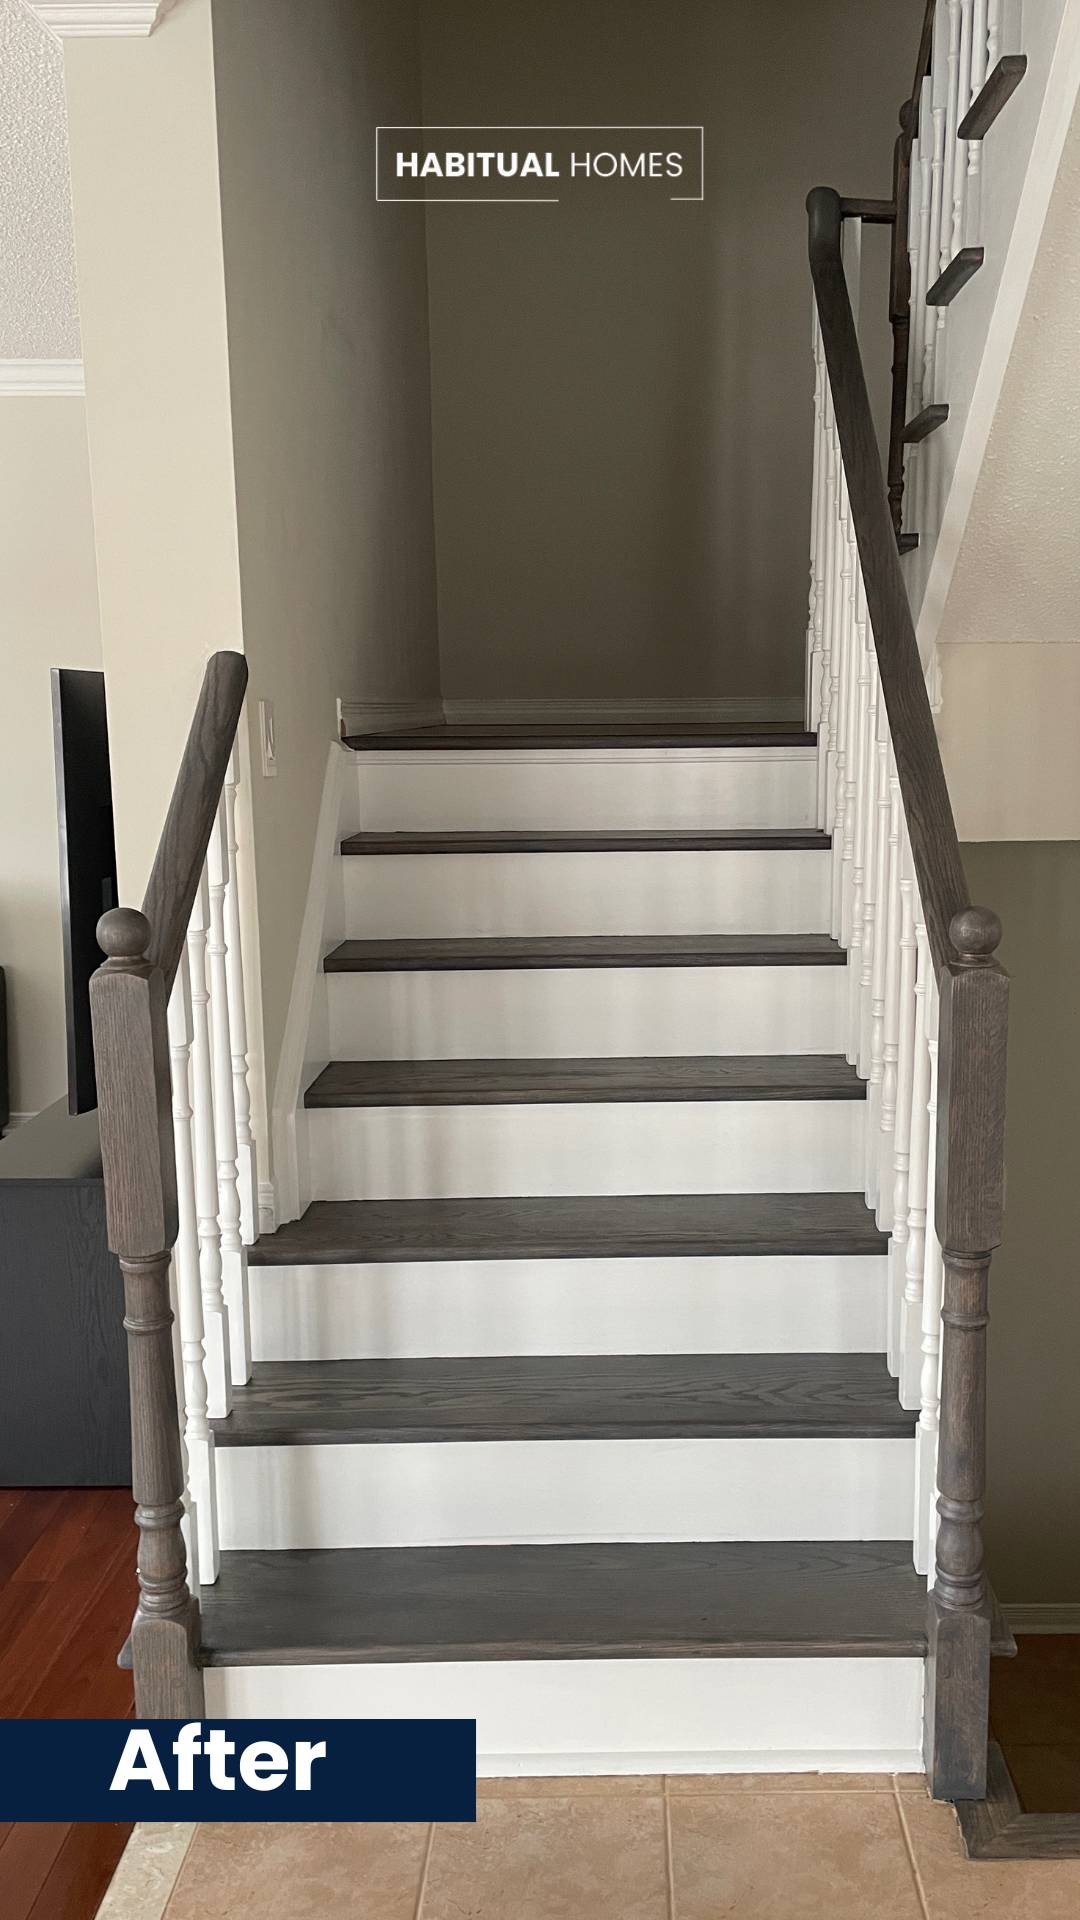
- White Risers and Spindles: To give the staircase a clean, modern look, we painted the risers, spindles, and stringers in crisp white.
- Sealing the Gaps: We applied caulking to fill all gaps for a seamless finish.
- Staining and Protecting: We applied the new stain on the steps and handrails, followed by two coats of clear protective finish to ensure durability and long-lasting beauty.
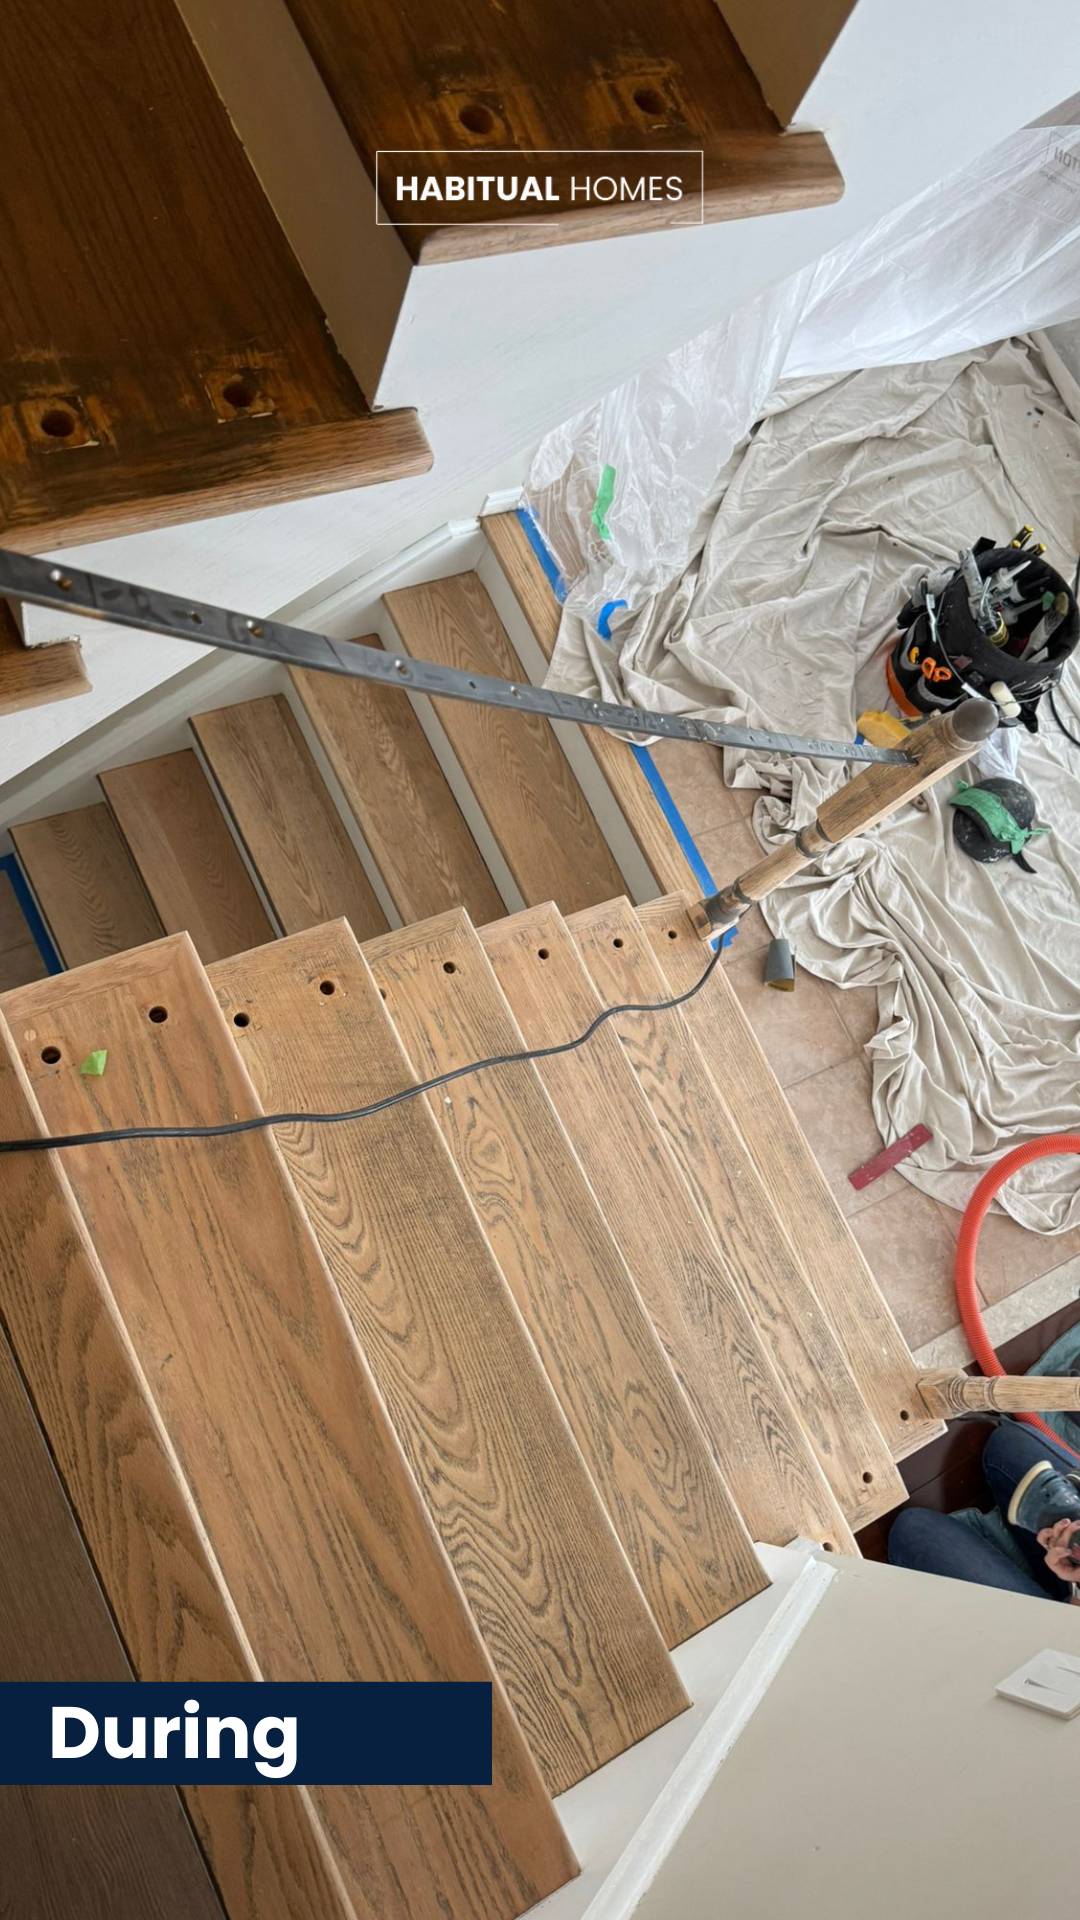
The Result
Tania was thrilled with her staircase makeover. She told us:
“I went through hell with the previous contractor, but you’ve been so professional and detail-oriented. I’m just so happy!”
She even sent us pictures afterward, saying how much she was enjoying her “new” staircase. That’s the kind of feedback we love to hear! Building lasting relationships with clients like Tania is why we do what we do.
Why Choose Habitual Homes?
At Habitual Homes, we pride ourselves on being empathetic and professional. Renovations can be overwhelming, and we’re here to make the process smooth and stress-free. From detailed work to open communication, we treat every project like it’s in our own home.
See the Transformation
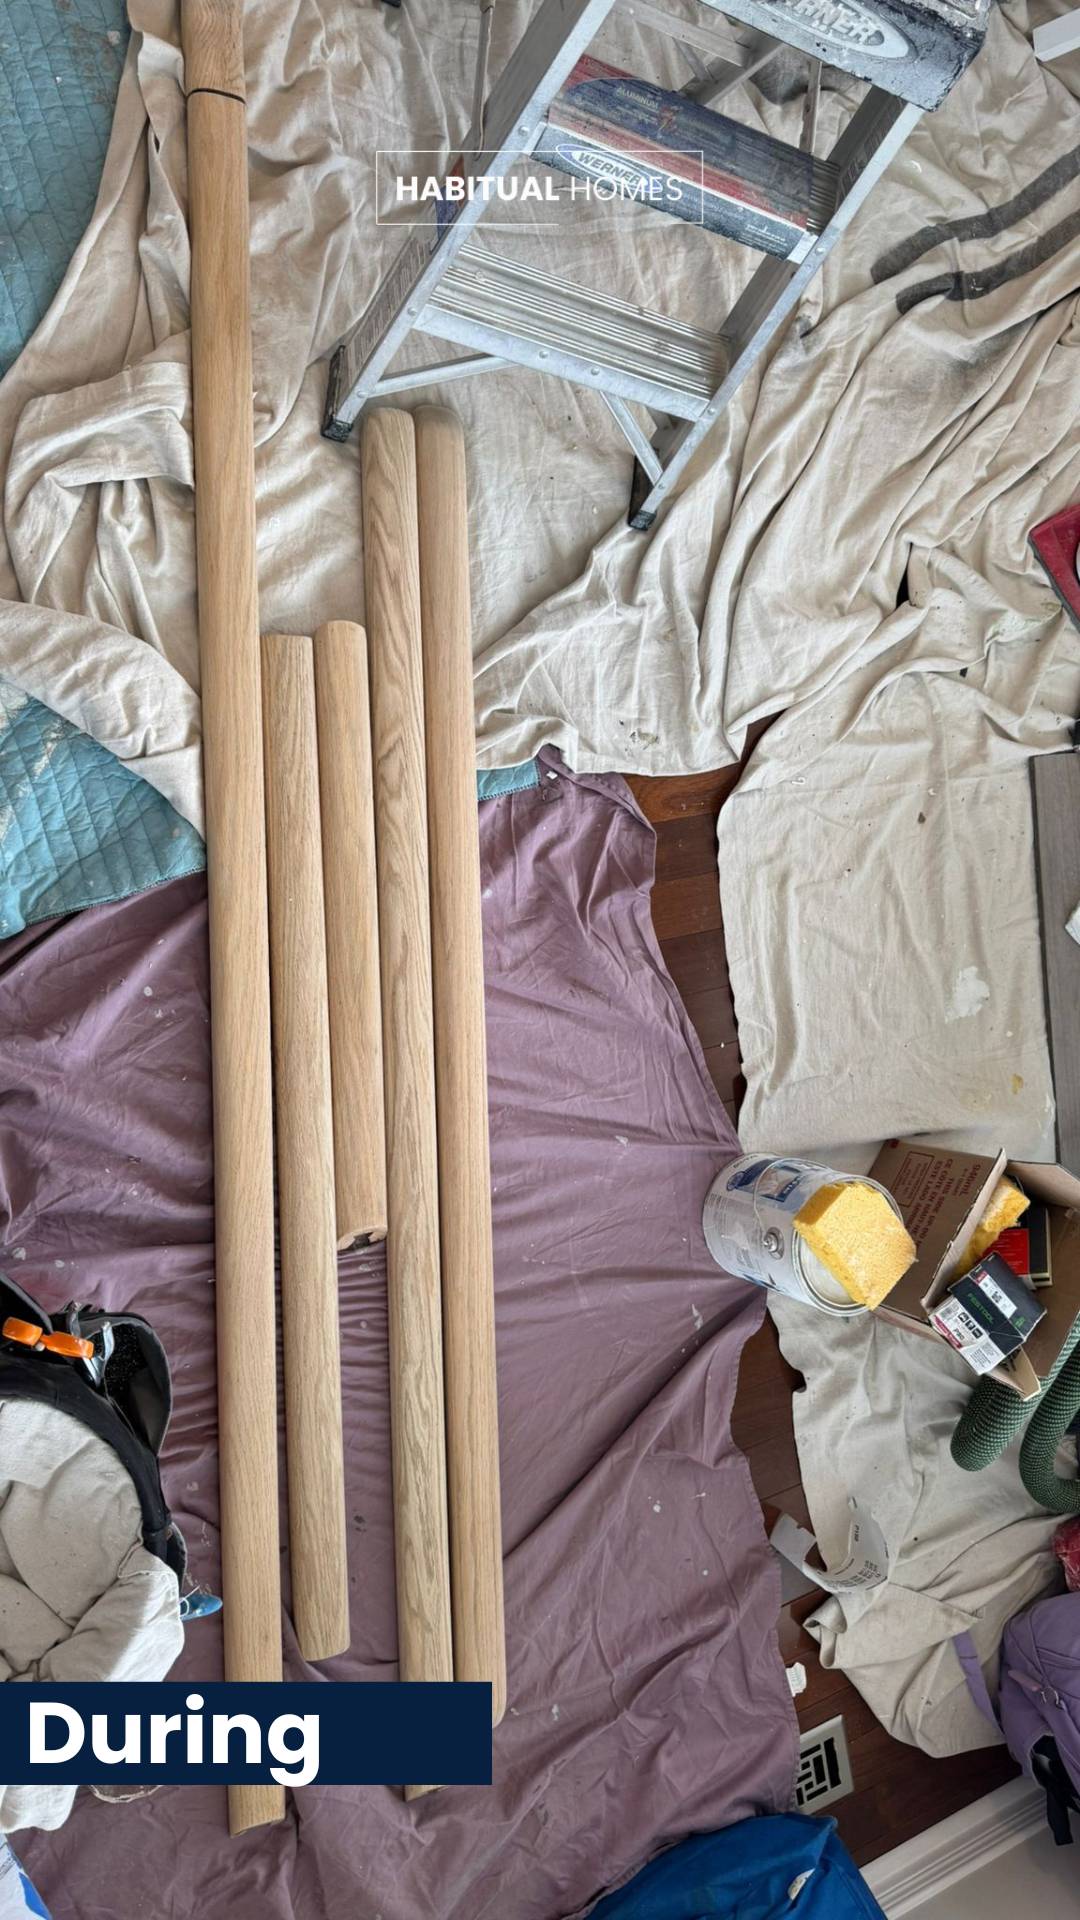
Check out the before and after photos of Tania’s staircase makeover:
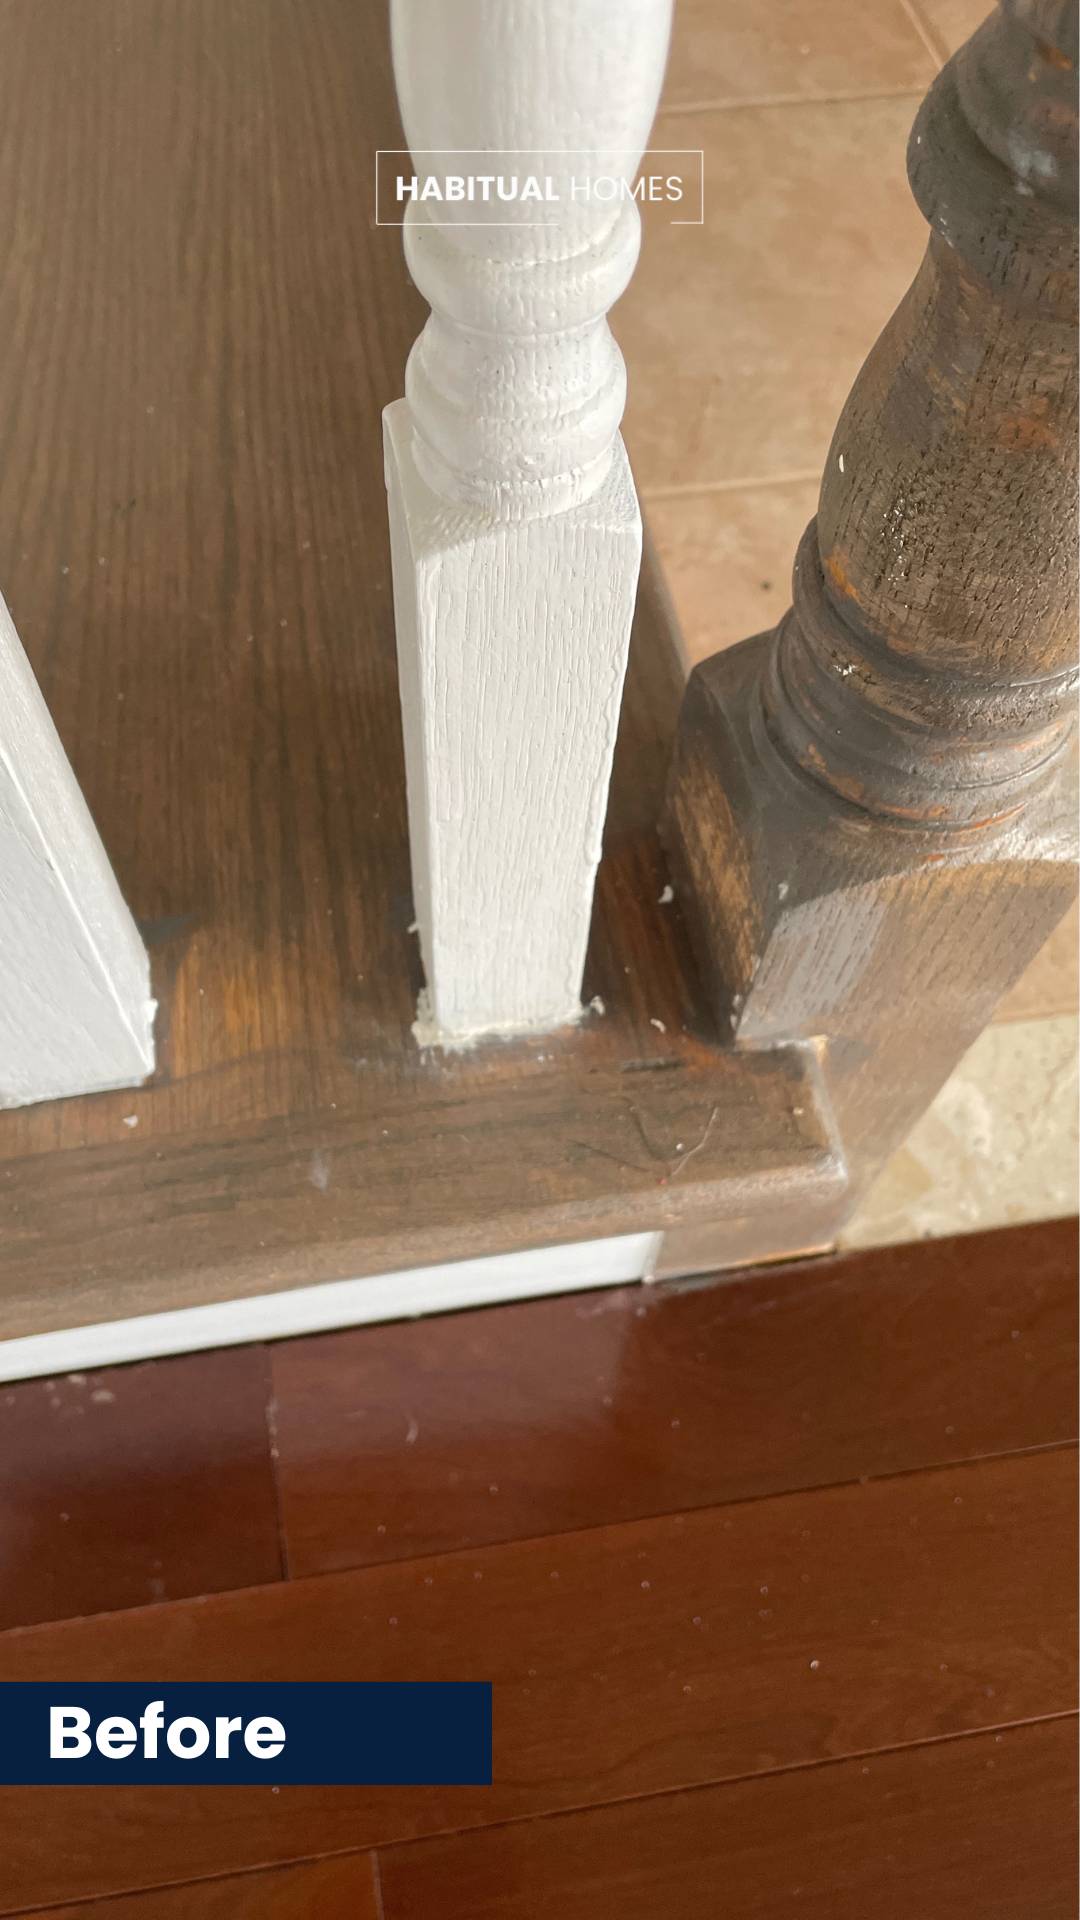
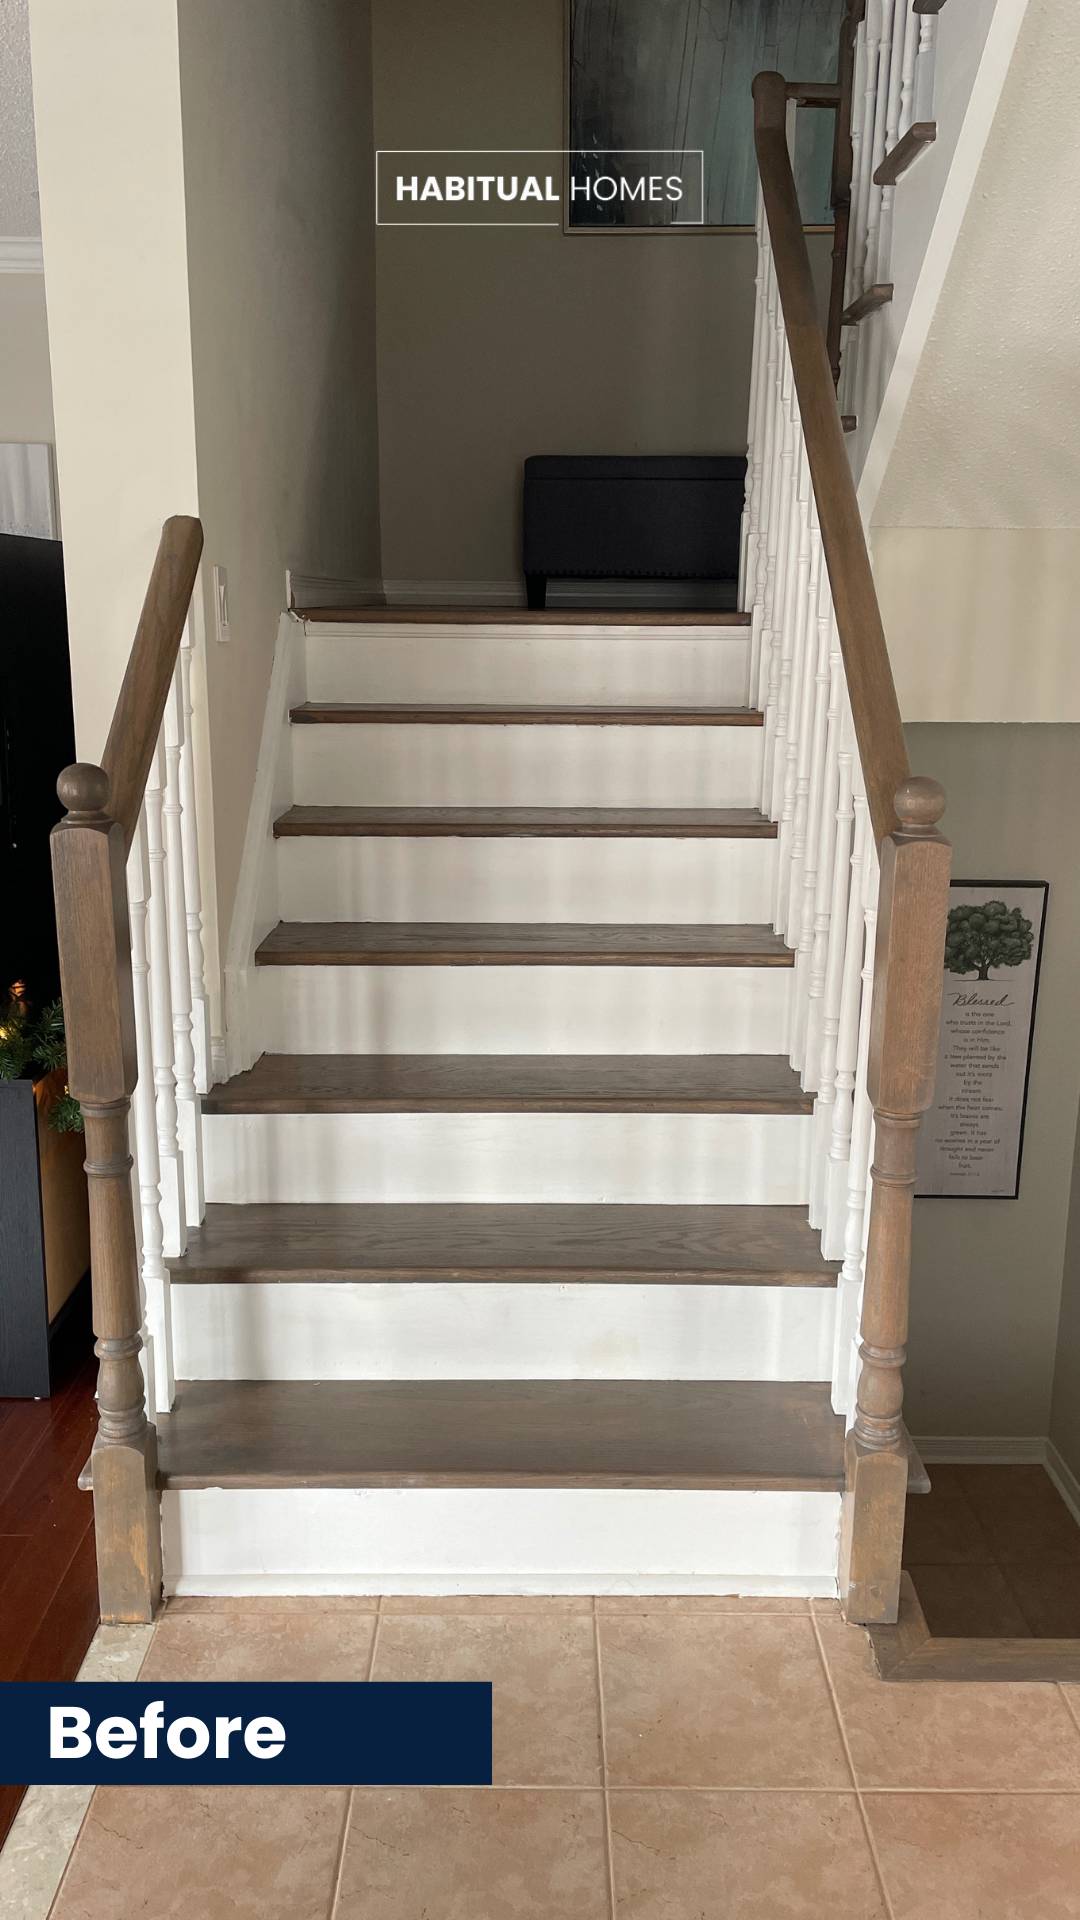
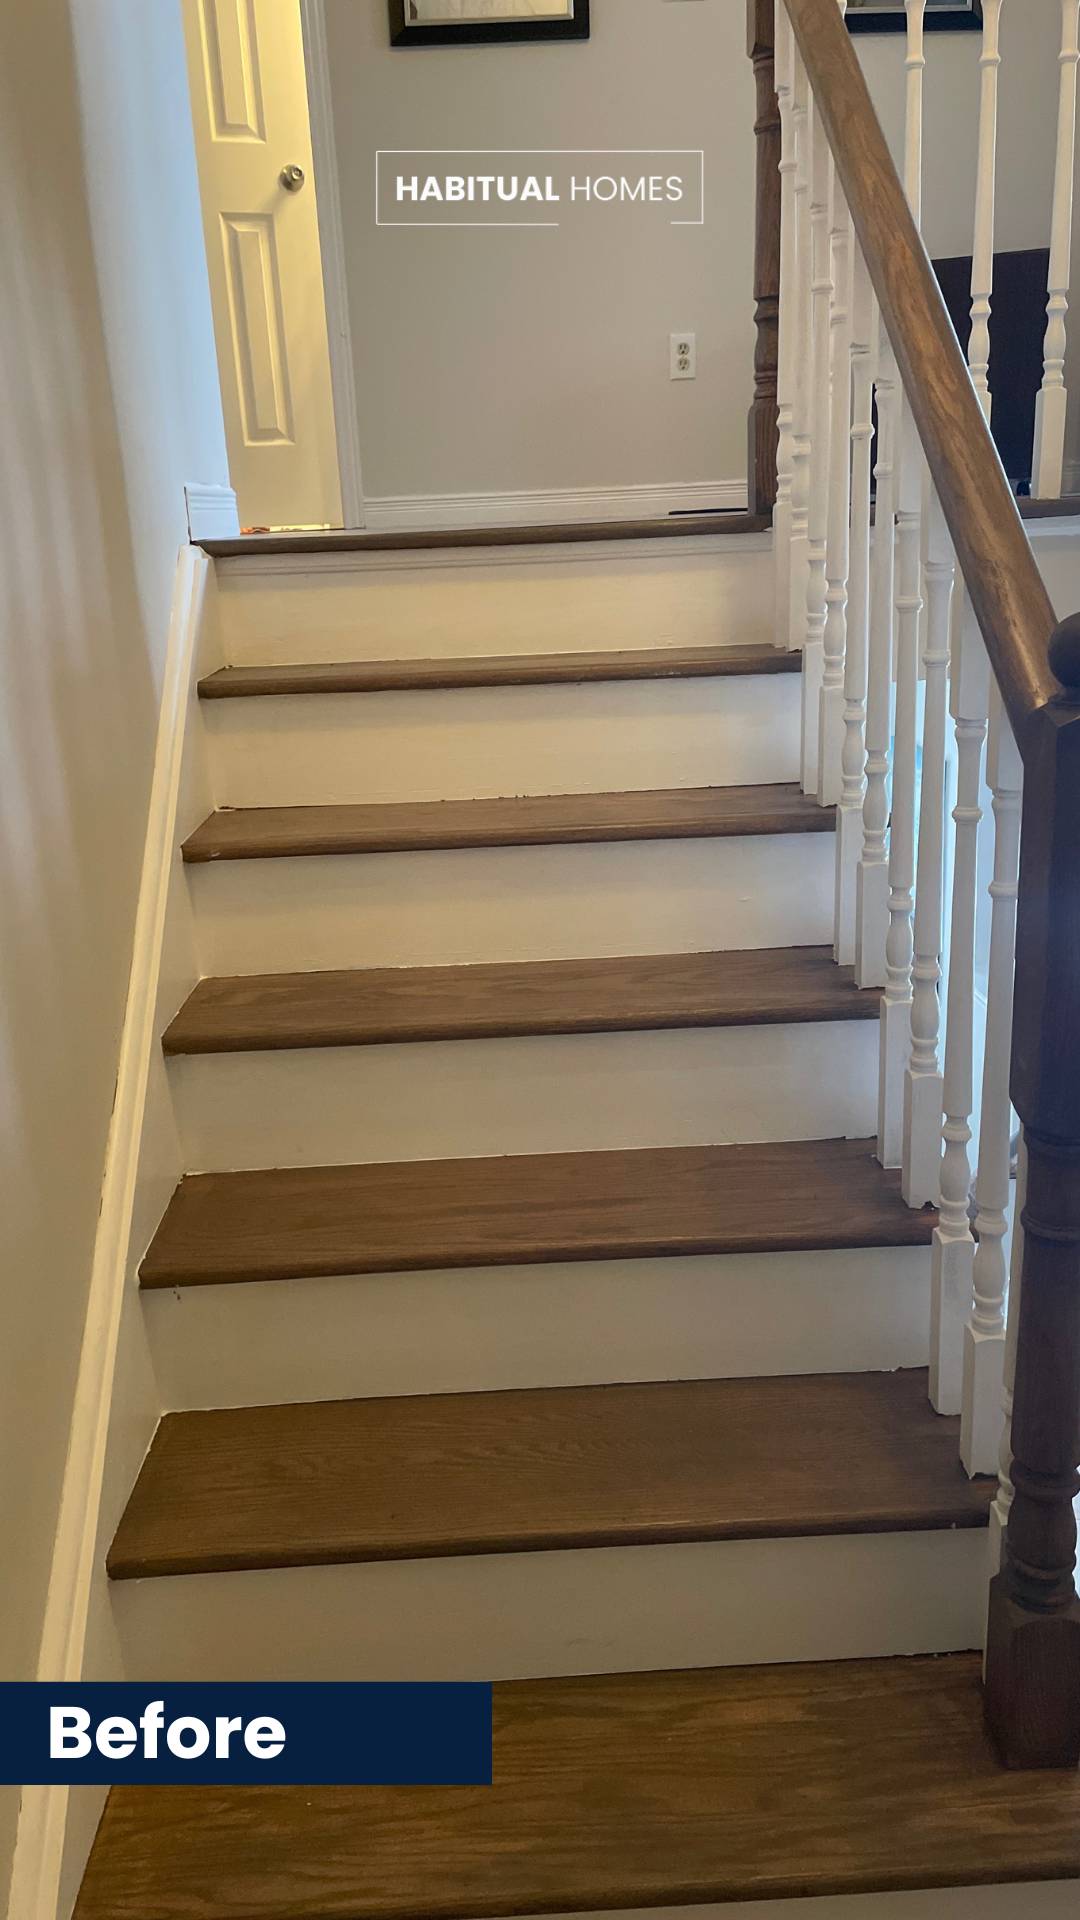
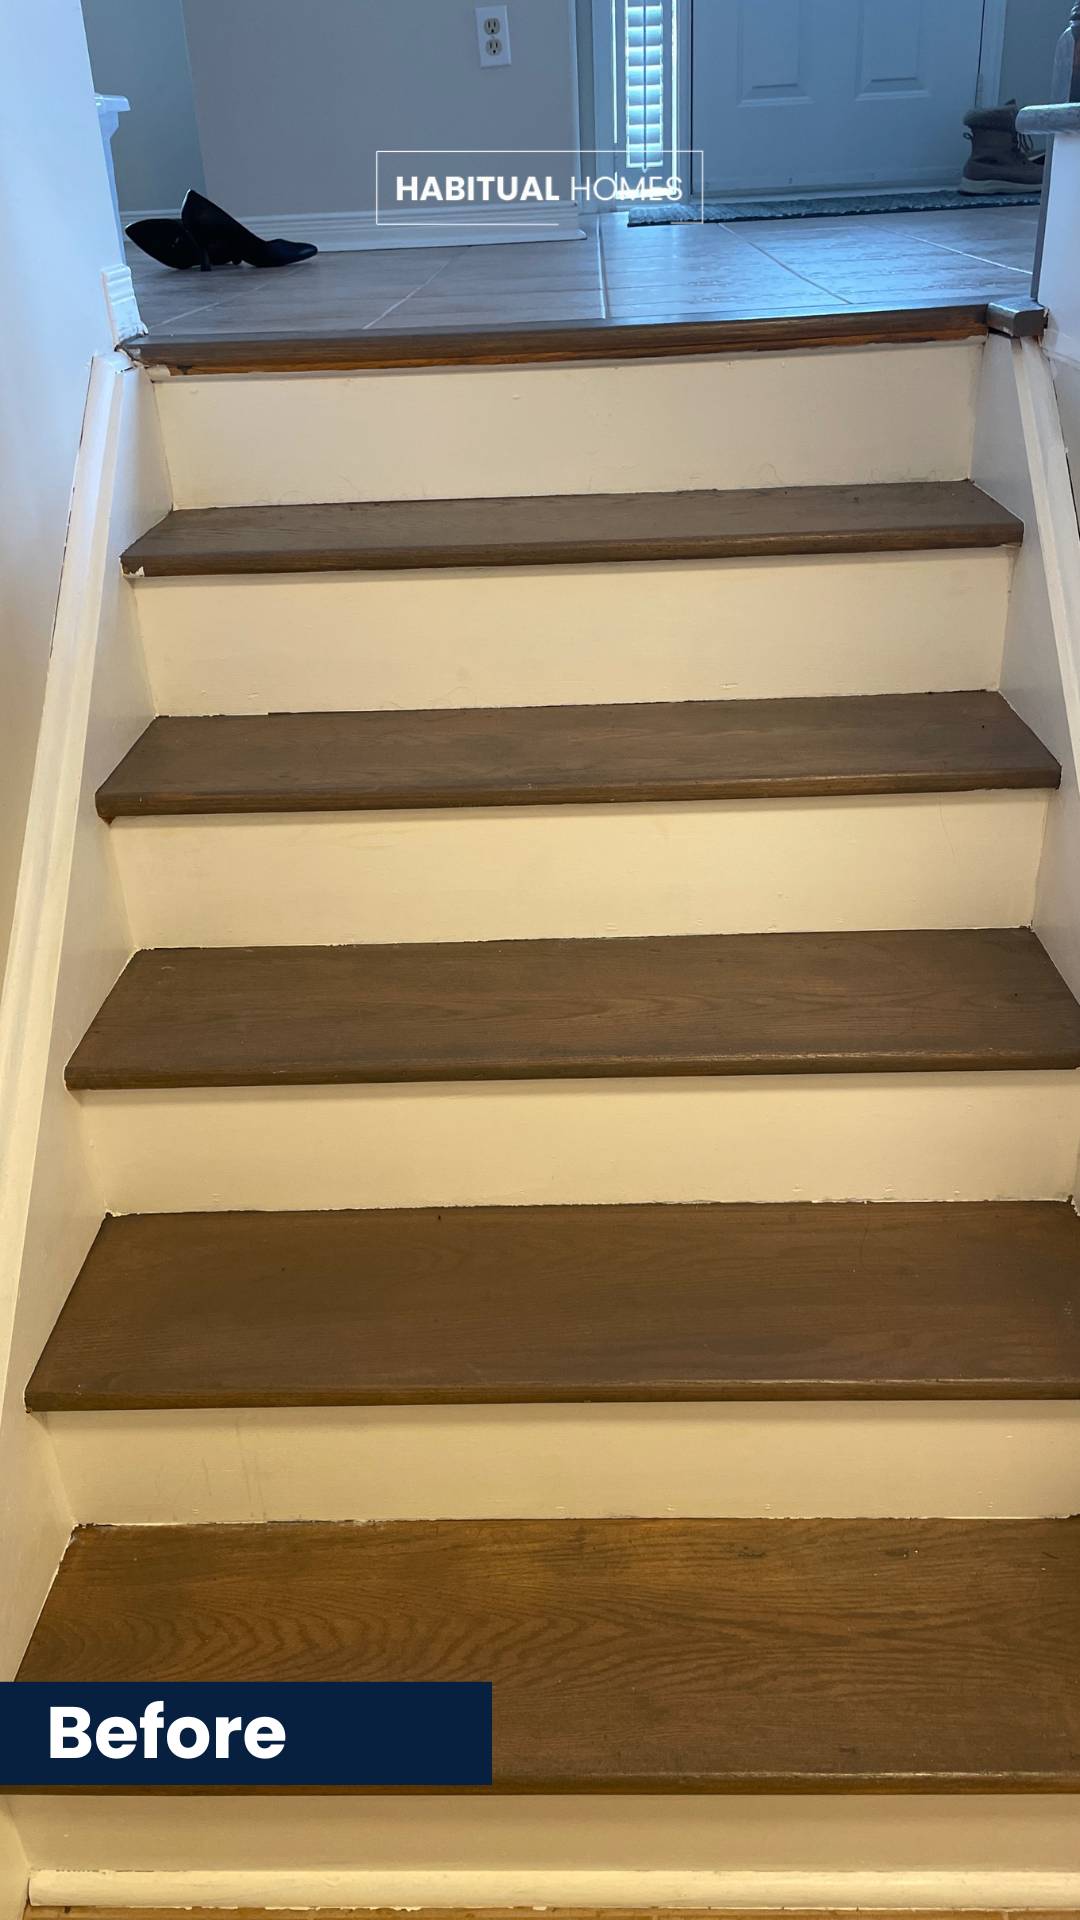

Let’s Transform Your Space
Are you facing a similar issue with a staircase or another renovation project? Don’t settle for poor results—give your home the care it deserves. Contact us today for a consultation, and let’s create something amazing together.
FAQ: All About Staircase Makeovers
1. What is the first step in a staircase makeover?
The first step in a staircase makeover is thorough prep work. This involves cleaning the surface, removing any existing stain or finish from the stair treads, and using a tack cloth to clear away dust.
2. How do you deal with old stairs that have existing stain?
When working with an old staircase, the best approach is to sand down the existing stain using fine-grit sandpaper. This ensures the new stain or white paint adheres properly.
3. What is the staining process for staircases?
The staining process starts with sanding the wood surfaces and applying a thin layer of stain using a foam brush. For a staircase makeover like this one, we often use multiple coats of gel stain for an even finish, allowing proper dry time between each coat.
4. Is it a good idea to restain wood stairs?
Absolutely! Restaining wood stairs can make a huge difference, especially if you want to enhance the wood grain or match new flooring. It’s also a great way to refresh old stairs.
5. How much work goes into a staircase makeover?
It’s a lot of work! From sanding and filling gaps with wood filler to applying stain and paint, each step requires care and precision. Small areas and tight spaces, like around the stair rail or newel post, take extra time.
6. What type of stain works best for staircase steps?
For stair treads and handrails, dark stains like General Finishes Java Gel Stain or Antique Walnut Gel Stain are popular choices. They enhance wood tones and provide a rich, dark wood finish.
7. Can I paint my staircase white?
Yes, painting your staircase white is a great idea for a modern look. For this project, we used Benjamin Moore white paint on the risers and balusters, creating a bright, clean contrast with the dark stain on the steps.
8. How do you protect the surrounding area during a staircase makeover?
We use drop cloths and painter’s tape to protect the hardwood floors, walls, and other surfaces during the process.
9. How do you fill gaps in wood stairs?
We use wood filler to fill any gaps or imperfections in the staircase steps, stair treads, and the banister. This ensures a smooth, polished finish before applying paint or stain.
10. What tools are needed for a staircase makeover?
Key tools include a putty knife for wood filler, fine-grit sandpaper for smoothing the surface, foam brushes for applying stain, and a tack cloth to remove dust.
11. How many coats of gel stain are needed?
Usually, two coats of gel stain are applied, followed by a top coat for added protection and durability. The second coat of stain enhances the richness of the wood tones.
12. How long does it take to complete the staining process?
It’s a long process, depending on the size of the staircase. Each coat requires sufficient dry time, and sanding, staining, and sealing all take much time and effort.
13. What’s the best way to match a staircase to hardwood floors?
To match a staircase to hardwood floors, select a stain color that complements the wood tones. Dark stain or antique walnut gel stain is often used for a cohesive look.
14. Should I use a satin finish or a glossy finish for my stairs?
It depends on personal preference. A satin finish provides a softer look, while a glossy finish adds a polished shine. For this project, we chose a satin finish to balance the natural light in the dining room and adjacent areas.
15. What do you recommend for first-time staircase makeovers?
For first-time projects, focus on proper prep work, such as sanding, using painter’s tape, and cleaning with a tack cloth. Start with small sections and apply a thin layer of stain to test the finish.
16. How do you ensure even coverage in tight spaces?
We use foam brushes and take it slow, working in small sections like around the newel post, white balusters, and bottom step.
17. How do you restore an old staircase in a new house?
Restoring an old staircase in a new house involves stripping the old finish, sanding, applying wood filler where needed, and staining or painting with fresh coats of stain or paint.
18. What makes a dark wood staircase stand out?
A dark wood staircase contrasts beautifully with white risers or balusters, creating a modern and timeless look. It pairs well with real wood and laminate floors alike.
19. Can natural light affect the appearance of a staircase?
Yes! Natural light highlights wood grain and makes colors like dark stain or white paint appear brighter. A well-lit staircase can transform the look of an entire space.
20. What’s the next step after applying stain?
The next step is applying a protective top coat to seal the stain. This ensures durability, especially in high-traffic areas like staircases.
FAQ: Everything You Need to Know About Staircase Makeovers
21. Can I stain bare wood on my staircase?
Yes, staining bare wood is ideal because it allows the stain to penetrate evenly and highlight the wood grain. Sanding down to bare wood using fine-grit sandpaper is an essential step to achieve a professional look.
22. How do you handle tight spaces around stair rails and balusters?
We carefully sand and stain or paint these tight spaces using small foam brushes for precision. Tack cloths are used to remove dust and ensure a smooth surface before applying the first coat.
23. What’s the difference between dark stain and light stain?
Dark stains, like General Finishes Java Gel Stain or Antique Walnut Gel Stain, create a bold, dramatic look and enhance wood tones. Light stains highlight natural grain patterns for a softer, more traditional appearance. In this project, we used a dark stain to complement the homeowner’s flooring.
24. How do you prepare an old staircase for a fresh coat of stain?
Preparation involves removing the existing stain, sanding down the surface, and cleaning with a tack cloth. Filling small gaps with wood filler ensures a smooth finish. Proper prep work is the most important step to ensure an even application.
25. What’s the best way to paint white risers?
White risers are painted with high-quality paint, such as Benjamin Moore, using a fine brush for detailed edges. Painter’s tape is used to create clean lines between the risers and the stair treads.
26. How long does it take to stain an entire staircase?
Staining an entire staircase is a long process that can take several days, especially with drying times between coats. Sanding and applying the stain in small sections is key to achieving an even finish.
27. What’s the benefit of using gel stain on staircase steps?
Gel stain, like General Finishes Java Gel Stain, is thicker than traditional stains and provides more control during application. It’s a great option for vertical surfaces like stair risers or banisters.
28. What tools are essential for staircase makeovers?
Key tools include:
- Fine-grit sandpaper for smoothing surfaces.
- Foam brushes for applying stain.
- Tack cloths for dust removal.
- Wood filler and a putty knife for filling gaps.
- Painter’s tape and drop cloths to protect surrounding areas.
29. How do you handle little spots or imperfections?
Small imperfections are filled with wood filler and carefully sanded. Little spots of uneven stain or paint are touched up with a fine brush for a flawless finish.
30. What type of top coat is best for stairs?
A satin finish top coat is commonly used for staircase steps, as it balances durability with a subtle sheen. For high-traffic areas, two coats of protective finish are recommended.
31. How do you match a staircase to the rest of the home?
Matching a staircase to the rest of the home involves coordinating the stain or paint with existing flooring and decor. For this project, we selected a dark stain to complement the gray laminate flooring on the second floor.
32. Can you work with antique wooden staircases?
Yes, antique wooden staircases can be restored by stripping old finishes, repairing any damage with wood filler, and refinishing with stain or paint. This process highlights the natural beauty of the real wood.
33. What is the best approach for tight spaces like around the newel post?
For tight spaces, we use small foam brushes or detail brushes. Working in small sections ensures precision and minimizes mistakes.
34. Is a white staircase hard to maintain?
While a white staircase looks stunning, it may require more maintenance to keep it clean. Choosing high-quality white paint with a durable finish, like Benjamin Moore, helps reduce wear and tear over time.
35. What do you do about natural light affecting the staircase’s appearance?
Natural light can enhance the staircase’s finish, especially dark wood or white paint. For areas with ample sunlight, we recommend a satin finish to prevent glare while maintaining a clean look.
36. How do you handle small areas like the bottom step or banister?
We use painter’s tape to define edges and work with small foam brushes or rags for these detailed areas. Proper care ensures that even small sections blend seamlessly with the rest of the staircase.
37. What is the first thing to consider before starting a staircase makeover?
The first thing is the homeowner’s personal preference—what they envision for their staircase. From there, we select stains or paints that complement the home’s design and meet durability needs.
38. Why does staining take so much time?
The staining process requires time because each layer (prep work, first coat, second coat, and top coat) needs adequate drying time. Rushing can lead to uneven application or finish.
39. How do you apply a fresh coat of stain evenly?
We use a foam brush or cloth to apply a fresh coat of stain in thin layers, working with the wood grain to ensure consistency. Wiping off excess stain immediately prevents blotches.
40. What makes a staircase makeover worth the effort?
A staircase makeover transforms a home’s focal point, adding value and beauty. Though it’s hard work and takes a long time, the results are always worth it at the end of the day.