When our client Ken purchased this two-bedroom condo in downtown Toronto, he had a clear vision for how he wanted to live in it.
Clean. Modern. Functional.
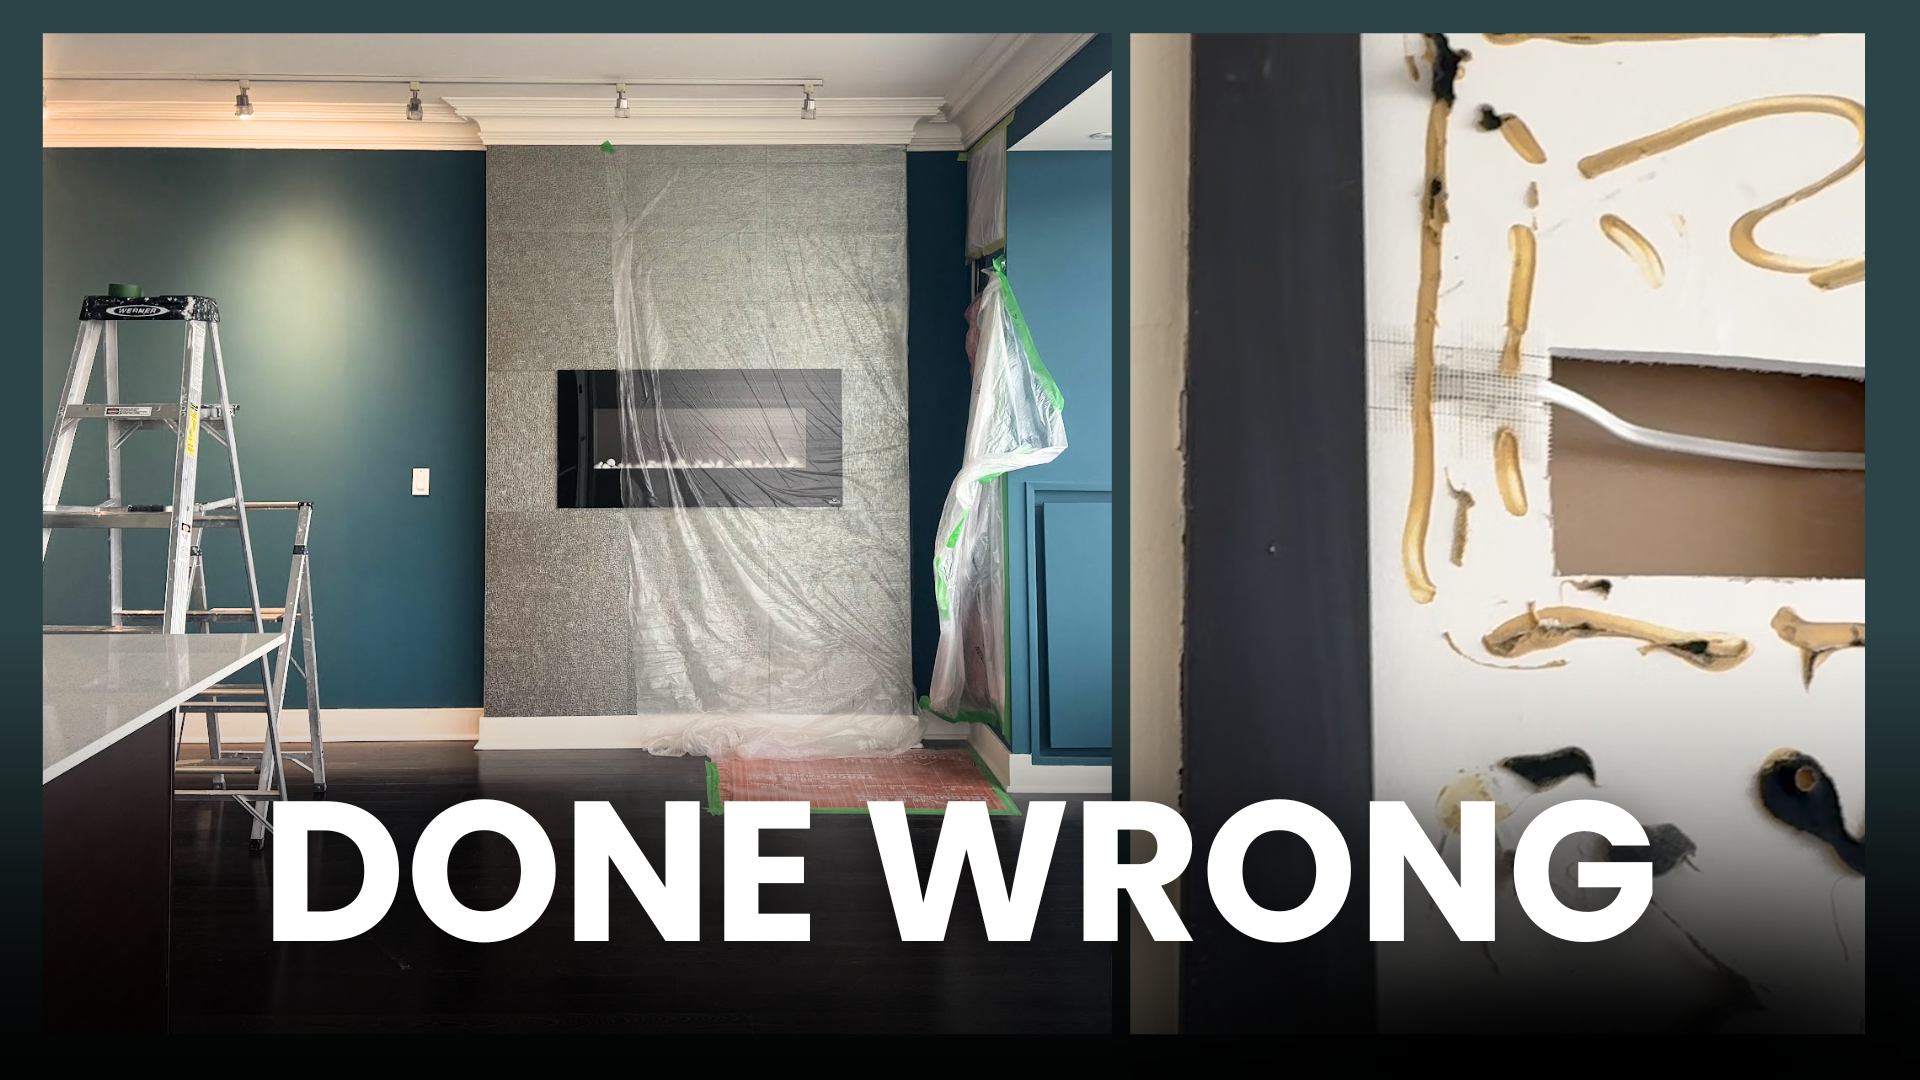
What he didn’t know was how much of the previous owner’s work he was inheriting — and how much of it had been done incorrectly.
As we started opening things up, the picture became clear. DIY electrical throughout. An oversized crown molding completely out of place in a modern space. A decorative electric fireplace dominating the best wall in the living room. And a bedroom with a DIY headboard feature, sconces positioned too high, and wiring that wasn’t done properly.
Almost every room had something that needed to be corrected before we could start building what Ken actually wanted.
This is the full story of how we transformed it — and what we learned along the way.
THE DESIGN PHASE — BEFORE ANYTHING WAS TOUCHED
The first thing we did was listen.
Ken knew what he wanted but needed help translating it into a buildable plan. We worked with him through the full design phase — 2D drawings, 3D models, and moodboards — before a single thing was removed or installed.
By the time construction started, every decision was already made. Material selections, color palette, layout changes, electrical relocations — all confirmed in advance.
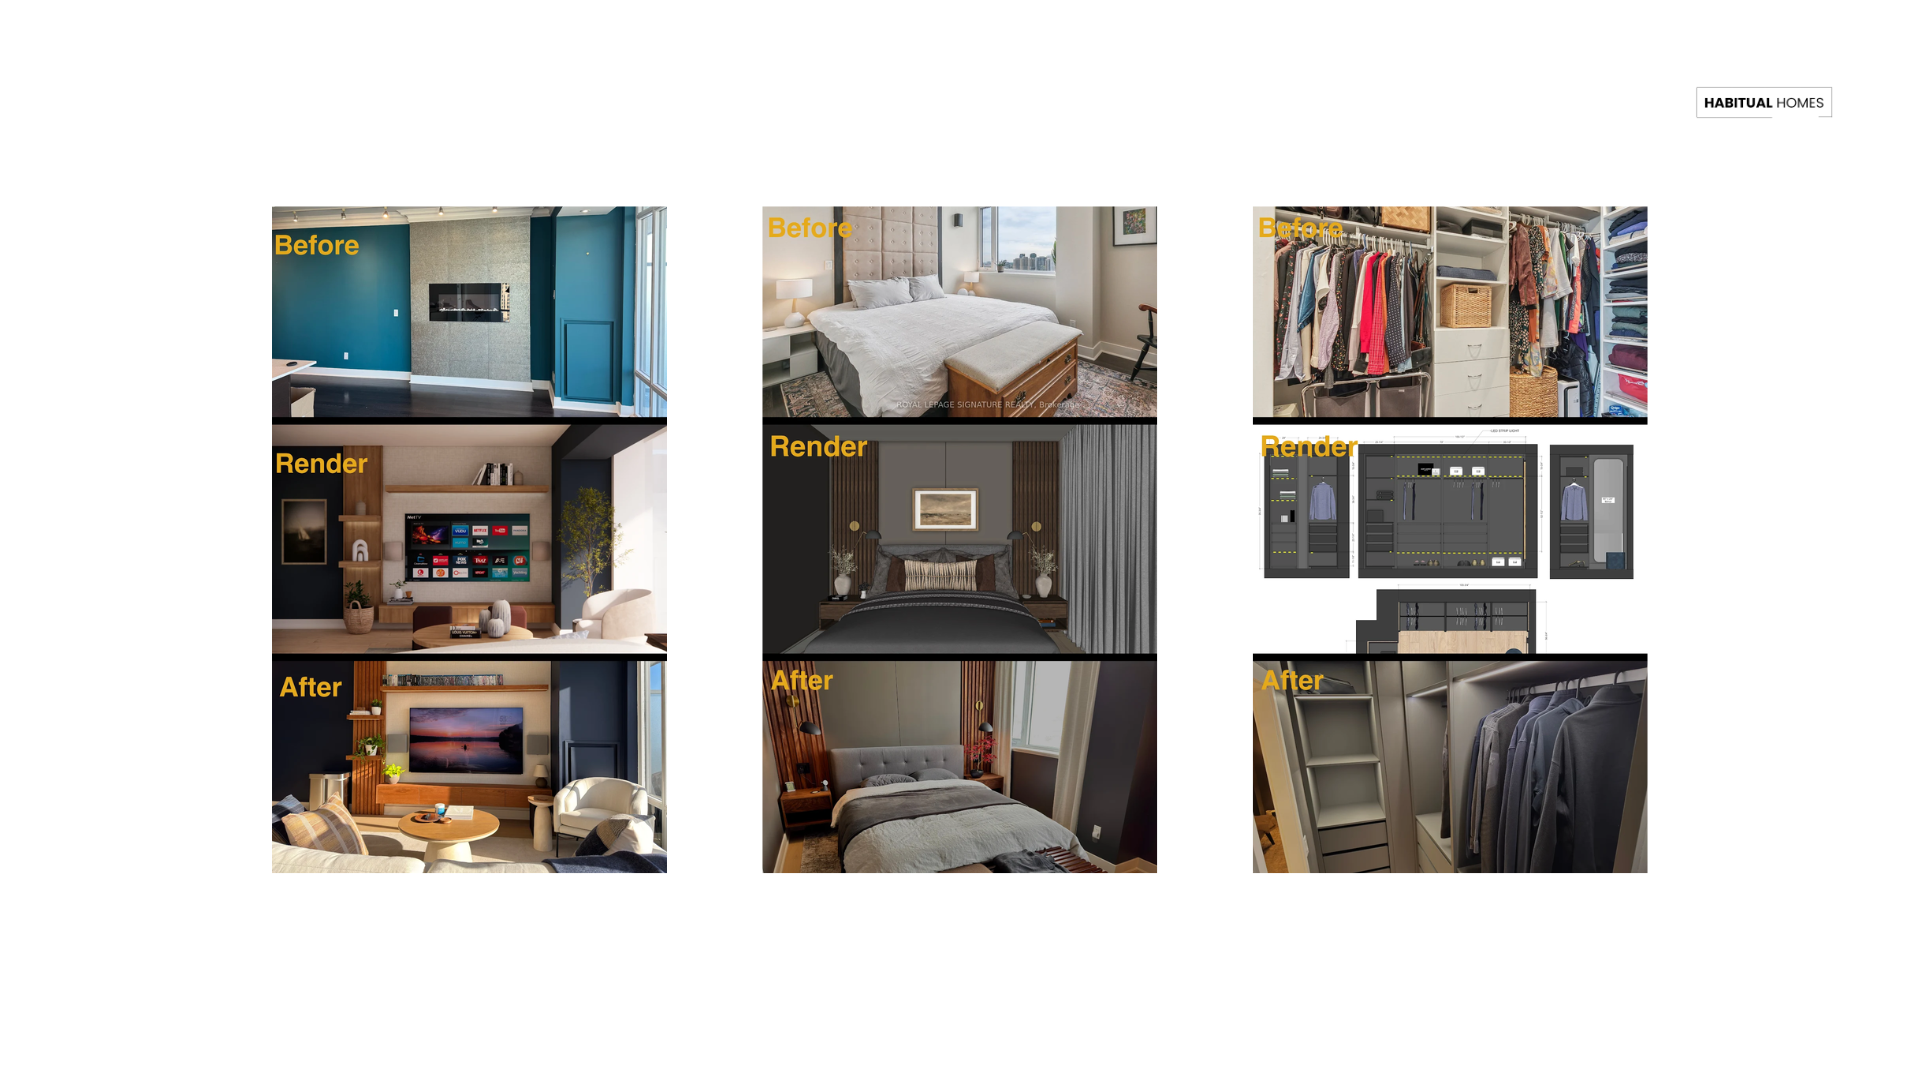
That’s how we avoid surprises mid-build. And that’s how the finished result ends up matching the render almost exactly.
THE FIREPLACE — THE BIGGEST PROBLEM IN THE LIVING ROOM
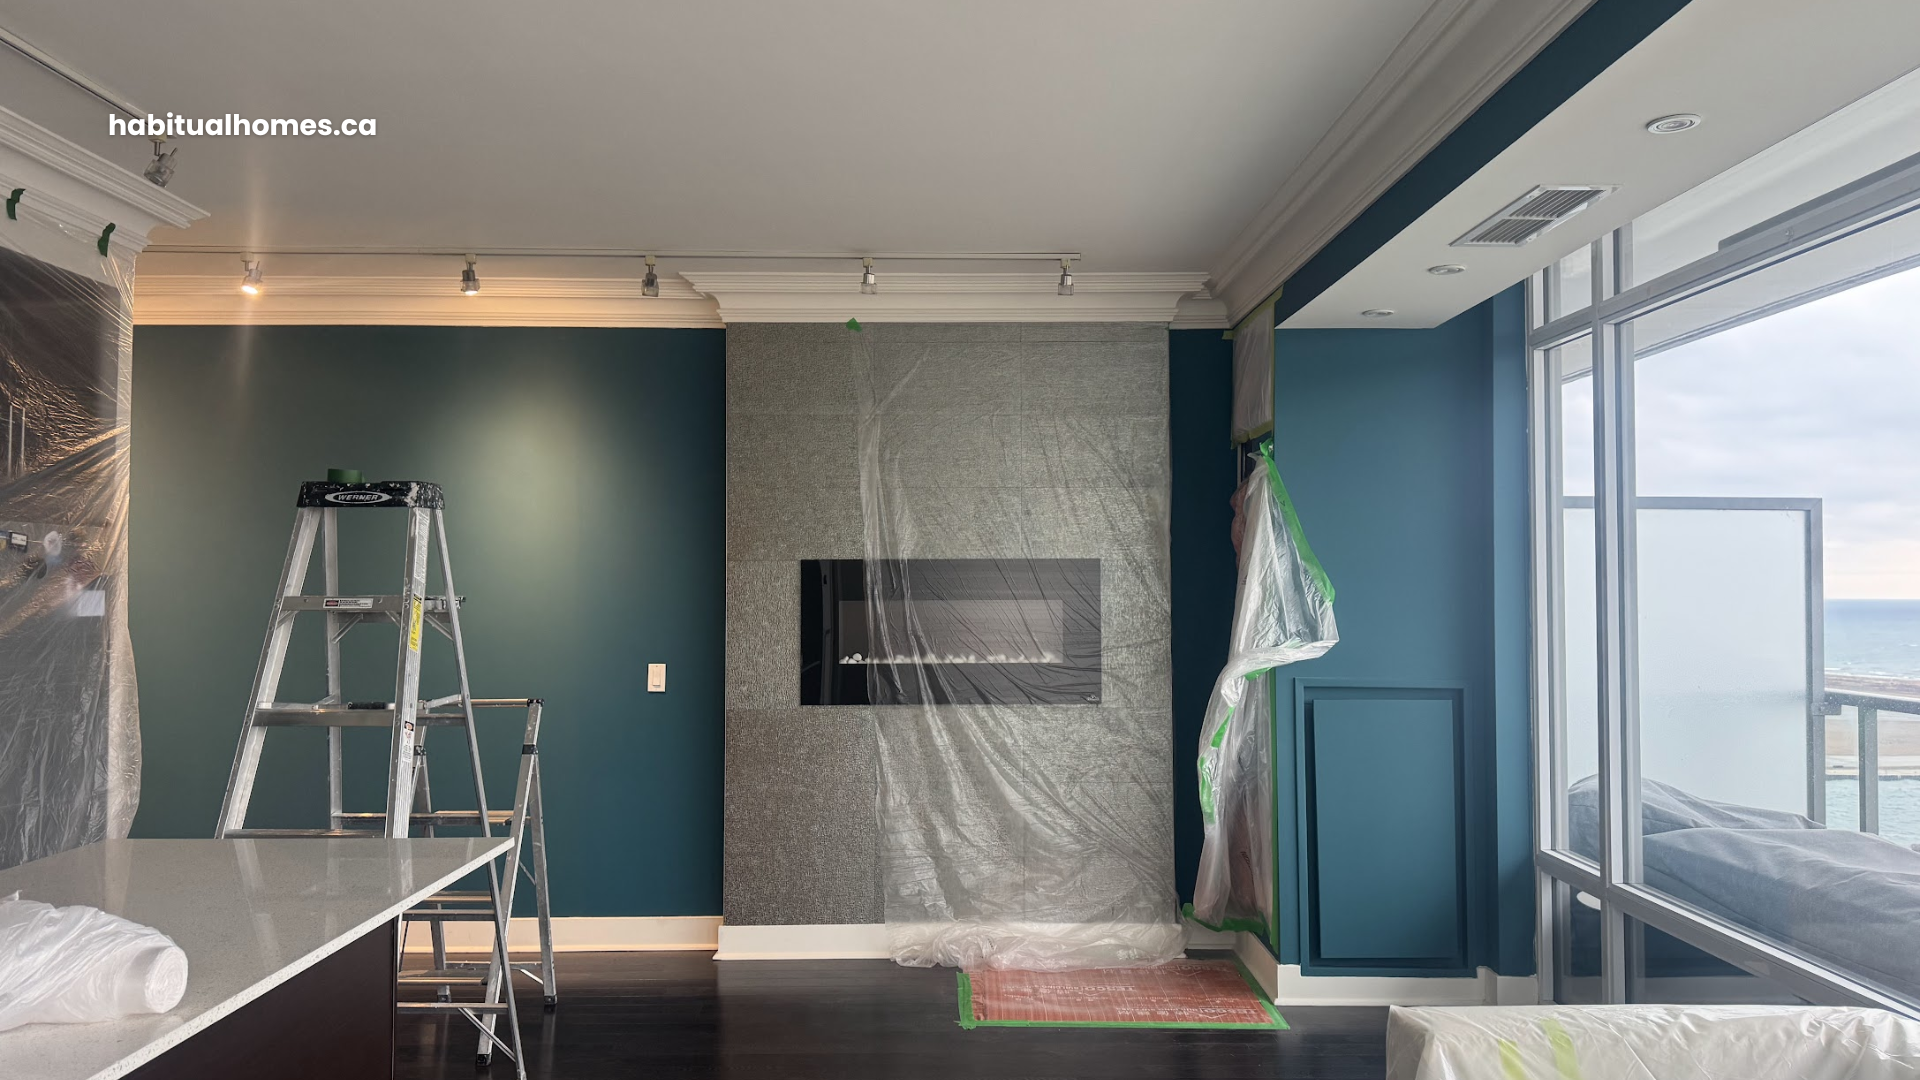
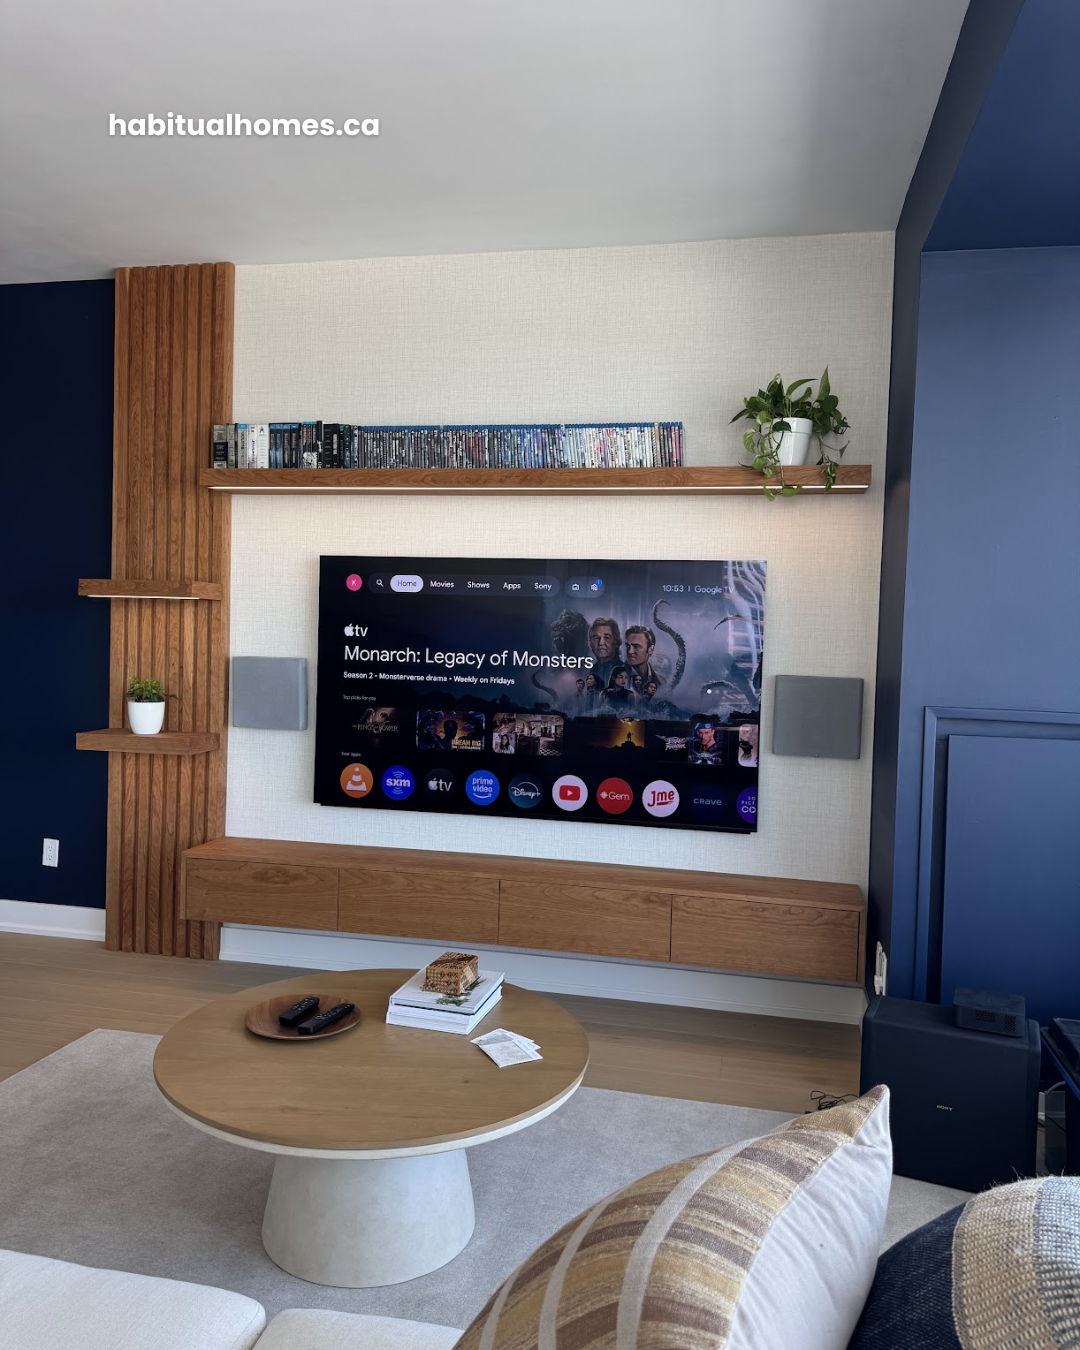
The electric fireplace was decorative. It didn’t heat the space in any meaningful way. But it was sitting in the middle of the main wall and making it nearly impossible for Ken to set up his living room properly.
We removed it completely.
In its place we built a new wall, ran all wiring through it with a licensed electrician, and designed a full custom media wall. Recessed TV cavity with a concealed mount. Built-in speakers with all cabling hidden behind the wall. Floating custom console cabinetry. LED strip lighting on the floating shelves. Solid cherry wood slats as the feature material.
Nothing visible. Everything intentional.
We also removed the oversized crown molding throughout the space — it was fighting the clean modern lines Ken wanted — and repaired and painted smooth ceilings throughout.
THE COLOR PALETTE — CONTRAST AS A DESIGN DECISION
Ken was looking for contrast between the living space and the bedroom. Light and open in one. Warm and intimate in the other.
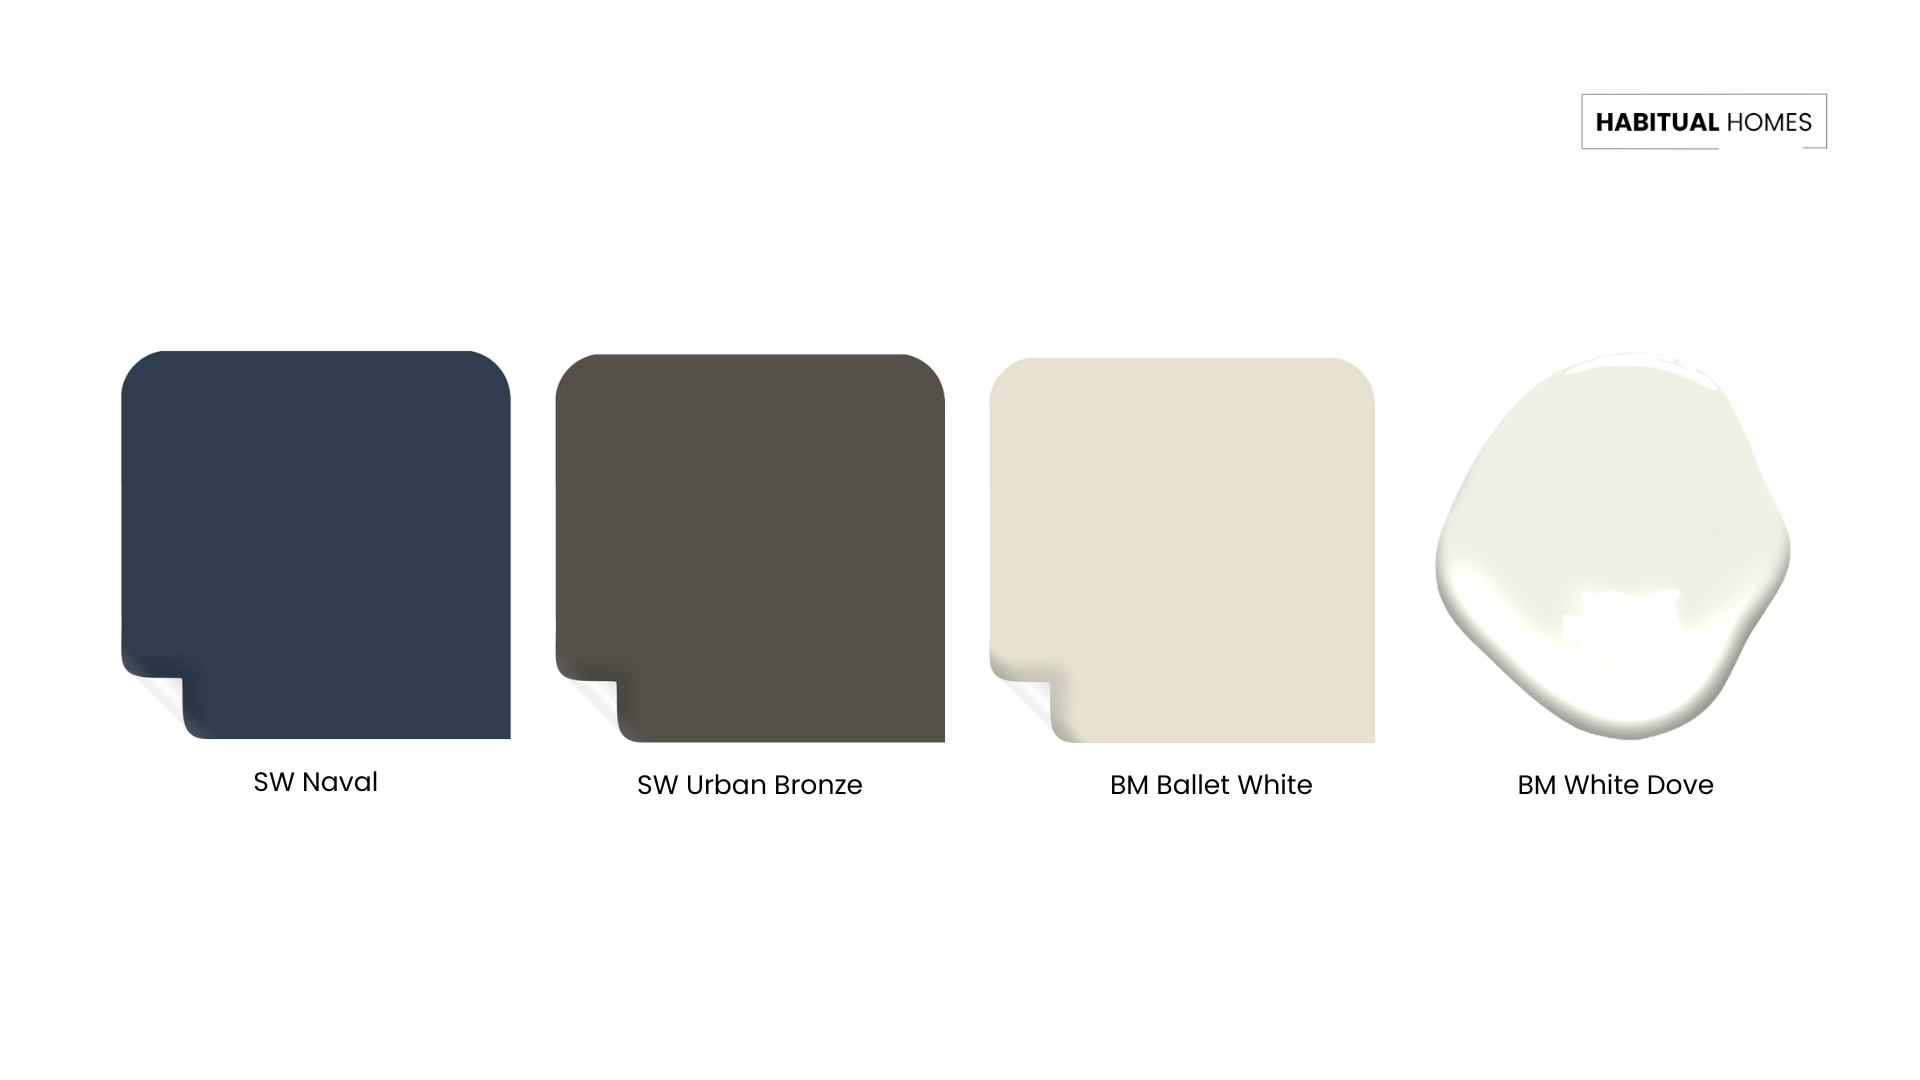
For the living room we used Sherwin-Williams Naval — a deep navy — paired with Benjamin Moore Ballet White on the walls and Benjamin Moore White Dove on all trims and doors. The combination gives the space depth without feeling heavy.
For the bedroom we used Sherwin-Williams Urban Bronze — a warm, dark tone that creates exactly the cozy atmosphere Ken was after.
Two very different moods. One cohesive project.
THE BEDROOM — REMOVING EVERYTHING THE PREVIOUS OWNER BUILT
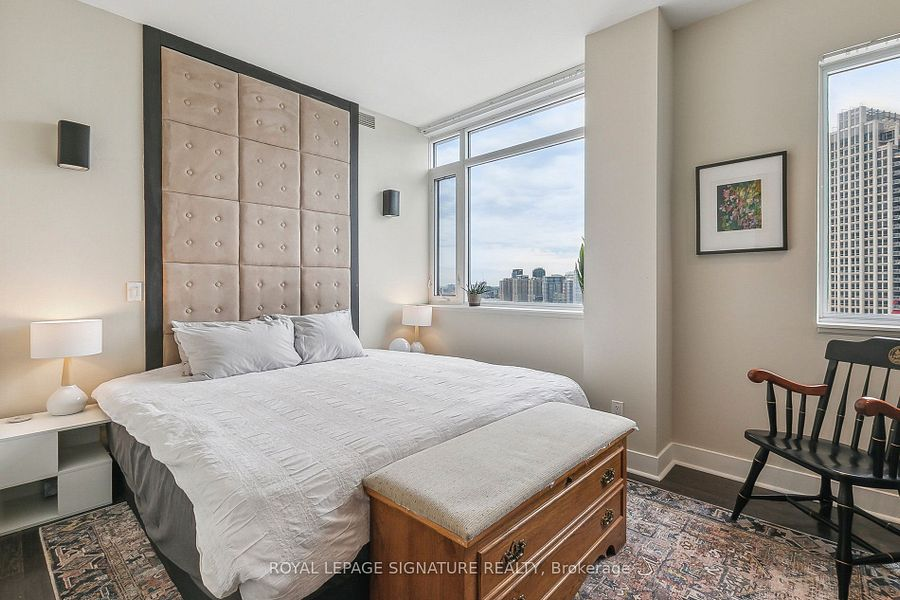
The main bedroom had a DIY headboard feature the previous owner had installed — sconces positioned too high, wiring done incorrectly, and details that weren’t working with the space.
We removed all of it.
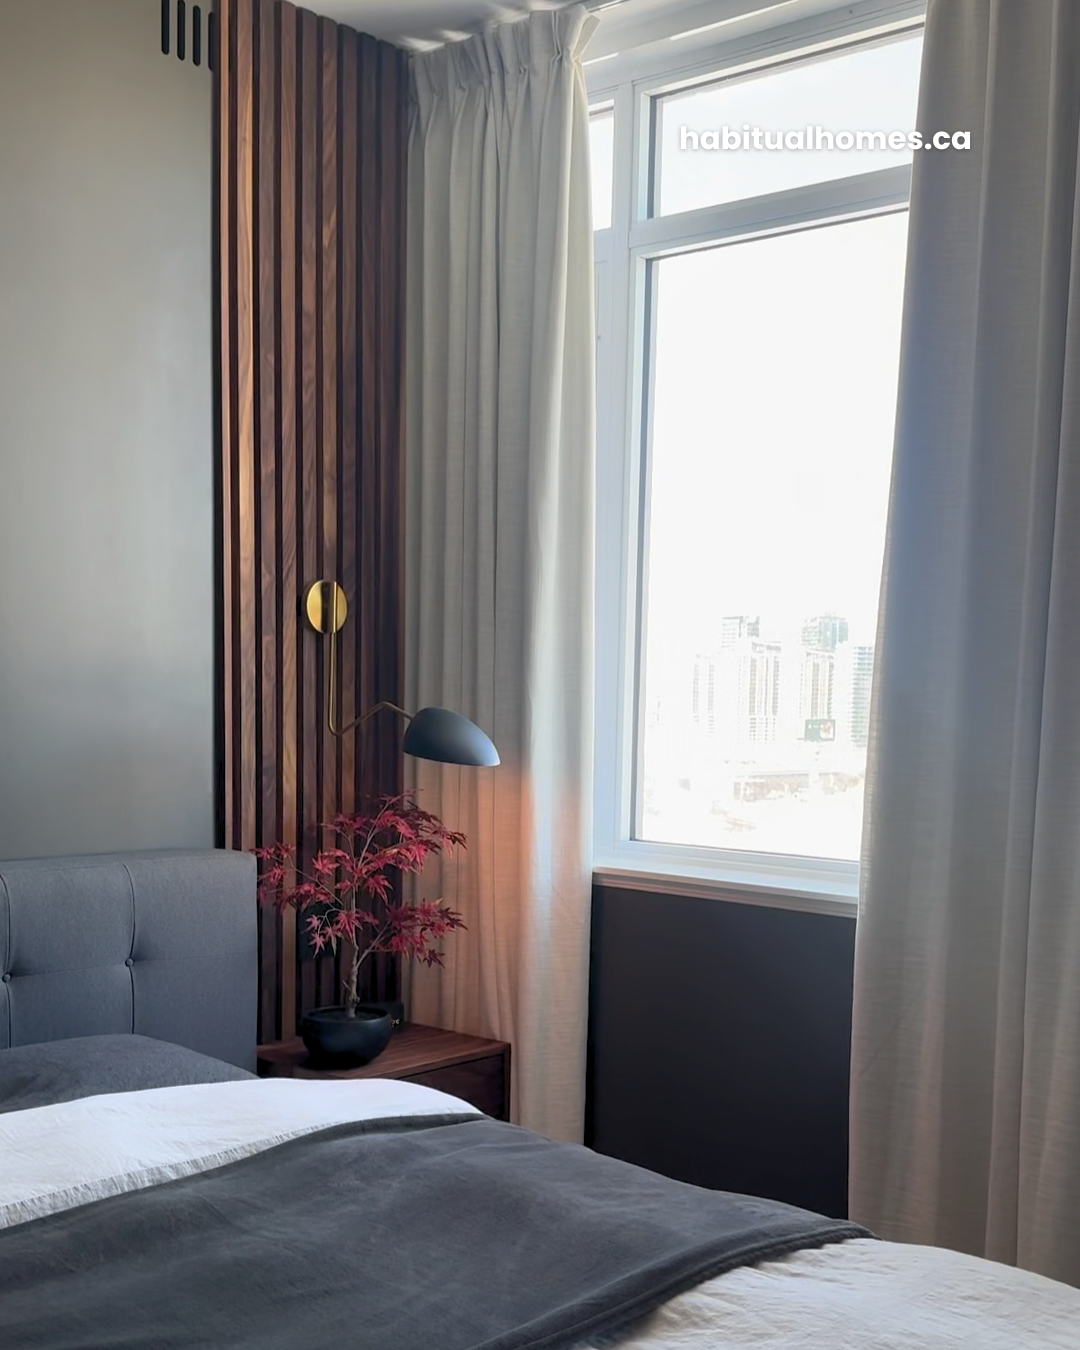
In its place we designed a new feature wall with solid walnut slats — a warmer, darker wood chosen specifically for the intimate mood of the bedroom. Different from the cherry we used in the media wall. Same natural material language, different feeling.
Floating built-in nightstands on both sides. Properly positioned sconces. All electrical relocated and corrected by a licensed electrician.
We also helped Ken choose and install the Roman shades and curtains — and removed a built-in closet inside the bedroom that was blocking the window and taking floor space unnecessarily.
THE WALK-IN CLOSET — CUSTOM FROM SCRATCH
The existing closet system was already falling apart when Ken moved in. We removed it entirely and built a full custom closet — integrated LED lighting, large drawers, hanging space, and wall color matched to the cabinetry so the whole room reads as one designed element.
THE FLOORING — WHY WE INSTALLED IT LAST
The existing laminate was dark and dated. It made the whole space feel heavy. We replaced it with a light oak engineered hardwood throughout — the living area, both bedrooms, and the hallway.
One decision worth explaining: we installed the flooring at the very end of the project, not at the beginning.
Some contractors install the floor first and cover it during construction. We prefer to complete all the work first and install the floor last — so there’s no risk of damage from tools, trades, or material movement during the renovation. It takes more coordination but the floor arrives to the client in perfect condition.
THE RESULT — RENDER TO REALITY
The full installation took five weeks.
Ken shared his own before and after photos in his Google review — including the 3D render we made during the design phase next to the finished room. His words: the final results look like they came straight out of the render.
That’s the standard we work to on every project. Not because we want to impress — but because doing the design work properly before construction starts is the only way to guarantee the result matches the vision.
WHAT’S NEXT FOR THIS PROJECT
The second bedroom — Ken’s home office — was painted as part of this phase. The built-in desk design is complete and installation is coming soon.
The kitchen and bathrooms are planned for a future phase. We’re also finishing the design for the laundry closet.
This project is ongoing. We’ll share each phase as it’s completed.
ABOUT HABITUAL HOMES
We’re Sandra and Johanna, the team behind Habitual Homes. We graduated as architects in Venezuela and have 10 years of construction experience across Venezuela, Chile, and Toronto. We help homeowners design and build spaces that work — with full design development before construction starts, so there are no surprises once the work begins.
If you’re planning a condo renovation in Toronto and want to understand what’s possible before committing to construction, reach out at habitualhomes.ca.
RELATED ARTICLES
Which Way Should Your Kitchen Island Face?
Before You Renovate Your Kitchen, Check Your Fridge Placement
Buying an Old House in Toronto — Here’s What We Learned From Our Full Gut Renovation
LET’S START A CONVERSATION
To get started, fill out the form below.
If you prefer, you can also email us directly at info@habitualhomes.ca.