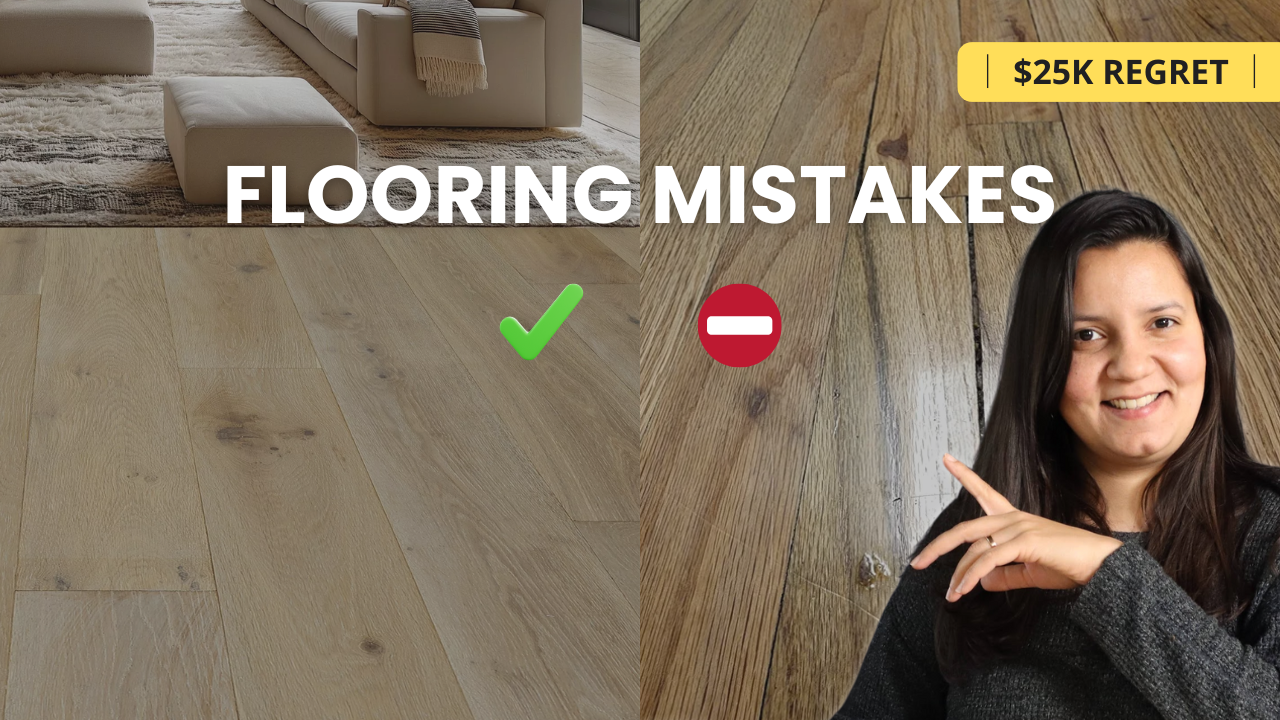
Quick takeaway: Choosing flooring for a custom home in Toronto requires balancing climate challenges, lifestyle needs, and visual flow. This guide breaks down the 3 biggest mistakes homeowners make, room-by-room recommendations, and real costs so you can make confident decisions.
The $25,000 Flooring Mistake
Here’s a sobering statistic: 9% of homeowners regret their flooring choice. That’s nearly 1 in 10 people who spend thousands of dollars on flooring, only to wish they’d chosen differently.
And here’s the thing—fixing flooring mistakes isn’t cheap. Depending on the scope of the problem, you could be looking at $15,000 to $25,000 or more to tear out and replace flooring throughout your home.
The good news? These mistakes are completely avoidable when you understand Toronto’s unique climate challenges and plan for your actual lifestyle—not just what looks good on Pinterest.
I’m Sandra from Habitual Homes, and after 10 years of designing and building custom homes across Venezuela, Chile, and Toronto, I’ve seen what works (and what doesn’t) when it comes to flooring in Toronto’s challenging climate.
Let’s make sure you get it right the first time.
Why Toronto’s Climate Changes Everything
Before we dive into specific flooring types, you need to understand why you can’t use one flooring type for your entire Toronto home.
Toronto’s Climate Challenges:
Cold winters:
- Snow, ice, and road salt tracked indoors daily
- Temperature fluctuations cause materials to contract
- Heated indoor air can be very dry (30-40% humidity)
Humid summers:
- Outdoor humidity can reach 70-90%
- Indoor humidity swings affect wood expansion
- Basements stay naturally humid year-round
The result? Solid hardwood that looks beautiful in September can warp by February if installed in the wrong location. Materials that work perfectly in California might fail miserably in Toronto.
This is why we always tell our clients: Your flooring strategy needs to be as climate-specific as your HVAC system.
The 3 Biggest Flooring Mistakes Toronto Homeowners Make
Mistake #1: Choosing Solid Hardwood Everywhere
The problem:
Solid hardwood is beautiful. It’s timeless. It increases home value. So naturally, many homeowners want it throughout their entire custom home.
But here’s what happens:
- In basements: The wood absorbs moisture from concrete, warps, and buckles within 1-2 years
- Near entryways: Constant exposure to salt, water, and temperature changes causes cupping and gaps
- In bathrooms: Humidity from showers causes swelling and eventual rot
The cost of this mistake: $12,000-$25,000 to tear out and replace with appropriate materials
The solution:
Use engineered hardwood or luxury vinyl plank (LVP) in high-moisture areas. These materials look nearly identical to solid hardwood but are specifically designed to handle humidity fluctuations.
Where solid hardwood DOES work:
- Main floor living rooms
- Dining rooms
- Hallways (with proper runners near doors)
- Upstairs bedrooms
Mistake #2: Ignoring Your Actual Lifestyle
The problem:
You fall in love with a flooring option at the showroom, install it throughout your home, and within 6 months it looks terrible because it can’t handle your real life.
Common scenarios:
Kids and pets:
- Soft pine floors dent from dropped toys
- Light-colored grout in kitchens shows every spill
- Carpet in high-traffic areas wears through in 2-3 years
Heavy foot traffic:
- Thin luxury vinyl shows wear patterns
- Cheap laminate chips at edges
- Grout lines crack from constant use
The cost of this mistake: $8,000-$15,000 to replace prematurely worn flooring
The solution:
Match your flooring to your lifestyle, not your wishlist.
Ask yourself:
- Do you have kids under 10? (Choose scratch-resistant, waterproof materials)
- Do you have pets? (Choose durable, easy-to-clean surfaces)
- Do you cook often? (Prioritize waterproof kitchen flooring)
- Do you work from home? (Consider sound-absorbing materials for office spaces)
Mistake #3: Bad Transitions in Open-Concept Spaces
The problem:
Your kitchen flows into your dining room, which opens to your living room. You choose tile for the kitchen, hardwood for the dining room, and a slightly different hardwood for the living room.
The result? Three different flooring types meeting in awkward, jarring transitions that make your beautiful open-concept space feel disjointed.
What goes wrong:
- Thin metal transition strips look cheap and catch on feet
- Mismatched tones create a “patchwork” effect
- Different floor heights create tripping hazards
- The space feels smaller and more cluttered
The cost of this mistake: $5,000-$10,000 to redo transitions or replace flooring
The solution:
Use wide transition boards that match the tone of both materials, or better yet, keep flooring consistent across open-concept spaces and only transition where there’s a natural break (like a doorway).
Pro tip from our design process:
We create full-scale floor plan mockups with actual flooring samples laid out together. This lets you see transitions in context before you commit. It’s much easier to change your mind at this stage than after installation.
Room-by-Room Flooring Guide for Toronto Custom Homes
Let’s break down the best flooring choice for each room, considering Toronto’s climate, typical usage, and real costs.
Entryways & Mudrooms
Best choice: Dark LVT (Luxury Vinyl Tile) or stone-look porcelain tile
Why it works:
- Handles salt, slush, and constant moisture
- Easy to clean (mop and done)
- Dark colors hide dirt and wear
- Durable enough for heavy traffic
Cost: $5-$9 per sq ft installed
What to avoid:
- Hardwood (warps from moisture)
- Light-colored tile (shows every mark)
- Carpet (impossible to keep clean)
Design tip:
Create a defined “landing zone” with your tile extending 6-8 feet into the entryway, then transition to hardwood. This protects your main floors while clearly marking the “take off your boots” area.
Kitchens
Best choice: Waterproof luxury vinyl plank or large-format porcelain tile
Why it works:
- Completely waterproof (spill coffee? No problem)
- Stain-resistant (wine, tomato sauce, oil)
- Comfortable underfoot (warmer than ceramic)
- Looks like real hardwood or stone
Cost:
- LVP: $6-$12 per sq ft installed
- Porcelain: $10-$18 per sq ft installed
What to avoid:
- Solid hardwood (stains and water damage)
- Carpet (unhygienic in food prep areas)
- Small grout lines (hard to keep clean)
Real client story:
We had a client who insisted on hardwood in her kitchen because “it matches the rest of the main floor.” Six months later, she had water stains around the dishwasher, scratches from dropped pots, and permanent discoloration near the sink. We replaced it with waterproof LVP that looks identical to her living room hardwood. Problem solved.
Living Rooms & Dining Rooms
Best choice: Wide-plank engineered hardwood (6-8 inches wide)
Why it works:
- Timeless, high-end look
- Increases home resale value
- Can be refinished once or twice
- More stable than solid hardwood in Toronto’s humidity
- Wide planks make rooms feel larger
Cost: $8-$15 per sq ft installed
Alternative: High-quality LVP if you have pets or kids
What to avoid:
- Carpet (dated, hard to clean)
- Solid hardwood in basements
- Trendy gray tones (already dating)
Finish recommendation:
Choose matte or satin finishes over high-gloss. Matte hides scratches and dust, looks more modern, and doesn’t show every footprint.
Bathrooms
Best choice: Porcelain tile or natural stone
Why it works:
- Completely waterproof
- Mold and mildew resistant
- Easy to clean and sanitize
- Handles humidity from showers
Cost: $12-$22 per sq ft installed
What to avoid:
- ❌ Hardwood (warps from shower steam)
- ❌ Carpet (mold magnet)
- ❌ Laminate (swells when wet)
Pro tip:
Use larger tiles (12×24 or larger) to minimize grout lines. Fewer grout lines = less cleaning and less mold risk.
Bedrooms
Best choice: Engineered hardwood with area rugs, or cork flooring
Why it works:
- Hardwood: Warm, elegant, cohesive with rest of home
- Cork: Soft underfoot, warm, sound-absorbing, eco-friendly
Cost:
- Engineered hardwood: $8-$15 per sq ft
- Cork: $6-$10 per sq ft
Alternative: High-quality carpet if you prefer softness
What to avoid:
- Cheap laminate (feels cold and hollow)
- Trendy patterns (you’ll tire of them)
Basements
Best choice: Luxury vinyl plank with moisture barrier
Why it works:
- Handles basement humidity naturally
- Completely waterproof (in case of minor flooding)
- Comfortable and warm underfoot
- Looks like real hardwood
Cost: $5-$10 per sq ft installed
Critical: Always install a moisture barrier over concrete before any flooring
What to avoid:
- ❌ Solid hardwood (will warp 100% of the time)
- ❌ Carpet directly on concrete (mold risk)
- ❌ Laminate (not waterproof enough)
Bonus tip:
If you’re planning to add radiant floor heating, most engineered hardwood and LVP products are rated for radiant heat. Check manufacturer specs before buying.
Flooring Costs: Real Numbers for Toronto Custom Homes
Here’s what you should budget for a 1,000 sq ft area:
| Flooring Type | Material Cost | Installation Cost | Total (1,000 sq ft) | Lifespan |
|---|---|---|---|---|
| Laminate | $4-$8/sq ft | $2-$4/sq ft | $6,000-$12,000 | 10-15 years |
| Luxury Vinyl Plank (LVP) | $5-$9/sq ft | $3-$5/sq ft | $8,000-$14,000 | 15-25 years |
| Engineered Hardwood | $6-$12/sq ft | $4-$8/sq ft | $10,000-$20,000 | 25-40 years |
| Solid Hardwood | $8-$18/sq ft | $5-$12/sq ft | $13,000-$30,000 | 50+ years (with refinishing) |
| Porcelain Tile | $8-$15/sq ft | $6-$12/sq ft | $14,000-$27,000 | 50+ years |
| Cork | $5-$8/sq ft | $3-$5/sq ft | $8,000-$13,000 | 15-25 years |
Cost-saving tip:
Use high-end materials (engineered hardwood, porcelain) in high-visibility areas (main floor living spaces, master bedroom) and more budget-friendly options (LVP) in less visible areas (basement, laundry room).
Hidden costs to budget for:
- Subfloor preparation: $2-$5 per sq ft
- Removal of old flooring: $1-$3 per sq ft
- Transitions and thresholds: $50-$150 each
- Underlayment: $0.50-$2 per sq ft
- HST (13% in Ontario)
How to Create Seamless Transitions in Open-Concept Homes
One of the biggest challenges in custom homes is creating cohesive flow when you need different flooring types in adjacent spaces.
Rule 1: Use intentional transition pieces
Don’t do this:
- Thin metal T-molding strips (looks cheap)
- Abrupt changes in floor height
- Mismatched wood tones meeting directly
Do this instead:
- Install a wide (6-8 inch) transition board in a wood tone that bridges both materials
- Use a threshold piece at natural break points (doorways, archways)
- Ensure the transition piece is professionally installed and level
Rule 2: Match tones, not materials
You don’t need the same material everywhere—you need the same color temperature.
Example of good flow:
- Living room: Warm honey-toned engineered oak
- Kitchen: Warm beige luxury vinyl with wood grain
- Transition: 8-inch wide oak board stained to match both
Example of bad flow:
- Living room: Cool gray engineered maple
- Kitchen: Warm brown ceramic tile
- Transition: Thin silver metal strip
The first example uses different materials but feels cohesive. The second uses mismatched tones that fight each other visually.
Rule 3: Zone intentionally
Use flooring changes to define spaces naturally:
Good zoning:
- Tile in kitchen (wet zone)
- Wood in dining area (dry zone)
- Transition at the edge of the kitchen island
Bad zoning:
- Different flooring in the middle of an open space
- Random transitions with no architectural logic
- Too many material changes (more than 3 in an open area)
The “Sample First” Method (How to Avoid Regrets)
Here’s the single most important tip I can give you:
Get large samples (at least 12×12 inches) of every flooring option you’re considering, and live with them for a week.
Here’s what to do:
Step 1: Get samples
- Request large samples from suppliers (not the tiny 2×2 chips)
- Get samples of transition pieces too
- Include underlayment samples if you’re considering cork or LVP
Step 2: Lay them out together
- Place samples side-by-side in the actual rooms
- Create mock transitions
- Look at them in different lighting (morning, afternoon, evening)
Step 3: Test them
- Walk on them barefoot
- Spill water on waterproof options (seriously—test it)
- Look at them from different angles
- Take photos and look at them on your phone (sometimes you see things differently in photos)
Step 4: Live with them
- Leave them in place for 5-7 days
- Notice which ones still look good after a week
- Notice which ones you stop noticing (that’s a good sign)
- Notice which ones start to annoy you (that’s a bad sign)
This process costs you nothing and can save you $25,000.
Toronto-Specific Considerations
Humidity Control is Critical
Wood floors expand and contract with humidity changes. In Toronto, this means:
Winter (dry):
- Indoor humidity drops to 30-40%
- Wood contracts, creating gaps
- Use humidifiers to maintain 45-55% humidity
Summer (humid):
- Indoor humidity can spike to 60-70%
- Wood expands, causing cupping or buckling
- Use dehumidifiers (especially in basements)
Solution:
Install a whole-home humidifier/dehumidifier system to maintain consistent 45-55% relative humidity year-round. This protects your flooring investment and makes your home more comfortable.
Radiant Floor Heating
Many Toronto custom homes include radiant floor heating, especially in bathrooms and basements.
Best flooring for radiant heat:
- ✅ Porcelain tile (excellent heat conductor)
- ✅ Stone tile (excellent heat conductor)
- ✅ Engineered hardwood rated for radiant (check specs)
- ✅ Luxury vinyl plank rated for radiant (check specs)
Avoid:
- ❌ Thick solid hardwood (insulates heat)
- ❌ High-pile carpet (insulates heat)
- ❌ Cork without manufacturer approval
Installation tip:
If installing radiant heat, use an uncoupling membrane under tile and follow manufacturer guidelines exactly for wood products.
Winter Installation
Pros of winter installation:
- Lower demand = better contractor availability
- Lower humidity = better for wood acclimation
- Potentially lower prices
- Wood naturally contracts in dry air, reducing summer expansion issues
Cons:
- Cold affects adhesive curing times
- Delivery can be delayed by weather
- Home must be heated during installation
Best practice:
If installing hardwood in winter, let it acclimate in the heated space for 7-14 days before installation and maintain 45-55% humidity during and after installation.
What Designers Say: Trends to Follow (and Avoid)
✅ Trends Worth Following:
1. Warm, natural wood tones
- Honey, chestnut, and natural oak are timeless
- Move away from gray (already dating)
- Warm tones make spaces feel inviting
2. Wide-plank flooring
- 6-8 inch wide planks are modern and upscale
- Make rooms feel larger
- Fewer seams = cleaner look
3. Textured finishes
- Wire-brushed or hand-scraped surfaces
- Hide scratches and wear
- Add character without being trendy
4. Sustainable materials
- FSC-certified wood
- Reclaimed wood
- Cork flooring
- Low-VOC finishes
5. Large-format tiles
- 12×24 or larger
- Fewer grout lines
- More modern look
❌ Trends to Avoid:
1. Gray-toned floors
- Already look dated
- Make spaces feel cold
- Hard to coordinate with warm furniture
2. Ultra-wide farmhouse planks
- Very specific style that may not age well
- Can overwhelm smaller spaces
- Already past peak popularity
3. High-gloss finishes
- Show every scratch and footprint
- Look dated
- Harder to maintain
4. Matching everything
- Floor, walls, and cabinets all the same tone looks flat
- Contrast creates visual interest
- Vary tones while keeping color temperature consistent
5. Cheap laminate that mimics expensive materials
- Looks fake in person (even if photos look good)
- Feels hollow underfoot
- Cheapens the overall look of your custom home
Red Flags: When NOT to Choose Certain Flooring
Don’t choose solid hardwood if:
- Installing in basement
- Installing in bathroom
- You have large dogs with long nails
- You live in a very humid environment
- You want to install over radiant heat (unless specifically rated)
Don’t choose luxury vinyl if:
- You want maximum resale value in a high-end home
- You want natural, authentic materials throughout
- You’re installing in a sunny room (some vinyl fades)
- You expect to refinish floors later (vinyl cannot be refinished)
Don’t choose porcelain tile if:
- You want warm, soft flooring in bedrooms
- You live in a noisy home (tile amplifies sound)
- You stand on your feet a lot (tile is very hard)
- You have young children (hard falls)
Don’t choose carpet if:
- You have pets
- You have allergies
- In kitchens, bathrooms, or entryways
- You want a modern, timeless look
Don’t choose cork if:
- You have very heavy furniture (can dent)
- In extremely wet areas (bathrooms)
- Without proper moisture barriers in basements
Our Design-Build Process for Flooring Selection
At Habitual Homes, here’s how we help clients choose flooring:
Phase 1: Lifestyle Assessment (Week 1)
We start by asking:
- How many people live in the home?
- Do you have pets? What kind and size?
- Do you have young children?
- Do you cook often?
- Do you work from home?
- What’s your cleaning style (daily maintenance vs. deep clean weekly)?
- What’s your budget?
Phase 2: Space Planning (Week 2-3)
We create:
- Detailed floor plans showing traffic flow
- Open concept sightlines diagram
- Moisture risk assessment for each room
- Budget allocation by priority
Phase 3: Material Selection (Week 3-4)
We:
- Source large samples from 3-5 manufacturers
- Lay out samples in your space
- Create transition mockups
- Calculate exact costs (material + installation + contingency)
Phase 4: Final Selection (Week 5)
We:
- Review samples after you’ve lived with them for a week
- Finalize transitions and thresholds
- Verify all materials are in stock and available
- Lock in pricing and create installation schedule
Phase 5: Installation (During Construction)
We:
- Coordinate with our licensed flooring installers
- Ensure proper subfloor preparation
- Monitor humidity levels during installation
- Inspect all transitions and thresholds
- Conduct final walkthrough with you
This process ensures you make informed decisions and avoid costly mistakes.
Frequently Asked Questions
Q: Should I choose the same flooring throughout my entire home for cohesion?
A: No. In Toronto’s climate, you need different materials for different moisture levels. Instead, focus on matching color temperature and tones across materials for visual cohesion. Use warm honey-toned engineered hardwood in living areas, warm beige LVP in kitchens, and coordinate everything with intentional transitions.
Q: Is engineered hardwood as good as solid hardwood?
A: For Toronto homes, engineered hardwood is often better than solid hardwood because:
- More stable in humidity fluctuations
- Can be installed in basements (over concrete with proper prep)
- Rated for radiant heat
- Still looks like real wood
- Can usually be refinished once or twice
- Costs less than solid hardwood
The only downside: it can’t be refinished as many times as solid hardwood (which can be refinished 4-6 times).
Q: How long does flooring installation take?
A: For a typical 2,000 sq ft home:
- Hardwood/engineered: 3-5 days
- Luxury vinyl plank: 2-3 days
- Tile: 5-7 days (including grout cure time)
- Full-home flooring project: 1-2 weeks
Add 1-2 weeks for:
- Removing old flooring
- Subfloor repairs
- Acclimation time for wood products
Q: Can I install flooring myself to save money?
A: We always recommend professional installation for custom homes because:
- Proper subfloor preparation is critical (DIYers often skip this)
- Transitions require precision cuts and proper materials
- Mistakes are expensive to fix
- Warranty often requires professional installation
- Labor cost is only 30-40% of total project cost
Where DIY can work: Luxury vinyl plank in a small, simple space (like a basement bedroom) with no transitions.
Where DIY fails: Hardwood installation, tile work, complex transitions, radiant heat installations.
Q: What’s the most cost-effective flooring that still looks high-end?
A: High-quality luxury vinyl plank (LVP) in the $6-$9/sq ft range offers the best value:
- Looks nearly identical to hardwood
- Completely waterproof
- Scratch-resistant
- Easy maintenance
- 20+ year lifespan
Brands we recommend: Coretec, Shaw Floorte, Mohawk RevWood, LifeProof
Q: How do I maintain hardwood floors in Toronto’s climate?
A:
- Maintain humidity at 45-55% year-round (invest in whole-home humidifier/dehumidifier)
- Use mats at all exterior doors to catch salt and moisture
- Sweep or vacuum weekly (no beater bar)
- Damp-mop with hardwood floor cleaner (not water)
- Avoid steam mops (too much moisture)
- Refinish every 7-10 years as needed
- Address spills immediately
Q: Should I match my floor color to my cabinets?
A: No. Create contrast instead:
- Dark cabinets → Medium to light floors
- White/light cabinets → Medium to dark floors
- Medium cabinets → Very light or dark floors
Matching everything makes the space look flat and boring. Contrast creates depth and visual interest.
Q: What if I change my mind after installation?
A: This is why we push the “sample first” method so hard. But if it happens:
- Best case: Return unused materials (usually 10-15% restocking fee)
- Worst case: Tear out and reinstall ($5,000-$15,000+ depending on scope)
Prevention is everything. Take your time in the selection phase.
Your Next Steps
Choosing flooring for your Toronto custom home doesn’t have to be overwhelming. Here’s your action plan:
This Week:
☐ Define your priorities
- Budget range
- Lifestyle needs (kids, pets, traffic)
- Must-have rooms/features
- Timeline
☐ Request samples
- Get large samples (12×12 minimum)
- Request samples of 3-4 top choices per room
- Get transition pieces too
Next Week:
☐ Live with samples
- Place them in actual rooms
- Look at them in different lighting
- Walk on them, test them
- Take photos
☐ Research costs
- Get 2-3 quotes from flooring installers
- Budget for subfloor prep and transitions
- Add 10-15% contingency
Within 30 Days:
☐ Make final selections
- Choose materials for each room
- Verify everything is in stock
- Confirm lead times (some materials require 8-12 weeks)
☐ Schedule installation
- Book your installer
- Coordinate with other trades if building new
- Plan for moving furniture if renovating
Work With Habitual Homes
Building a custom home in Toronto? We can help you make confident flooring decisions as part of our complete design-build service.
What we do:
- Space planning and architectural design
- Material selection guidance (including flooring)
- Permit coordination and building code compliance
- Project management from first sketch to move-in
- Coordination with licensed flooring installers
Our approach:
- Transparent pricing (no hidden costs)
- Education-first (we teach you so you can make informed decisions)
- Architectural background (we create permit-ready drawings)
- 10 years of construction experience across three countries
📞 Book a free 15-minute consultation:
Watch the Full Video Guide
Prefer to watch instead of read? Check out our complete flooring guide video:
In this 2-minute video, I walk through:
- The 3 biggest flooring mistakes
- Room-by-room recommendations
- Real cost breakdowns
- Pro tips for avoiding regrets
Related Articles
How Much Does a Full House Renovation Cost in Toronto
Best Flooring for Bathroom and Kitchen